216
6.
Select
Check
.
7.
Select
to confirm that the print head is clean.
8.
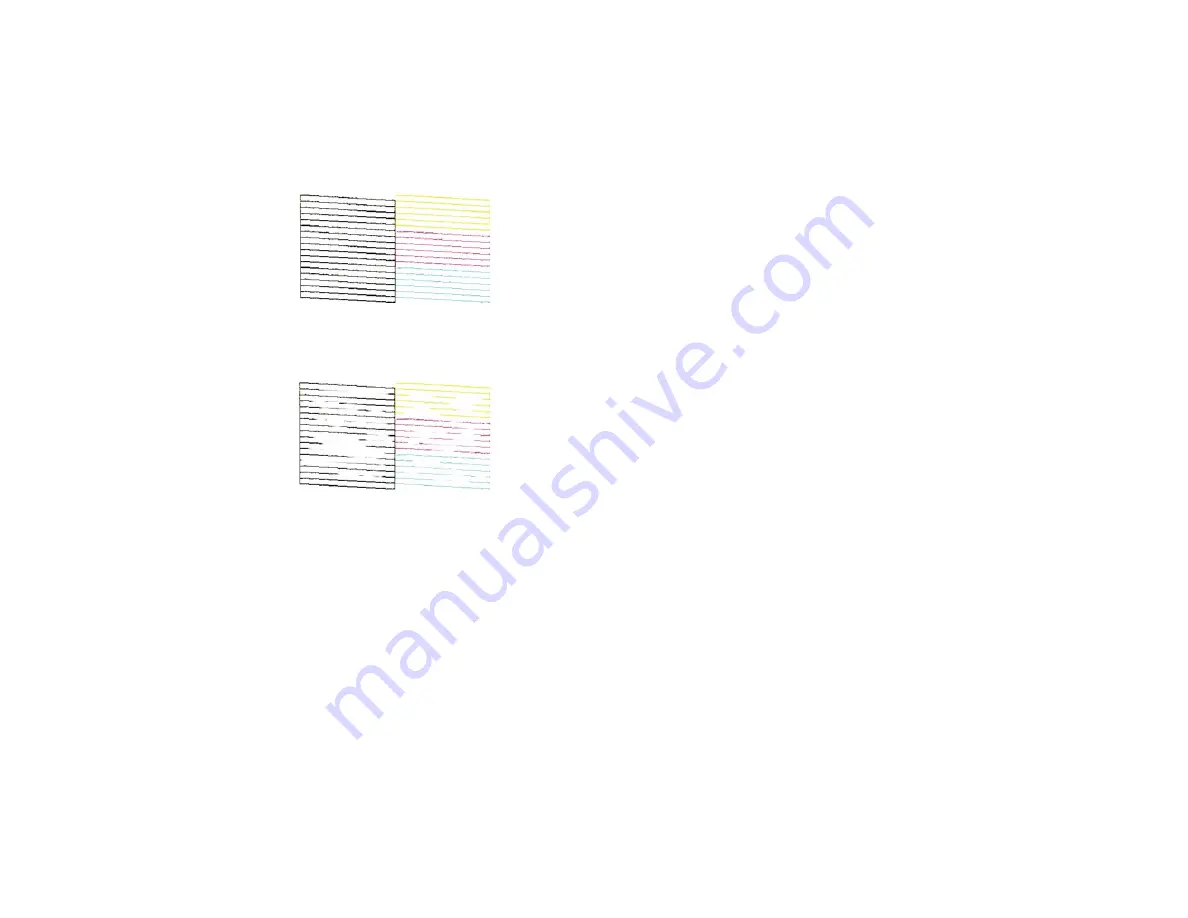
Check the printed pattern to see if there are gaps in the lines.
Print head is clean
Print head needs cleaning
9.
Follow the instructions on the screen to clean the print head, check the nozzles, and repeat the
process as necessary.
If you don’t see any improvement after cleaning the print head up to 4 times, wait at least 6 hours without
printing or longer if printing. Then try cleaning the print head again. If quality still does not improve,
contact Epson.
Parent topic:
Related tasks
Cleaning the Print Head Using a Computer Utility
Checking the Nozzles Using the Product Control Panel
Cleaning the Print Head Using a Computer Utility
You can clean the print head using a utility on your Windows or Mac computer.
1.
Make sure there are no errors on the LCD screen.
Содержание C11CG31201
Страница 1: ...WF 2850 User s Guide ...
Страница 2: ......
Страница 13: ...13 WF 2850 User s Guide Welcome to the WF 2850 User s Guide For a printable PDF copy of this guide click here ...
Страница 111: ...111 10 Select the Layout tab 11 Select the orientation of your document as the Orientation setting ...
Страница 137: ...137 You see an Epson Scan 2 window like this ...
Страница 139: ...139 You see an Epson Scan 2 window like this ...
Страница 141: ...141 You see this window ...
Страница 226: ...226 4 Lift up the scanner unit 5 Using the flashlight check the translucent film shown here for ink smears ...
Страница 230: ...230 Print Head Cleaning ...
Страница 249: ...249 3 Open the scanner unit 4 Carefully remove any paper jammed inside the product ...
Страница 253: ...253 3 Open the ADF cover 4 Carefully remove any jammed pages from beneath the ADF 5 Raise the ADF input tray ...


