background image

3  /  GET STARTED

18 /  XPS3

Elevation

Windage

Windage and Elevation

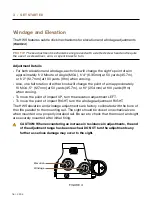
The HWS features subtle click mechanisms for elevation and windage adjustments 

(

FIGURE 4


PRO TIP: 

These adjustment mechanisms are grooved with a slotted screw head and require 

the use of a screwdriver, coin, or spent brass to turn.

Adjustment Details
•  For both elevation and windage, each click will change the sight’s point of aim 

approximately 1/2 Minute of Angle (MOA), 1/4" (6 35mm) at 50 yards (45 7m),  

or 1/2" (12 7mm) at 100 yards (91m) when zeroing 

•  Also, one full rotation of either knob will change the point of aim approximately 

10 MOA, 5" (127mm) at 50 yards (45 7m), or 10" (254mm) at 100 yards (91m) 

when zeroing 

•  To move the point of impact UP, turn the elevation adjustment LEFT 
•  To move the point of impact RIGHT, turn the windage adjustment RIGHT 
The HWS elevation and windage adjustments are factory collimated with the bore of 

the rifle parallel to the mounting rail  The sight should be close to mechanical zero 

when mounted on a properly installed rail  Be sure to check that the mount and sight 

are securely mounted after initial firing 

   CAUTION: When encountering an increase in resistance in adjustments, the end 

of the adjustment range has been reached. DO NOT turn the adjustments any 

farther as serious damage may occur to the sight.

FIGURE 4

Содержание XPS3

Страница 1: ...XPS3 HWS HOLOGRAPHIC WEAPON SIGHT ...

Страница 2: ...THIS PAGE WAS LEFT BLANK INTENTIONALLY ...

Страница 3: ...ons 11 3 GET STARTED Operating Instructions 12 Mounting the HWS 12 Battery 14 Battery Recommendations Replacing the Battery Electronic Features 16 Night Vision Mode 17 Windage and Elevation 18 Zeroing Procedures 19 4 MAINTENANCE Cleaning Instructions 20 Operator Level Maintenance 21 Troubleshooting 22 5 NEED SOME HELP Service and Repair 24 Replacement Items 24 Contact Information 25 ...

Страница 4: ... clear your weapon please see the operator s manual that accompanied the weapon platform you are mounting the sight on Laser Safety The HWS is a Class I laser product The illuminating beam can become accessible to the eye if the housing is broken Turn the sight off immediately and return the broken unit to the factory for repair FCC Compliance The HWS complies with Part 15 of the FCC Rules Operati...

Страница 5: ...e in resistance is felt in the elevation or windage adjustment shafts the end of the adjustment range has been reached DO NOT TURN THE ADJUSTMENTS ANY FARTHER OR SERIOUS DAMAGE MAY OCCUR TO THE SIGHT Always dampen the glass surfaces prior to cleaning Never clean the glass surface with a dry cloth or paper towel All moving parts of the sight are permanently lubricated Do not try to lubricate them D...

Страница 6: ...tes The XPS3 HWS is a lightweight non magnifying optical sight designed for close to midrange engagements It allows for very fast target acquisition and engagement at short ranges while providing aiming capability out to 300 meters equal to or better than iron sights The major combat advantage of the HWS is extremely rapid reticle on target acquisition As quickly as a target is identified the holo...

Страница 7: ...phic reticle image with helmet mounted or weapon mounted night vision devices The HWS is a passive system and emits no signature from frontal or from a peripheral aspect While in the NV mode the sight is undetectable by opposing force night vision equipment The HWS can be positioned behind night vision systems without any bloom on the target area The primary use of the HWS is for the M4A1 carbine ...

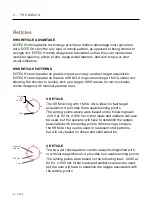
Страница 8: ...ith minimal parallax error 0 RETICLE The 68 MOA ring with 1 MOA dot is ideal for fast target acquisition It provides three usable aiming points The aiming points above were based on the following load 223 Cal 62 Gr 2 900 Vel Other loads and calibers can also be used but the operator will have to establish the ranges associated with the aiming points When using a shotgun the 68 MOA ring can be used...

Страница 9: ...eflection coating on external surfaces Window Dimensions 1 20 0 85 30 23mm Front Window Material Glass 1 8 3 17mm thick Rear Window Material Laminate 3 16 4 76mm thick FOV 100 Yds 91m 30 yds 28m at a 3 eye relief Reticle Options 0 68 MOA circle with quadrant ticks with 1 MOA aiming dot 2 68 MOA circle with quadrant ticks with 2 1 MOA aiming dots ELECTRICAL Power Source 1 CR123 battery Battery Life...

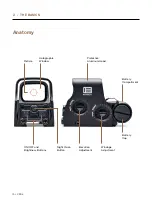
Страница 10: ...2 THE BASICS 10 XPS3 Anatomy ON OFF and Brightness Buttons Holographic Window Reticle Elevation Adjustment Night Vision Button Windage Adjustment Protective Aluminum Hood Battery Cap Battery Compartment ...

Страница 11: ...ace allows the operator to perform and adjust user settings for appropriate and preferred conditions see page 16 Protective Aluminum Hood Preassembled protective hood increases durability of sight housing and protects the sight from impact damage Universal Mount Integrated base to accommodates all MIL STD 1913 rail tolerances Elevation Adjustment Adjusts the point of aim at 100 yards approximately...

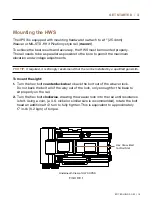
Страница 12: ...lease read the instructions carefully before mounting and using the sight and always practice proper firearm safety The HWS will include HWS XPS3 Sight 1 CR123 Lithium Battery Hex Cross Bolt Quick Reference Card Product Registration Warranty Card PRO TIP Sight shown below mounted to help identify front and back FRONT BACK ...

Страница 13: ...mmend that the rail be installed by a qualified gunsmith To mount the sight 1 Turn the hex bolt counterclockwise to back the bolt out of the weaver lock Do not back the bolt all of the way out of the lock only enough for the base to sit properly on the rail 2 Turn the hex bolt clockwise drawing the weaver lock into the rail until resistance is felt Using a coin a U S nickel or similar size is reco...

Страница 14: ...st indication of the battery draining is the reticle blinking when the unit is turned on see Electronic Features page 16 Another indication of a low battery is the reticle pattern blinking off and on during recoil With high recoil guns this can occur before the battery check indicates low battery condition If the reticle pattern blinks off and on during recoil or turns off suddenly replace the bat...

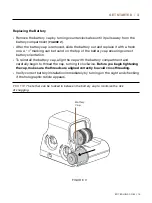
Страница 15: ...nsuring correct battery orientation To reinstall the battery cap align the cap with the battery compartment and carefully begin to thread the cap turning it clockwise Before you begin tightening the cap make sure the threads are aligned correctly to avoid cross threading Verify correct battery installation immediately by turning on the sight and checking if the holographic reticle appears PRO TIP ...

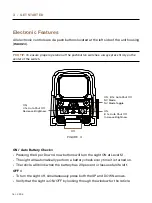
Страница 16: ...row buttons will turn the sight ON at Level 12 The sight will automatically perform a battery check every time it is turned on The reticle will blink when the battery has 20 percent or less useful life left OFF To turn the sight off simultaneously press both the UP and DOWN arrows Verify that the sight is ON OFF by looking through the window for the reticle FIGURE 3 ON 4 hr Auto Shut Off Decrease ...

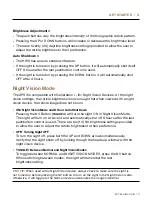
Страница 17: ... the reticle image does not bloom ON Night Vision Mode and 8 Hour Auto Shut Down Pressing the NV Button FIGURE 3 will turn the sight ON in Night Vision Mode The sight will turn on at Level 4 and automatically shut off 8 hours after the last pushbutton control is used There are ten 10 NV brightness settings provided to allow the user to adjust the reticle brightness to their preference OFF Turning ...

Страница 18: ...hange the point of aim approximately 10 MOA 5 127mm at 50 yards 45 7m or 10 254mm at 100 yards 91m when zeroing To move the point of impact UP turn the elevation adjustment LEFT To move the point of impact RIGHT turn the windage adjustment RIGHT The HWS elevation and windage adjustments are factory collimated with the bore of the rifle parallel to the mounting rail The sight should be close to mec...

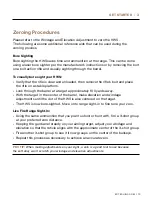
Страница 19: ... approximately 100 yards away With the target in the center of the barrel make elevation and windage adjustments until the dot of the HWS is also centered on the target The HWS is now bore sighted Move on to range sight in to fine tune your zero Live Fire Range Sight In Using the same ammunition that you plan to shoot or hunt with fire a 3 shot group at your preferred zero distance Keeping the gun...

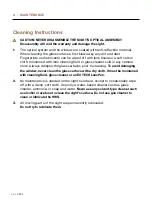
Страница 20: ...d in any camera store Always dampen the glass surfaces prior to cleaning To avoid damaging the window never clean the glass surface with a dry cloth It must be moistened with cleaning fluid glass cleaner or an EOTECH LensPen 2 No maintenance is needed on the sight s surface except to occasionally wipe off with a damp soft cloth Use only a water based cleaner such as glass cleaner ammonia or soap a...

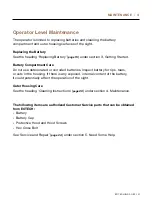
Страница 21: ...e deteriorated or corroded batteries Inspect battery for rips tears or cuts in the housing If there is any exposed internal content of the battery it could potentially affect the operation of the sight Outer Housing Care See the heading Cleaning Instructions page 20 under section 4 Maintenance The following items are authorized Customer Service parts that can be obtained from EOTECH Battery Batter...

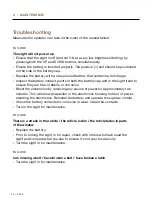
Страница 22: ...f debris or corrosion Reset the electronics by removing any source of power for approximately two minutes This will allow a capacitor in the electronics housing to drain of power resetting the electronics Reinstall the battery and operate the sight as normal Check the battery contacts for corrosion or wear Clean the contacts Turn in the sight for maintenance FAILURE There is a streak in the reticl...

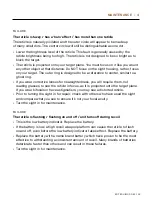
Страница 23: ...r nearsightedness you will require them not reading glasses to see the reticle in focus as it is projected onto the target plane If you wear bifocals or have astigmatism you may see a distorted reticle Prior to turning the sight in for repair check with others who have used the sight and compare what you see to ensure it s not your focal acuity Turn the sight in for maintenance FAILURE The reticle...

Страница 24: ... for EOTECH s Service Department to sign indicating the receipt of materials The signed copy will be mailed faxed or emailed back to you upon receipt of the sight s for the purposes of accountability If the manufacturing date is more than five years old a fee will be assessed for repair to include the cost of both parts and labor A purchase order will be required to process the repair Please conta...

Страница 25: ...nformation CUSTOMER SERVICE REPAIR 888 EOTHOLO eotechinc com help center RA REQUEST WEB ADDRESS eotechinc com help center SHIPPING ADDRESS EOTECH 46900 Port Street Plymouth MI 48170 USA SCAN FOR PRODUCT REGISTRATION SCAN FOR WARRANTY INFORMATION ...

Страница 26: ...Thank you for purchasing an EOTECH HWS XP1957 Rev C JANUARY 2022 Proudly Made in Michigan USA EOTECHINC COM ...

Отзывы: