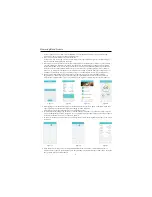
Setting Date and Time
To set-up the date and time, the user has to be set up first
User Set-up
Press the ‘SET” button to activate the set-up process.
The user number appears and flashes.
Press the ’Memory’ button to select a user and the press “SET” button to confirm the user.
When the User is set up, the “Year” icon will start flashing to prompt to set the year. Press the ‘MEMORY’ button
continuously until the desired year appears. Press ‘SET’ button to set the year.
Now the ‘Month’ icon will start flashing. Press the ‘Memory’ button continuously until the desired month appears.
Press the ‘SET’ button to set the month. When the month is set, the “Date” icon will start flashing. Press the ‘Memory’
button continuously until the desired date appears. Press the ‘SET’ button to set the date. similarly set the hour and
minute.
Once the year , month, date and time is set, press the ‘Memory’ button and select the measurement unit: “mmHg” or
“kPa” and press the ‘SET’ button to set the measurement unit.
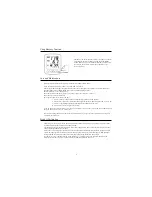
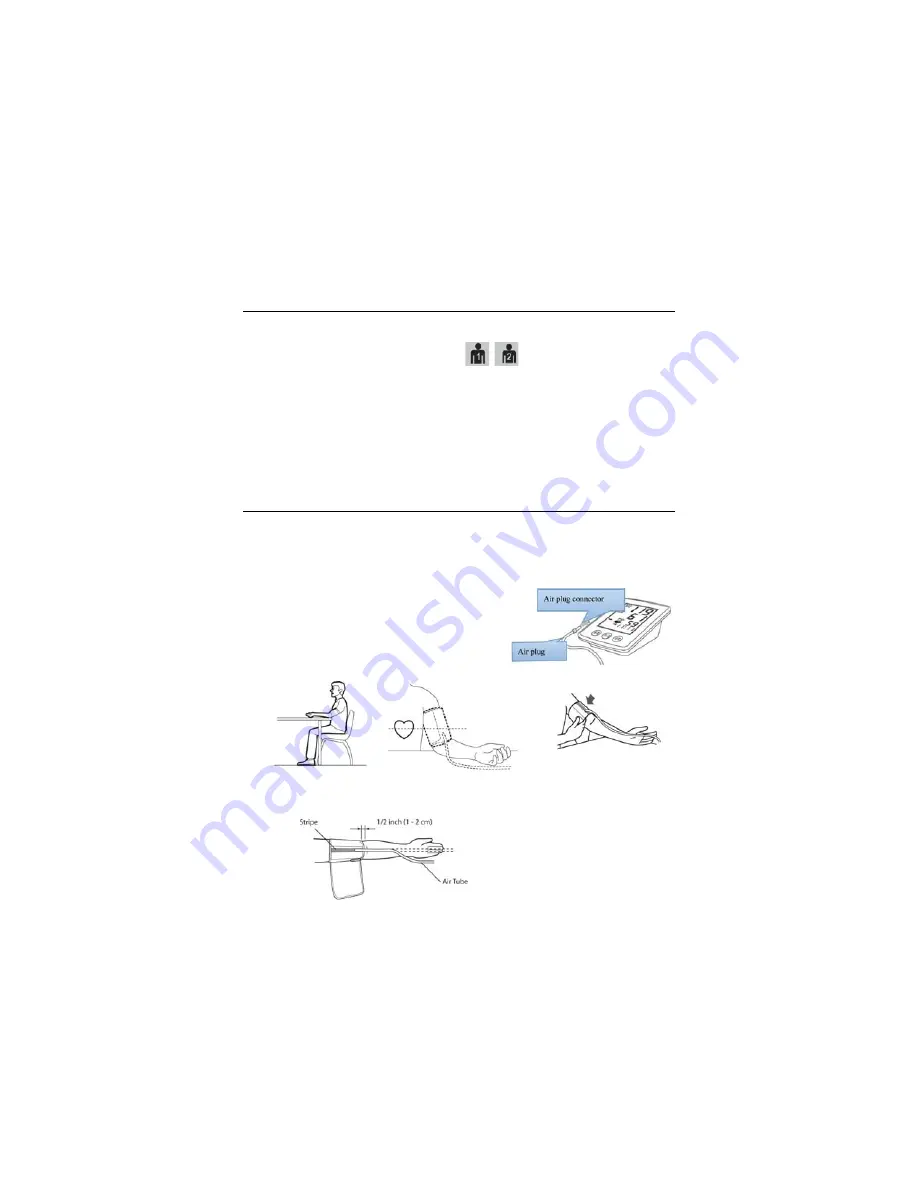
Using the Cuff
Both left and right arms can be used to measure. Usually the left arm is used.
Keep your wrist bare or only wear thin and close-fitting clothes when measuring.
Measure in a room with favorable temperature.
Don’t roll you sleeves up or measure when wearing thick clothes, but perform measurement after removing off your
heavy clothes.
For accurate measurement, please pay attention to position the arm band correctly.
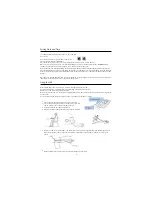
Connect the air plug to the connector on the monitor
Sit on a chair with your feet flat on the floor. Place your left
arm on a table so the cuff is level with your heart.
Insert your left arm through the arm band.
Place the air tube on the palm and turn your palm upward
Rotate the cuff so the metal stripe is on the inside of your arm and aligned with your middle finger. The air
tube runs down the inside of your arm. The bottom of the cuff should be approximately 1/2" above your
elbow.
Wrap the cuff firmly in place around your arm using the cloth fastener.
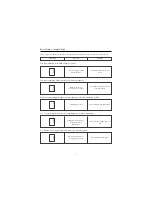
1.
2.
3.
4.
5.
6.
4