


EN-7100e
17
31MY02
EN-7100e
Appendix
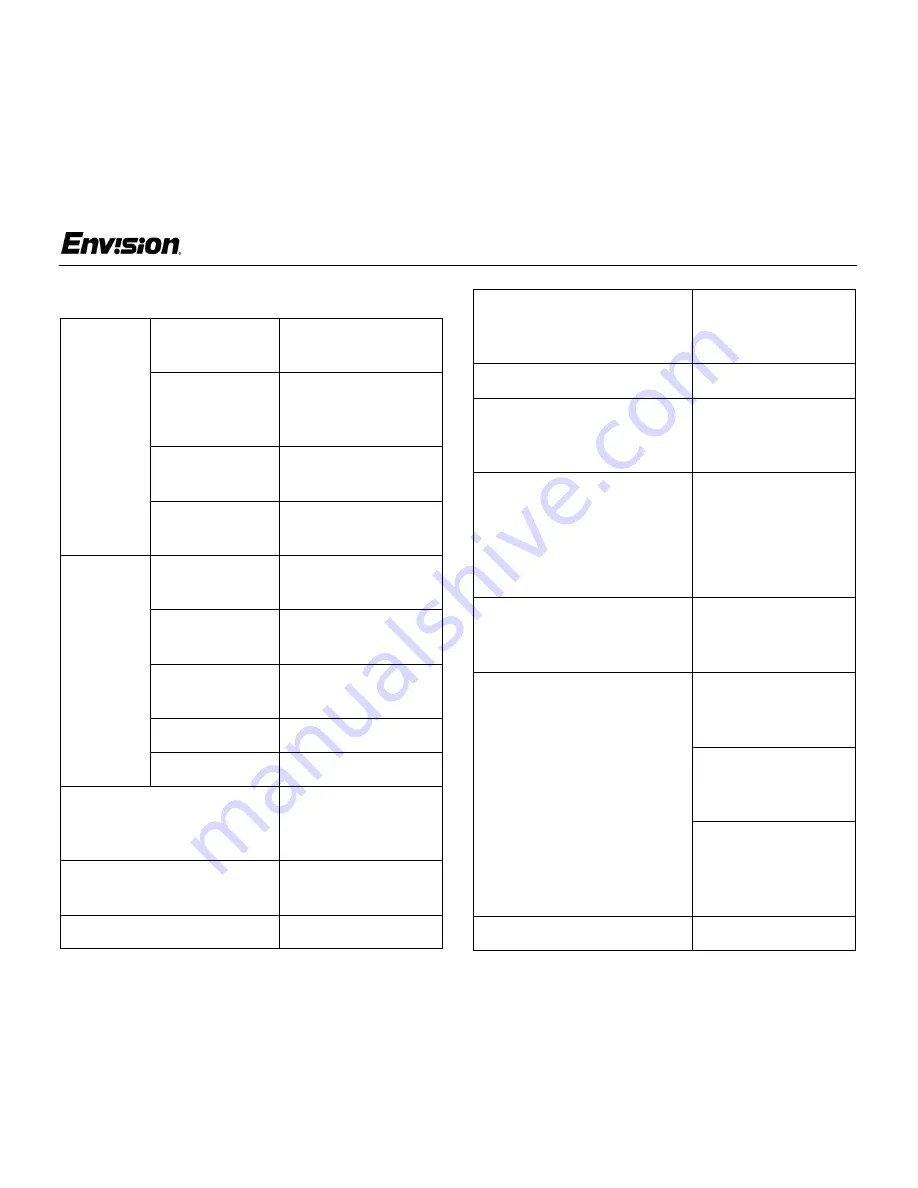
Specifications
LCD
Panel
Driving
system
TFT Color LCD
Size
17.0" (43.2 cm)
Diagonal
Pixel pitch
0.264 mm (H) x
0.264 mm (V)
Viewable
angle
120° (H) 100° (V)
Input
Response
time
50 milliseconds
Video
Red, Green, Blue
Analog Interface
Separate
Sync.
H/V TTL
H-Frequency
30 kHz - 80 kHz
V-Frequency
55-75 Hz
Display Colors
16.7 million colors
Dot Clock
135 MHz
Maximum Resolution
1280 x 1024 pixels
Plug & Play
VESA DDC1/
2BTM
Input Connector
D-Sub 15-pin
Input Video Signal
Analog: 0.7 Vpp
(standard),
75 OHM, Positive
Maximum Screen Size
Horizontal:
13.3" (337.92 mm)
Vertical:
10.6" (270.34 mm)
Power Source
100~264 VAC,
47~63 Hz
Environmental
Considerations
Operating Temp:
32° to 104°F
(0° to 40°C)
Storage Temp:
14° to 122°F
(-10° to 50°C)
Operating
Humidity:
20% to 90%
Weight
12.1 lbs. (5.5 Kg)


