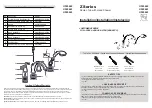
1.) Decide on a suitable position for the slide bar avoiding
buried cables and pipes in the wall.
2.) Mark the wall fixing hole position for the top of the slide
shower and drill a hole to suit the bracket(2).
Insert anchor(1) into the hole.
3.) Fix bracket(2) to the wall using screw(3).
Note:
The hole in bracket(2) for cover screw(9) must face up.
4.) Slide the handspray holder(11) onto the bar(10) and adjust
the holder to the centre of the bar.
5.) Slide the covers(8) onto the slide bar(10) so that they are about
10mm from each end and loosely tighten the fixing screws(7).
6.) Rehearse installation using the slide bar(10), brackets(2 & 5)
and covers(8).
Note:
Adjust location of covers and if necessary.
Mark the outline of the lower bracket(5) on the wall and find
the position of the hole. Carefully remove the bar assembly
and tighten the fixing screws(7) to lock the covers in place.
7.) Drill a hole to suit bracket(5). Insert anchor(4) into the hole.
8.) Fix bracket(5) to the wall using screw(6).
Note:
The hole in bracket(5) for cover screw(9) must face down.
9.) Slide the covers(8) onto the brackets(2 & 5) and fix both covers
in place using cover screws(9).
9.) Insert the endcap(12) into the top of the slidebar(10).
1.) Insert the soap dish(13) with plastic insert(14) into the bottom
end of the slide bar(10) and fix in place using screw(15).
Note:
Be careful not to overtighten.
2
5
4
3
6
7
10
11
8
8
12
9
9
15
14
13
13
10
1
CLEANING INSTRUCTIONS
INSTALLATION CHECKOUT
All Finishes: Clean the finish with mild soap and warm water. Wipe entire surface completely dry with
clean soft cloth. Many cleaners may contain chemicals, such as ammonia, chlorine, toilet cleaner etc.
which could adversely affect the finish and are not recommended for cleaning.
Do not use abrasive cleaners or solvents on Englefield faucets and fittings.
1.) Ensure that all connections are tight.
2.) Turn on the main water supply and check for leaks. Repair as needed.
3.) Remove the handspray(20) and run water through the hose(19) for about
one minute to remove any debris. Remove any debris from the handspray,
shut off the main water supply and reinstall the handspray.
4.) The height of the handspray holder(11) can be adjusted by twisting the
lever and sliding the holder up or down.
www.englefield.co.nz
How to Install the Slide Bar
How to Install the Soap Dish
How to Install the Elbow and Handspray
INSTALLATION
www.englefield.co.nz
NOTE
: To perform installation the installer must provide a G1/2" water supply
nipple(16). Distance from the end of the nipple to the finished wall surface
should be between 10 and 13mm
and perpendicular to the wall.
1.) Apply tape or thread sealant to the threads of the water supply nipple(16).
2.) Apply a ring of plumbers putty or sealant around the back surface
of the elbow(17).
3.) Thread the elbow(17) onto water supply nipple. Adjust and make sure
the outlet(18) faces down.
4.) Tighten hose(19) to elbow outlet(18) and to handspray(20).
Note:
Make sure hose goes through the soapdish(13).
Note:
For low pressure situations the flow restrictor(21)
can be removed using a tool such as a toothpick.
5.) Hang handspray on handspray holder(11).
Page 3
1227802-A02-B 11/11/2013
INSTALLATION INSTRUCTIONS
STUDIO Slide Shower
Page 2
1227802-A02-B 11/11/2013
INSTALLATION INSTRUCTIONS
STUDIO Slide Shower
10~13mm
16
17
18
21
20
18
19
19
20
19
7


