background image


Venting


Introduction


INSTALLATION


Venting


Guidelines


This


wood


stove


operates


on


a


natural


draft


system,


in


which


the


chimney


system


pulls


air


through


the


stove.


This


unit


must


be


installed


in


accordance


with


the


following


detailed


descriptions


of


venting


techniques;


not


installing


the


stove


in


accordance


with


the


details


listed


here


can


result


in


poor


stove


performance,


property


damage,


bodily


injury


or


death.


Avoid


make

shift


compromises


when


installing


the


venting


system.


England’s


Stove


Works


is


not


responsible


for


any


damage


incurred


due


to


a


poor


or


unsafe


installation.


Be


certain


that


all


aspects


of


the


venting


system


are


installed


to


the


venting


manufacturer’s


instructions,


particularly


the


required


clearances


to


combustibles.


Also,


be


certain


to


use


an


attic


radiation


shield


to


prevent


insulation


from


contacting


a


chimney


which


passes


through


an


attic.


The


chimney


system


is


the


“engine”


which


drives


a


wood


stove,


so


it


is


imperative


for


proper


unit


function


that


the


venting


system


be


installed


exactly


as


described


in


the


following


section.


If


questions


arise


pertaining


to


the


safe


installation


of


the


stove,


our


Technical


Support


line


(800

245

6489)


is


available.


Contact


your


local


code


official


to


be


certain


your


installation


meets


local


and


national


fire


codes,


and


if


you’re


uncertain


about


how


to


safely


install


the


stove,


we


strongly


recommend


contacting


a


local


NFI


certified


installer


to


perform


the


installation.


• 

ALWAYS


install


vent


pipe


in


strict


adherence


to


the


instructions


and


clearances


included


with


your


venting


system.


• 

DO


NOT


CONNECT


THIS


UNIT


TO


A


CHIMNEY


FLUE


SERVING


ANOTHER


APPLIANCE.


• 

DO


NOT


install


a


flue


pipe


damper


or


any


other


restrictive


device


in


the


exhaust


venting


system


of


this


unit.


• 

USE


an


approved


wall


thimble


when


passing


and


a


ceiling


support/fire


stop


when


passing


through


a


ceiling.


• 

INSTALL


three


sheet


metal


screws


at


every


chimney


connector


joint.


• 

AVOID


excessive


horizontal


runs


and


elbows,


as


both


will


reduce


the


draft


of


the


venting


system


and


will


result


in


poor


stove


performance.


• 

INSPECT


your


venting


system


often,


to


be


certain


it


is


clear


of


creosote,


fly

ash


and


other


restrictions.


• 

CLEAN


the


venting


system


as


detailed


in


the


maintenance


section


of


this


manual.


• 

ADHERE


to


the


10

3

2


rule


regarding


chimney


terminations.


• 

INSTALL


single


wall


chimney


connector


with


the


male


end


down


to


prevent


creosote


leakage.


Follow


double


wall


chimney


connector


manufacturer’s


instructions


regarding


proper


pipe


installation.


WARNING

:


Venting


system


surfaces


get


HOT,


and


can


cause


burns


if


touched.


Noncombustible


shielding


or


guards


may


be


required.


Where passage through a wall or partition of combustible construction is desired, the 

installation shall conform with CAN/CSA-B365. 

9

Содержание 15-W08

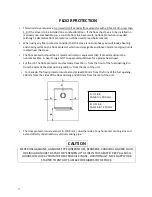
Страница 1: ...s outlined in this manual Contact your local building or fire officials about restrictions and installation inspection requirements including permits in your area PFS File Number 20 607 Rev 1 2021 THIS WOOD HEATER NEEDS PERIODIC INSPECTION AND REPAIR FOR PROPER OPERATION CONSULT THE OWNER S MANUAL FOR FURTHER INFORMATION IT IS AGAINST FEDERAL REGULATIONS TO OPERATE THIS WOOD HEATER IN A MANNER INC...

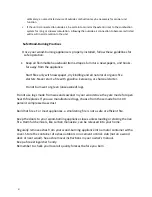
Страница 2: ...anufacture Serial Number This information can be found on the safety tag attached to the rear of the unit Have this information on hand if you phone the factory or your dealer regarding this product Keep children away CAUTION Supervise children in the same room as this appliance Alert children and adults to the hazards of high temperatures Do NOT operate with protective barriers open or removed Ho...

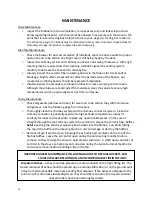
Страница 3: ...g lip is on the outside of the stove pedestal it is incorrectly installed CORRECT INSTALLATION LOCKING LIP INCORRECT INSTALLATION DAILY Inspect the firebox for ash accumulation remove excess ash and follow instructions in your owner s manual regarding disposal Ash should not be allowed to accumulate in the stove to the point that it covers the dog box hole The ash dump plug in the firebox may be r...

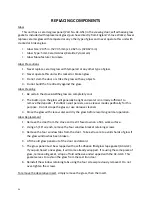
Страница 4: ...ng 32 Illustrated Parts Detail Parts List 33 Brick Layout 34 Warranty Sample Tag 35 Warranty Details 36 Important Notice 37 Warranty registration Form 38 This manual is available for free download on the manufacturer s web site It is a copyrighted document and resale is strictly prohibited The manufacturer may update this manual occasionally and cannot be responsible for problems including injurie...

Страница 5: ...ll our Technical Support department at 800 245 6489 if you need any help with your unit We are nearly always able to help walk you through any repairs problems or questions you may have PLEASE NOTE While information obtained on our web site and through our 800 number is always free of charge there will be a service charge incurred with any on site repairs or maintenance that we may arrange Wishing...

Страница 6: ... on the type of wood burned in the stove as such these numbers may vary The maximum heating capacity of this unit can vary greatly based on climate construction style insulation and a myriad of other factors Use this information in conjunction with a BTU loss calculation for your home to determine if this unit will be sufficient for your needs TAMPER WARNING This wood heater has a manufacturer set...

Страница 7: ...e Keeping the entire chimney system inside the heated envelope of the home will ensure a strong easy to initiate draft in the chimney Although exterior chimney systems often function properly they are more likely to suffer from cold down drafts at start up or provide weak draft to the unit Also consider the cross sectional area of the chimney although existing masonry chimneys can often be used a ...

Страница 8: ... cm in cm in cm in cm Single Wall Chimney Connector Unprotected Surface with side shields 19 48 3 30 76 2 12 30 5 6 15 2 5 12 7 17 43 2 Double Wall Chimney Connector Unprotected Surface with side shields 19 48 3 30 76 2 12 30 5 6 15 2 5 12 7 17 43 2 Notes for this unit The product may differ slightly from the diagrams The clearances are the minimum for this unit and may need to be increased for bl...

Страница 9: ...tional fire codes and if you re uncertain about how to safely install the stove we strongly recommend contacting a local NFI certified installer to perform the installation ALWAYS install vent pipe in strict adherence to the instructions and clearances included with your venting system DO NOT CONNECT THIS UNIT TO A CHIMNEY FLUE SERVING ANOTHER APPLIANCE DO NOT install a flue pipe damper or any oth...

Страница 10: ...or stovepipe damper with this unit Never use single wall or double chimney connector as a chimney system never pass either type of chimney connector through a combustible wall without carefully following the manufacturer s instructions and those listed in the following page on Wall Pass Throughs NEVER pass chimney connector through an attic floor closet or roof Only use 24 gauge MSG black single w...

Страница 11: ...INSTALLATION Wall Pass Throughs In Canada the installation must conform to CAN CSA 8365 when passing through combustible construction 11 ...

Страница 12: ...himney connector is used Drill three holes in the flue collar of the unit and attach the chimney connector to the unit using sheet metal screws holes should be pre drilled in flue collar from factory Properly attach the prefabricated chimney system to the home in strict accordance with the prefabricated chimney system manufacturer s instructions Avoid numerous elbows and excessive horizontal runs ...

Страница 13: ...uble wall chimney connector is used Drill three holes in the flue collar of the unit and attach the chimney connector to the unit using sheet metal screws holes should be pre drilled in flue collar from factory Properly attach the prefabricated chimney system to the home in strict accordance with the prefabricated chimney system manufacturer s instructions The overall length of the chimney connect...

Страница 14: ... the chimney connector to the unit using sheet metal screws holes should be pre drilled in flue collar from factory Avoid numerous elbows and excessive horizontal runs as both will lead to poor draft and increased creosote accumulation Horizontal runs of chimney connector must never exceed 4 0 ft and the overall length of the chimney connector must not exceed 8 0 ft with single wall black connecto...

Страница 15: ...pect your fireplace to ensure it is in proper working order and free of any obstructions Prior to installation remove the existing damper or wire it to fasten it open Venting Your Stove Direct Connect When this unit is direct connected it will require six inch 6 diameter 24 gauge pipe from the stove through the damper opening NOTE The chimney connector must be attached to the appliance with a mini...

Страница 16: ...y Standard Chimney Cap Spark Arrestor Class A Chimney System Roof Flashing and Storm Collar Joist Shield Firestop Mobile Home Approved Double Wall Chimney Connector Use silicone to create a vapor barrier where the chimney passes through to exterior HUD CFR 3280 Part 24 as well as any applicable local codes Outside Combustion Air The use of outside combustion air is mandatory when installing this w...

Страница 17: ...h rug is NOT an approved substitute for a proper hearth pad For the US The floor protector must extend at least 16 in from the front of the fuel opening 8 in from the sides of the door opening and 8 in from the rear of the unit For Canada The floor protector must extend at least 450 mm from the front of the fuel opening 200 mm from the sides of the door opening and 200 mm from the rear of the unit...

Страница 18: ...o die out with the air control open The second and third break in fires should be a bit larger with some small dry splits added to the kindling load The temperature goal during these fires is about 350 F 450 F don t let the fire get hotter than that Continuous Operation Daily Operation after your Break In Fires Start up Load the firebox with wood split to moderate size On top of the startup wood a...

Страница 19: ...w Creosote Formation and Need for Removal When wood is burned slowly it produces tar and other organic vapors which combine with expelled moisture to form creosote The creosote vapors condense in the relatively cool chimney flue of a slow burning fire As a result creosote residue accumulates on the flue lining When ignited this creosote makes an extremely hot fire The chimney and chimney connector...

Страница 20: ...toxic fumes or render the heater ineffective and cause smoke Burning fuels other than cordwood particularly coal and charcoal can result in hazardous concentrations of carbon monoxide being emitted into the dwelling For these reasons NEVER burn coal or charcoal in this cordwood stove Installing a carbon monoxide detector and being aware of the symptoms of carbon monoxide poisoning can help reduce ...

Страница 21: ...re with gasoline kerosene or charcoal starter Do not burn wet or green unseasoned logs Do not use logs made from wax and sawdust in your wood stove they are made for open hearth fireplaces If you use manufactured logs choose from those made from 100 percent compressed saw dust Build hot fires For most appliances a smoldering fire is not a safe or efficient fire Keep the doors to your wood burning ...

Страница 22: ...nd to be certain they still maintain an airtight seal See the following page for instructions Thoroughly clean the chimney system and the chimney connector system Since the chimney connector is generally exposed to high exhaust temperatures inspect it carefully for leaks and weak spots replace any questionable pieces In the case of straight through the roof chimney system be certain to remove the ...

Страница 23: ...should only be replaced with equivalent fiberglass gaskets purchased from England s Stove Works specifically for this unit Gaskets 1 Door This unit comes with a rope gasket around the door that should be replaced at least every year To replace the door gasket Part AC DGKHD the old gasket must first be removed entirely prior to adding the new adhesive you may have to scrape the old cement from the ...

Страница 24: ... to remove the deposits If stubborn soot persists use a cleaner made specifically for this purpose Do not scrape the glass or use abrasive cleaners 3 Rinse the glass with clean water and dry the glass before resuming normal operation Glass Replacement 1 Remove the door from the stove and rest it face down on a firm work surface 2 Using a 5 16 wrench remove the four window bracket retaining screws ...

Страница 25: ...p layer is oriented East West To replace a cracked or broken board first remove the front burner tube Then remove the board you need to replace Install the new board the boards should sit flush together side by side Replace the tube previously removed Dog box replacement See Brick Layout page 34 for dog box location in the firebox To replace the dog box first remove the ash pan Then remove the two...

Страница 26: ... below for clarification on the room air blower installation See pages 18 and 19 for operation instructions This unit can use the AC 16 which comes standard with the unit or the AC 30 upgrade blower Both are installed using the four factory installed 5 16 screws The optional heat circulation blower on this stove requires periodic lubrication this lubrication should be performed no less than every ...

Страница 27: ...n which the chimney system pulls air through the stove This unit must be installed in accordance with the following detailed descriptions of venting techniques not installing the stove in accordance with the details listed here can result in poor stove performance property damage bodily injury or death Avoid make shift compromises when installing the venting system England s Stove Works is not res...

Страница 28: ...tem surfaces get HOT and can cause burns if touched Noncombustible shielding or guards may be required The 10 3 2 Rule The chimney system must terminate 3 0 ft above the point where it s centerline passes through the roof AND the chimney must terminate 2 0 ft above part of the dwelling within a 10 ft radius of the chimney Operation and Maintenance Please refer to the Operation Operating Instructio...

Страница 29: ...ation Firewood is ready at 10 25 moisture content Newly cut logs can have a moisture content MC of 80 or more depending on species Since wood shrinks and can also split twist or otherwise change shape as it dries most wood is dried before being used Air drying or seasoning is the most common method used for cord wood In most parts of the United States the minimum moisture content that can be gener...

Страница 30: ...R BURNING THESE MATERIALS MAY RESULT IN RELEASE OF TOXIC FUMES OR RENDER THE HEATER INEFFECTIVE AND CAUSE SMOKE Safe Wood burning Practices Once your wood burning appliance is properly installed follow these guidelines for safe operation Keep all flammable household items drapes furniture newspapers and books far away from the appliance Start fires only with newspaper dry kindling and all natural ...

Страница 31: ...tubes in the correct order Front to Back Smoke Detectors England s Stove Works Inc highly recommends the use of smoke detectors in every room of the house However locating a smoke detector directly above this unit can result in nuisance alarms CAUTION This unit is meant to operate only with door closed Smoke spillage and an inefficient lazy burn will result from attempting to operate the stove wit...

Страница 32: ... Stove at Low Burn Rate 8 Wood Loaded Too Close to Glass Coals build up in firebox 9 Operating Stove at High Burn Rates 7 1 Operate the stove at higher burn rates to allow the air wash system to keep the glass clean 8 1 Never load wood so that it is touching the ceramic glass viewing window 9 1 Reduce combustion air control and allow coals to burn down before reloading Fire burns out of control 10...

Страница 33: ...et kit 3 4 high density AC DGKHD 1 Front burner tube AC W06FBT 1 Middle burner tube AC W02MBT 1 Rear burner tube AC W02RBT 1 Glass size 20 75 X 12 625 AC G51 1 Decorative Glass Insert Mountain AC W08WI M 1 Ceramic fiberboard AC W02CFB 4 Small spring handle Nickel AC SH4N 1 Large spring handle Nickel AC SHN 1 Blower back cover AC BBC30 1 Glass tabs AC W01GT 4 Hinge pins AC HP 2 Outside Air Kit AC O...

Страница 34: ...er delivery DIAGRAM NUMBER BRICK SIZE PART NUMBER QUANTITY PER STOVE 1 9 X 4 X 1 25 AC SB 26 2 4 25 X 4 X 1 25 AC SB4 25 1 3 8 X 4 X 1 25 with Notch AC SB8x4 2 4 6 5 X 4 X 1 25 AC SB6 5 1 ASH DUMP PLUG CA 30ADP 1 1 2 3 4 3 Dog Box Steel 1 1 1 1 1 1 1 1 1 1 1 1 1 1 1 1 1 1 1 1 1 1 1 1 1 Ash Plug 34 ...

Страница 35: ...Date and Serial Number in the blank spaces on this sample tag for future reference This sample tag also shows the safety info such as UL ULC testing standard etc for your local officials or anyone else who may need reference information 35 ...

Страница 36: ...t or expense or service during periods of malfunction or non use Do NOT use substitute materials or components to replace original equipment 4 All liability for any consequential damage for breach of any written or implied warranty is disclaimed and excluded 5 This warranty does not cover internal wear parts of the combustion system including the firebrick lining and gaskets 6 Warranty is void if ...

Страница 37: ...ese three easy ways to send your warranty information in Mailing Address England s Stove Works Inc Technical Support Department P O Box 206 Monroe Virginia 24574 Fax Number 434 929 4810 Twenty four hours a day Online Registration Visit our warranty registration website at www heatredefined com WARRANTY CARD LOCATED ON NEXT PAGE For parts warranty replacement procedures may be found at our parts st...

Страница 38: ...State Zip Code Unit Information Refer to the sticker on the back of the manual or box to complete this section IX Model Number Purchase Date X Purchase Price XI Serial Number Mfg Date Purchase Questions How did you first hear about our product Please check one Word of Mouth Burn Trailer Demonstration Internet Other Where did you receive information about our product Via Telephone Dealer Name of de...

Страница 39: ... locales en matière de construction ou le service d incendie afin de connaître les restrictions et les exigences d inspection des installations y compris l obtention de permis de votre région Rév 1 2021 PFS numéro de dossier 20 607 AFIN D ASSURER LE BON FONCTIONNEMENT DU POÊLE À BOIS VOUS DEVEZ L INSPECTER ET LE RÉPARER PÉRIODIQUEMENT CONSULTEZ LE GUIDE D UTILISATION POUR OBTENIR DE PLUS AMPLES RE...

Страница 40: ...rits sur l étiquette de sécurité fixée à l arrière de l appareil Ayez ces renseignements à portée de la main si vous appelez le fabricant ou votre détaillant au sujet de ce produit Gardez les enfants à l écart Surveillez les enfants qui se trouvent dans la même pièce que cet appareil Prévenez les enfants et les adultes des risques que représentent les températures élevées N utilisez PAS l appareil...

Страница 41: ...lée La lèvre de verrouillage Installation incorrecte Du quotidien Vérifiez l accumulation de cendres dans la chambre de combustion Retirez l excès de cendres et suivez les instructions indiquées dans votre manuel du propriétaire concernant l élimination des cendres Les cendres ne devraient pas s accumuler dans le poêle au point de couvrir le trou du boîtier de crampon Le bouchon de vidange des cen...

Страница 42: ...tration détaillée des pièces Liste des pièces 32 Disposition des briques 33 Garantie Étiquette de référence 34 Détails de la garantie 35 Avis important 36 Formulaire d enregistrement de la garantie 37 REMARQUE Si vous avez acheté ce modèle en fonction des magasins le numéro de modèle peut se terminer par L LC H CT etc Ce guide concerne ces modèles également Ce manuel peut être téléchargé gratuitem...

Страница 43: ...ction d aide de notre site Web ou appeler notre service de soutien technique au 1 800 245 6489 Nous sommes presque toujours en mesure de vous guider en cas de réparation à effectuer ou de problème ou encore de répondre à vos questions REMARQUE Les renseignements obtenus sur notre site Web ou en composant notre numéro sans frais sont gratuits en tout temps Cependant les réparations ou l entretien q...

Страница 44: ...ment selon le climat le type de construction l isolation et de nombreux autres facteurs Combinez les renseignements exposés dans le présent guide aux résultats d un calcul de déperdition thermique pour votre maison afin de déterminer si cet appareil suffira à combler vos besoins AVERTISSEMENT RELATIF AUX MODIFICATIONS Ce poêle à bois est doté d un taux de combustion bas minimum réglé en usine qui ...

Страница 45: ...urera un tirage fort et facile à amorcer dans la cheminée Bien que les systèmes de cheminée extérieurs fonctionnent souvent de façon adéquate ils subissent plus souvent le contre tirage d air froid à l allumage ou sont fréquemment la cause d un tirage faible de l appareil Tenez compte également de la section transversale de la cheminée Même si les cheminées en maçonnerie existantes peuvent souvent...

Страница 46: ...cheminée à paroi simple sur une surface non protégée avec écrans latéraux 483 19 762 30 305 12 152 6 127 5 432 17 Raccord de cheminée à paroi double sur une surface non protégée avec écrans latéraux 483 19 762 30 305 12 152 6 127 5 432 17 Notes pour cette unité Le produit peut différer légèrement des diagrammes Les dégagements sont le minimum pour cette unité et peuvent devoir être augmentés pour ...

Страница 47: ... vous suggérons fortement de faire appel à un installateur local certifié par le NFI National Fireplace Institute des États Unis Installez TOUJOURS le tuyau de ventilation en respectant rigoureusement les instructions et les indications sur les dégagements qui accompagnent le système de ventilation NE RACCORDEZ PAS LE POÊLE À BOIS À UN CONDUIT DE FUMÉE DÉJÀ UTILISÉ POUR UN AUTRE APPAREIL N install...

Страница 48: ...e registre de tirage sur cet appareil N utilisez jamais de raccord de cheminée à paroi simple ou double comme système de cheminée Ne faites jamais passer un raccord de cheminée dans un mur combustible sans respecter à la lettre les instructions du fabricant et celles indiquées à la page suivante concernant les traversées de mur Ne faites JAMAIS passer un raccord de cheminée à travers un grenier un...

Страница 49: ...îtement ventilé d épaisseur n 24 au minimum ayant deux conduits d air de 1 po séparé des matériaux combustibles par de l isolant en fibre de verre d une épaisseur minimale de 6 po L ouverture doit obligatoirement être couvert et le manchon d emboîtement soutenu par un support en tôle d acier d épaisseur n 24 au minimum D Longueur de cheminée préfabriquée à isolation pleine homologuée ayant un diam...

Страница 50: ...heminée à l appareil au moyen de vis à tôle les trous devraient généralement être prépercés dans la buse à l usine Fixez correctement le système de cheminée préfabriqué à la maison en respectant précisément les instructions du fabricant du système de cheminée préfabriqué Évitez de trop nombreux coudes et parcours horizontaux car ils réduiront le tirage et entraîneront une accumulation accrue de cr...

Страница 51: ...utilisation d un raccord de cheminée à paroi double Percez trois trous dans la buse de l appareil et fixez le raccord de cheminée à l appareil au moyen de vis à tôle les trous devraient généralement être prépercés dans la buse à l usine Fixez correctement le système de cheminée préfabriqué à la maison en respectant précisément les instructions du fabricant du système de cheminée préfabriqué La lon...

Страница 52: ...eil au moyen de vis à tôle les trous devraient généralement être prépercés dans la buse à l usine Évitez de trop nombreux coudes et parcours horizontaux car ils réduiront le tirage et entraîneront une accumulation accrue de créosote Les parcours horizontaux d un raccord de cheminée ne doivent jamais dépasser 1 22 m et la longueur totale du raccord de cheminée ne doit pas dépasser 2 44 m si vous ut...

Страница 53: ... fonctionnement et qu il est exempt d obstructions Avant l installation retirez le registre existant ou fixez le à l aide d un câble pour le maintenir ouvert de façon sécuritaire Ventilation du poêle raccordement direct Lorsque cet appareil est raccordé directement un tuyau de calibre 24 d un diamètre de 15 24 cm doit être utilisé à partir du poêle jusqu à l ouverture du registre REMARQUE Le racco...

Страница 54: ...acturers Home Safety Standard HUD CFR 3280 partie 24 des États Unis ainsi qu aux codes locaux en vigueur Chapeau de cheminée et pare étincelles Système de cheminée de classe A Solin de toit et mitre Protecteur de solive et coupe feu Raccord de cheminée à paroi double approuvé pour les maisons mobiles Utilisez de la silicone pour créer un coupe vapeur à l endroit où la cheminée passe à l extérieur ...

Страница 55: ... États Unis Le protecteur de plancher doit dépasser d au moins 40 6 cm 16 po à l avant de l ouverture pour le combustible de 20 3 cm 8 po sur les côtés de l ouverture de porte et de 20 3 cm 8 po à l arrière de l appareil Pour le Canada Le protecteur de plancher doit dépasser d au moins 450 mm à l avant de l ouverture pour le combustible de 200 mm sur les côtés de l ouverture de porte et de 200 mm ...

Страница 56: ...mportants en ajoutant quelques petits morceaux secs au bois d allumage La température à atteindre pendant ces feux se situe entre 176 67 C et 232 22 C environ entre 350 et 450 F ne laissez pas le feu dépasser cette température Fonctionnement continu Fonctionnement quotidien après votre premier feu Allumage Chargez la chambre de combustion avec de démarrage fendu Sur le bois de démarrage ajoutez de...

Страница 57: ...nce du retrait Lorsque le bois brûle lentement il produit du goudron et d autres vapeurs organiques qui se combinent avec l humidité évacuée pour former la créosote Les vapeurs de créosote se condensent dans le conduit de fumée relativement froid lorsque le feu se consume lentement Par conséquent des résidus de créosote s accumulent sur le conduit de fumée Lorsqu elle s enflamme cette créosote pro...

Страница 58: ...êche pas d utiliser des allume feu à base de papier de carton de sciure de cire ou d autres substances semblables pour allumer un feu dans le poêle à bois La combustion de ces matériaux peut compromettre l efficacité du poêle et produire de la fumée et des vapeurs toxiques Le fait de brûler d autres combustibles que le bois enstéré plus particulièrement du charbon et du charbon de bois peut entraî...

Страница 59: ...un feu utilisez uniquement du papier journal du bois d allumage et un allume feu entièrement naturel ou biologique N utilisez jamais d essence de kérosène ou d allumoir à charbon pour allumer un feu Ne brûlez pas de bûches humides ou vertes non séchées N utilisez pas de bûches faites de cire ou de sciure de bois dans votre poêle à bois car elles sont conçues pour des foyers ouverts Si vous utilise...

Страница 60: ...é fenêtre et porte et assurez vous qu ils continuent de fournir une fermeture hermétique Consultez les instructions à la page suivante Nettoyez à fond le système de cheminée et le système de raccord de cheminée Étant donné que le raccord de cheminée est généralement soumis à des températures d évacuation élevées vérifiez la présence de fuites et de points faibles puis remplacez les pièces dont l é...

Страница 61: ...cialement conçus pour cet appareil par England s Stove Works Joints d étanchéité 1 Porte Cet appareil est muni d un joint d étanchéité cordé de 19 05 mm po autour de la porte qui doit être remplacé au moins tous les ans Pour remplacer le joint d étanchéité de la porte n de pièce AC DGKHD retirez d abord le vieux joint en entier Avant d ajouter le nouvel adhésif vous devrez peut être gratter la vie...

Страница 62: ...t être nettoyés avec de l eau Si de la suie tenace persiste utilisez un nettoyant spécialement conçu pour l enlever Vous ne devez pas gratter la vitre ni la nettoyer avec un produit abrasif 3 Rincez la vitre avec de l eau propre et séchez la avant de faire fonctionner le poêle à nouveau Remplacement de la vitre 1 Retirez la porte du poêle et placez la sur une surface de travail solide face vers le...

Страница 63: ...vant Retirez ensuite le panneau que vous devez remplacer Installez le nouveau panneau les deux panneaux doivent être placés directement sur les tubes de bord à bord Replacez le tube retiré précédemment Remplacement de la niche voir la disposition des briques à la page 34 Pour remplacer la niche retirez d abord le bac à cendres Retirez ensuite les deux écrous de 9 16 po qui retiennent les boulons d...

Страница 64: ... plus de précisions sur l installation du ventilateur de pièce Voir pages 18 et 19 pour les instructions de fonctionnement Cet appareil peut utiliser le ventilateur AC 16 offert de série avec l appareil ou la nouvelle version de ventilateur AC 30 Les deux versions sont installées à l aide des quatre vis de 5 16 po posées à l usine Le ventilateur de circulation de chaleur en option sur ce poêle néc...

Страница 65: ...ans le poêle Cet appareil doit être installé conformément aux techniques de ventilation décrites en détail ci après Le non respect des détails mentionnés pourrait réduire son rendement et causer des dommages matériels des blessures ou la mort Évitez d avoir recours à des expédients lors de l installation du système de ventilation England s Stove Works n est pas responsable des dommages causés par ...

Страница 66: ...du système de ventilation deviennent CHAUDES et peuvent causer des brûlures si vous les touchez Il peut être nécessaire d utiliser un revêtement ou des grilles de protection incombustibles Règle 10 3 2 Le système de cheminée doit se terminer à 0 91 m 3 pi au dessus du point où son axe central traverse le toit ET la cheminée doit se terminer à 0 61 m 2 pi au dessus de toute partie du logement dans ...

Страница 67: ...e teneur en humidité de 10 à 25 Les bûches fraîchement coupées peuvent avoir une teneur en humidité de 80 ou plus selon l essence du bois Puisque le bois rétrécit et peut également se fendre se tordre ou autrement changer de forme en séchant la plupart des bois doivent être séchés avant d être utilisés Le séchage à l air est la méthode la plus fréquemment utilisée pour le bois enstéré Dans la plup...

Страница 68: ...ÊLE ET PRODUIRE DE LA FUMÉE ET DES VAPEURS TOXIQUES Pratiques de chauffage au bois sécuritaires Une fois que votre appareil de chauffage au bois est correctement installé suivez ces directives pour assurer un fonctionnement sécuritaire Conservez tous les articles de maison inflammables draps meubles journaux et livres loin de l appareil Pour allumer un feu utilisez uniquement du papier journal du ...

Страница 69: ...and s Stove Works Inc recommande fortement l utilisation de détecteurs de fumée dans chaque pièce de la maison Cependant le fait de poser un détecteur de fumée directement au dessus de l appareil pourrait causer des alarmes intempestives MISE EN GARDE Cet appareil est conçu pour fonctionner uniquement lorsque la porte est fermée L utilisation du poêle avec la porte ouverte provoquerait un refoulem...

Страница 70: ... un taux de combustion plus élevé afin de permettre au système autonettoyant de maintenir la vitre propre 8 Le bois chargé est trop près de la vitre 8 1 Ne chargez jamais le bois de sorte qu il touche à la fenêtre en vitrocéramique Accumulation de braises dans la chambre de combustion 9 Utilisation du poêle à un taux de combustion élevé 9 1 Réduisez l admission d air comburant et permettez aux bra...

Страница 71: ... Tube de brûleur avant AC W06FBT 1 Tube de brûleur central AC W02MBT 1 Tube de brûleur arrière AC W02RBT 1 Vitre d une dimension de 52 71 x 32 07 cm 20 75 x 12 625 po AC G51 1 Insert décoratif pour la vitre la montagne AC W08WI M 1 Panneau en fibres de céramique AC W02CFB 4 Petite poignée à ressort nickel AC SH4N 1 Grosse poignée à ressort nickel AC SHN 1 Couvercle arrière du ventilateur AC BBC30 ...

Страница 72: ...IÈCE QUANTITÉ PAR POÊLE 1 22 86 x 10 16 x 3 18 cm 9 x 4 x 1 25 po AC SB 26 2 10 8 x 10 16 x 3 18 cm 4 25 x 4 x 1 25 po AC SB4 25 1 3 20 32 x 10 16 x 3 18 cm 8 x 4 x 1 25 po avec l encoche AC SB8x4 2 4 16 51 x 10 16 x 3 18 cm 6 5 x 4 x 1 25 po AC SB6 5 1 BOUCHON DE TRAPPE À CENDRES CA 30ADP 1 1 2 3 4 3 Niche Acier 1 1 1 1 1 1 1 1 1 1 1 1 1 1 1 1 1 1 1 1 1 1 1 1 1 Bouchon de cendre 34 ...

Страница 73: ... dans les espaces prévus à cet effet sur cette étiquette pour référence ultérieure Cette étiquette comprend également des renseignements de sécurité comme la norme d essai UL ULC au Canada à l intention de vos représentants locaux ou de toute autre personne qui peut en avoir besoin 35 ...

Страница 74: ...ine 4 Le fabricant déclinera toute responsabilité pour les dommages consécutifs en cas de violation de toute garantie écrite ou implicite 5 Cette garantie ne couvre pas l usure des pièces internes du système de combustion y compris les joints d étanchéité 6 La garantie est nulle si l unité est pas utilisé conformément au manuel du propriétaire Certains États ou certaines provinces ne permettent pa...

Страница 75: ...originale Il y a trois moyens faciles de nous faire parvenir cette information Adresse postale England s Stove Works Inc Technical Support Department P O Box 206 Monroe Virginia 24574 États Unis Télécopieur 1 434 929 4810 24 heures par jour Enregistrement en ligne Consultez notre page d enregistrement de la garantie sur notre site Web à www heatredefined com Les pieces www heatredefined com LA CAR...

Страница 76: ...Ville_______________________ Province________ Code postal__________ Renseignements sur l appareil IX Numéro de modèle Date d achat X Prix d achat XI Numéro de série Date de fabrication Questions relatives à l achat Comment avez vous entendu parler de notre produit Veuillez cocher l une des réponses suivantes De bouche à oreille Démonstration Internet Autre À quel endroit vous a t on donné des rens...

Отзывы: