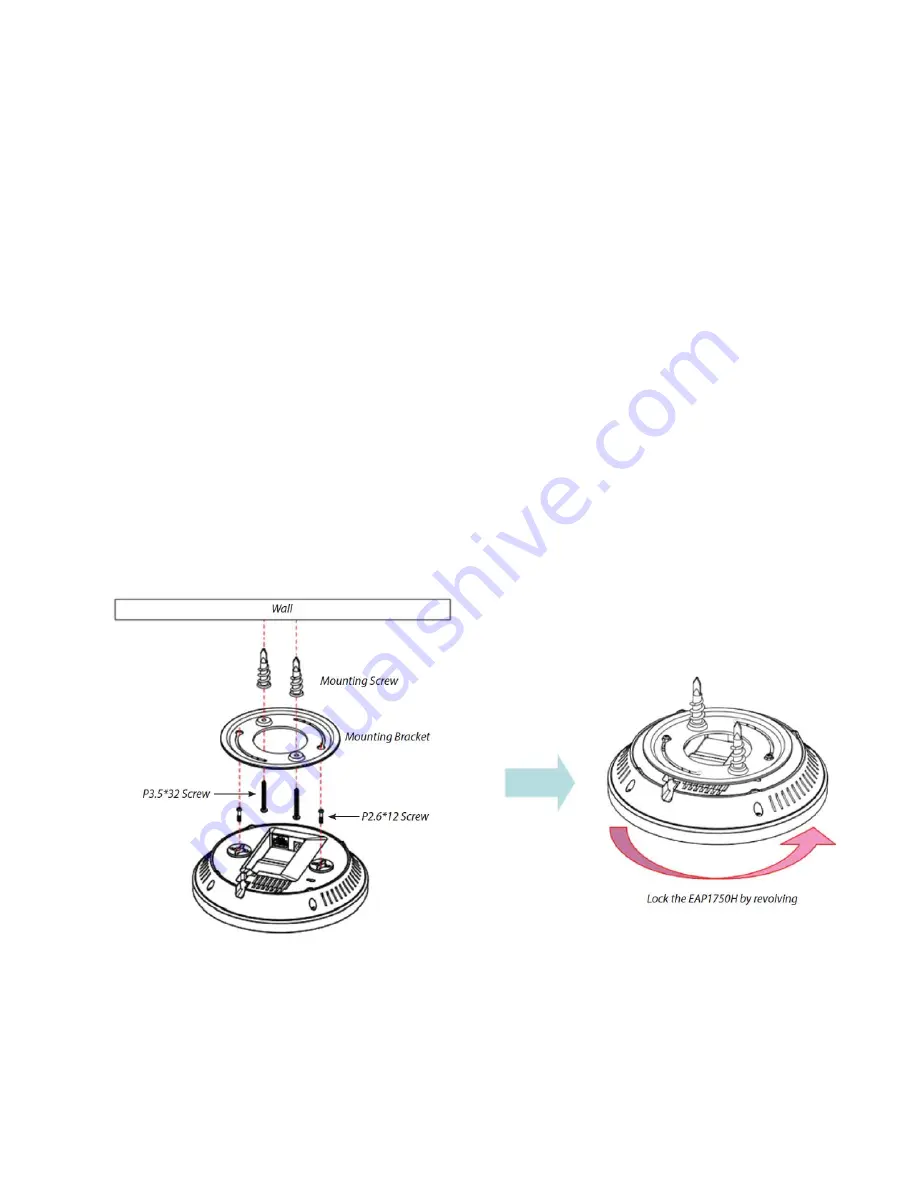
Mounting the Access Point
Using the provided hardware, the AP can be attached to a ceiling or wall.
To attach the AP to a ceiling or wall using the mounting bracket:
1. Attach the mounting bracket to the wall or ceiling using the provided wall/ceiling mounting hardware kit.
2. Insert the provided short screws into the bottom cover of the AP.
Leave enough of the screws exposed to ensure that the unit can be attached to the mounting bracket.
If extra space is required, use the provided spacers and long screws from the T-Rail mounting hardware kit to increase
the space between the unit and the mounting bracket.
3. Mount the AP on the mounting bracket by rotating the unit clockwise about 90 degrees to secure it in place.
Содержание EAP1300 EXT
Страница 1: ...Table of Contents...
Страница 4: ...Appendix A FCC Interference Statement 80 Appendix b CE Interference Statement 81...
Страница 5: ...Chapter 1 Product Overview...
Страница 10: ...Technical Specifications...
Страница 11: ......
Страница 13: ...Chapter 2 Before You Begin...
Страница 22: ...Chapter 3 Configuring Your Access Point...
Страница 25: ......
Страница 26: ...Chapter 4 Overview...
Страница 30: ...The Statistics section shows Mac information such as SSID MAC address RX and TX...
Страница 32: ...Traffic Loading 2 4GHz and 5GHz and Ethernet port inbound and outbound traffic by current average and peak time...
Страница 34: ...Chapter 5 Network...
Страница 38: ...Chapter 6 2 4GHz 5GHz Wireless...
Страница 56: ...Chapter 7 Management...
Страница 71: ...Chapter 8 System Manager...
Страница 78: ...Logout Click Logout it will pop up a warning window Click OK to logout...
Страница 79: ...Appendix...
Страница 81: ...Appendix b CE Interference Statement Europe EU Declaration of Conformity...
Страница 82: ...0560...
Страница 83: ......


