background image

12

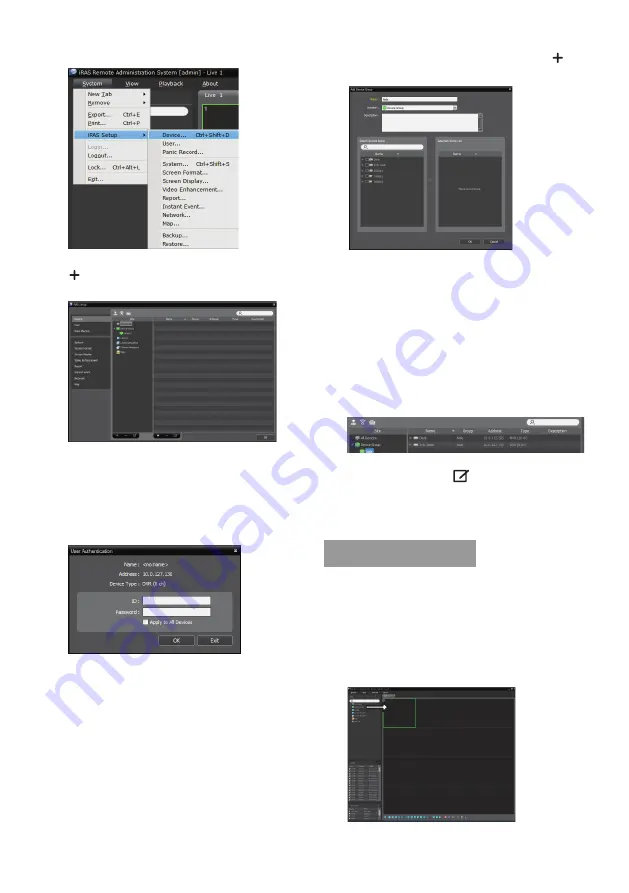
top of the screen.

On the 

Site

 panel, click on 

All Devices

, then click on the 

E

 button at the bottom of the Site List panel on the 

right. A 

Device Scan

 window will appear on the screen.

After selecting a scan mode, click on 

Start Scan

 button 

and the scan results will be displayed on the list. 

Click 

Add Devices

 at the bottom of the 

Device Scan


window.

When user authentication window appears, enter the 

User ID and Password set up on each device, and then 

select OK for remote access.

Click 

Device Group

 on the 

Sites

 panel and click 

E

 at 

the bottom. 

Add Device Group

 window will appear.


Name

: Enter a name for the device group.


Location

: Select a location for the subject device 

group.

When you select a device from the device List on the 

left, it will be added to the 

Selected Device List

 on the 

right. Click 

OK

 to register the device group.

Make sure that the device has been added to the device 

group correctly. Click 

Device Group

 on the 

Sites

 panel 

and click on next to 

Device Group

. When you click 

on a registered device group, a list of devices added the 

selected device group will be displayed on the right.

To modify a device group that has been registered, select 

a device group and click 

E

 on the bottom of the 

Sites


panel. 

Modify Device Group

 window will appear. You 

can modify the selected device group from this window.

Live Video Mode

In the Site List, make sure that the device has been added 

to the device group.

In the panel tabs, click the 

Live

 tab. In the 

Site

 list, select 

a zone you wish to connect to. Then, drag & drop the se-

lected site on the Live screen using your mouse. The live 

video of the selected site will be displayed on the screen. 

Содержание PNR-5332/3TB

Страница 1: ...Quick Installation Guide Network Video Recorder 32xIP 1920x1080 800fps H 264 HDMI PNR 5332 3TB PNR 5332 6TB DE EN FR ...

Страница 2: ...ice Scan 8 Advanced Setup Video In IP Setup 8 Login 9 Live Mode 9 Video Recording 9 Panic Recording 9 Audio Recording 9 Video Recording Playback 9 All Channel Playback 9 Setup WebGuard 10 System Requirements 11 Installation 11 Start Program 11 Login 11 Device Registration 11 Live Video Mode 12 Recorded Video Playback 13 Android OS device 13 iOS device 13 ...

Страница 3: ...fer servicing to qualified service personnel under the following conditions A When the power supply cord or the plug has been damaged B If liquid is spilled or objects have fallen into the equipment C If the equipment has been exposed to rain or water D If the equipment does not operate normally by following the operating instructions adjust only those controls that are covered by the operating in...

Страница 4: ...AUTHORITY TO OPERATE THE EQUIPMENT THIS CLASS OF DIGITAL APPARATUS MEETS ALL REQUIREMENTS OF THE CANADIAN INTERFERENCE CAUSING EQUIPMENT REGULATIONS WEEE Waste Electrical Electronic Equipment Correct Disposal of This Product Applicable in the European Union and other European countries with separate collection systems This marking shown on the product or its literature indicates that it should not...

Страница 5: ...Cables Overview Front Panel 1 2 3 4 5 6 7 8 90 1 Camera Buttons 2 Enter Button 3 Arrow Buttons 4 Menu Button 5 Zoom Button 6 PTZ Button 7 Panic Recording Button 8 LEDs 9 Display Button 0 Status Button Bookmark Button Freeze Button Alarm Button Playback Control Buttons Jog Dial Shuttle Ring USB Ports For more details on USB ports and LEDs of the front panel refer to the operation manual Rear Panel ...

Страница 6: ...ort Power In Port For more details on rear panel connections refer to the operation manual Connections on the Rear Panel Speaker VGA Monitor HDMI Monitor Network Camera Remote Monitoring Keyboard Sensor Alarm Power POS eSATA Storage Device Network Analog Camera Microphone ...

Страница 7: ... 4 Freeze Button 5 Alarm Button 6 Camera Buttons 7 Focus near far Button 8 Preset set view Button 9 Zoom in out Button 0 Menu Button PTZ Button Arrow Button Enter Button Zoom Button Panic Buttons Playback Buttons For more details on remote control buttons refer to the operation manual ...

Страница 8: ...me settings will only be ap plied after clicking Next Record Method Setup Record Video Qual ity Setup Higher recording quality uses up more disk space Finish the Quick Setup Wizard Network Setup Wizard After exiting from Quick Wizard the network with Network Wizard will start automatically Start the Network Setup Wizard Internet Connec tion LAN Setup This test must be per formed before proceeding ...

Страница 9: ...etup Video In IP Setup If the camera is networked but not scanned use this setup This setup allows you to change the network setting of the NVR s VIDEO IN port which is camera s network environ ment Check the camera s network setting first before you use this setup Make sure that this setting does not conflict with the WAN setting For more information on the WAN set ting refer to the operation man...

Страница 10: ...ns Video Recording Records the live video Refer to the Operation Manual for more information Panic Recording Select Live or Search menu s Panic Recording icon or press the Panic button on the front panel or the remote con trol to commence panic recording on all registered cameras To stop Panic Recording select the Panic Recording icon or press the Panic button again If the Panic Recording Duration...

Страница 11: ... the following information in the address bar http IP Address Port Number NVR system s IP ad dress and WebGuard port number configured under Network General Default Value 12088 Or http FEN server address FEN Name FEN Name NVR name configured on the FEN server Or http www dvronline net will be prompted to enter NVR s IP address or FEN name registered to the FEN server upon login Contact your networ...

Страница 12: ... Next 4 Select an installation path for the program and click Next 5 When the install confirmation window appears click Next NET Framework and Visual C Runtime Libraries will be installed automatically and it may take a few minutes If NET Framework and Visual C Runtime Libraries are already installed on the system this step will be skipped automatically 6 When the Installation Completed window app...

Страница 13: ... List on the left it will be added to the Selected Device List on the right Click OK to register the device group 7 Make sure that the device has been added to the device group correctly Click Device Group on the Sites panel and click on next to Device Group When you click on a registered device group a list of devices added the selected device group will be displayed on the right To modify a devi...

Страница 14: ...f the device is using an additional FEN server press Settings in the start up menu and enter the FEN server information Default site dvrnames net Default port number 10088 For more details contact your FEN server administrator Address Watch Enter the device name used to register the device to FEN If FEN feature is not enabled on the device deselect FEN checkbox and enter the device s IP address Fo...

Страница 15: ...y outputs NC NO 2A 125VAC 1A 30VDC Alarm Reset In 1 TTL terminal block Internal Buzzer 78dB at 10cm Network Connection 10Mbps 100Mbps 1Gbps Ethernet Audio In 16 lines RCA Audio Out 1 line RCA Text In POS Interface ATM Interface Connector Video In Ethernet 1 port Composite 16 BNC Camera Power Out Composite 16 BNC Monitor Out HDMI 1 HDMI VGA 1 DB15 Audio In 16 RCA connectors Audio Out 1 RCA connecto...

Страница 16: ...rätescan 23 Login 24 Live Modus 24 Videoaufzeichnung 24 Notfallaufnahme 24 Audioaufnahme 24 Videoaufzeichnung wiedergeben 24 Alle Kanäle wiedergeben 24 Konfiguration von WebGuard 25 Systemvoraussetzungen 26 Installation 26 Programm starten 26 Login 26 Geräteregistrierung 27 Live Videomodus 28 Wiedergabe von Videoaufnahmen 28 Android basierte Geräte 29 iOS basierte Geräte 29 ...

Страница 17: ...ühren könnte Verschütten Sie niemals irgendwelche Flüssigkeiten auf das Gerät 13 Wartung Versuchen Sie nicht dieses Gerät selbst zu warten oder zu reparieren Lassen Sie alle Wartungs und Reparaturarbeiten durch qualifiziertes Kundendienst personal ausführen 14 Reparaturbedürftige Schäden Trennen Sie dieses Gerät von der Steckdose und lassen Sie es durch qualifizier tes Kundendienstpersonal warten ...

Страница 18: ... der Stromzufuhr haben könnten Bei der Lösung dieser Aufgabe müssen die Angaben auf dem Typenschild ausreichende Berücksichtigung finden 24 Zuverlässige Erdung Es sollte eine zuverlässige Erdung gestellmontierter Geräte aufrechterhalten werden Es sollte besonders auf die Netzversorgungsleitungen geachtet werden die nicht direkt mit dem Zweigstromkreis verbunden sind z B bei Verwendung von Steckdos...

Страница 19: ...LLE ANFORDERUNGEN DER KANADISCHEN BESTIMMUNGEN FÜR STÖRUNGEN VERURSACHEN DE GERÄTE WEEE Richtlinie Elektro und Elektronik Altgeräte Ordnungsgemäße Entsorgung dieses Produkts Gilt für die Europäische Union und anderen Europäischen Länder mit getrennten Sammelsystemen Dieses am Produkt oder in seiner Dokumentation gezeigte Symbol bedeutet dass es am Ende seiner Lebensdauer nicht mit dem Hausmüll ent...

Страница 20: ... 1 Kamera Tasten 2 Eingabe Taste 3 Pfeiltasten 4 MENU Taste 5 ZOOM Taste 6 PTZ Taste 7 Notfallaufnah me Taste 8 LEDs 9 Display Taste 0 STATUS Taste LESEZEICHEN Tas te FREEZE Taste Alarm Taste Wiedergabe Steuerungs schaltflächen Jog Dial Shutt le Ring USB Anschlüsse Weitere Informationen zu USB Anschlüssen und LEDs auf der Frontseite finden Sie in der Betriebsanleitung Rückseite 1 2 3 4 5 6 7 8 9 0...

Страница 21: ...gangsport Stromversorgungs ein gang Für weitere Details lesen Sie bitte die Betriebsanleitung Anschlüsse an der Rückseite Speaker VGA Monitor HDMI Monitor Network Camera Remote Monitoring Keyboard Sensor Alarm Power POS eSATA Storage Device Network Analog Camera Microphone ...

Страница 22: ...rm Taste 6 Kamera Tasten 7 Nahfokus Fernfokus Taste 8 Taste zum Einstellen Ansehen von Voreinstellungen 9 Taste zum Heran Herauszoomen 0 Menü Taste PTZ Taste Pfeiltaste Eingabetaste ZOOM Taste Notfall Taste Wiedergabe Tasten Weitere Informationen zu Fernbedienungstasten finden Sie in der Betriebsanleitung ...

Страница 23: ...cheinen erst nachdem Sie auf Weiter geklickt haben Konfiguration Auf nahme methode Konfiguration Videoaufnah me qualität Eine höhere Aufnahme qualität benötigt mehr Speicherplatz Beenden Sie den Konfigurationsassistenten Netzwerkkonfigurationsassistent Nach dem Beenden des Schnellassistenten starten das Netzwerk und der Netzwerkassistent automatisch Starten Sie den Netzwerkkonfigurationsassistente...

Страница 24: ...onfiguration wenn die Kamera an das Netzwerk angeschlossen ist aber beim Scannen nicht gefun den wird Mit dieser Konfiguration können Sie die Netzwer keinstellung des NVR Videoeingangsports ändern der sich in der Netzwerkumgebung der Kamera befindet Überprüfen Sie zuerst die Netzwerkeinstellung der Kamera bevor Sie diese Konfiguration nutzen Stellen Sie sicher dass diese Einstellung nicht im Konfl...

Страница 25: ...ufzeichnung Aufnahme von Live Video Nähere Informationen hierzu finden Sie in der Betriebsan leitung Notfallaufnahme Wählen Sie das Notfallaufnahme Symbol im Live oder Suchmenü oder drücken Sie die NOTFALL Taste auf der Frontseite des NVRs oder auf der Fernbedienung um die Notfallaufnahme auf allen registrierten Kameras zu starten Zum Beenden der Notfallaufnahme wählen Sie erneut das Notfallaufnah...

Страница 26: ...resse Portnummer die IP Adresse des NVRs und die WebGuard Portnummer wie unter Netzwerk Allgemein konfiguriert Standardwert 12088 Oder http FEN Serveradresse FEN Name FEN Name der auf dem FEN Server konfigurierte NVR Name Oder http www dvronline net nach dem Login werden Sie aufgerufen die IP Adresse des NVRs oder den auf dem FEN Server registrierten FEN Namen einzugeben Wenden Sie sich an Ihren N...

Страница 27: ...eim Erscheinen des Installationsfensters klicken Sie auf Weiter 4 Wählen Sie einen Installationspfad für das Programm und klicken Sie auf Weiter 5 Beim Erscheinen des Fensters zur Bestätigung der Instal lation klicken Sie auf Weiter NET Framework und Visual C Runtime Bibliotheken werden automatisch installiert dies kann einige Minuten in Anspruch nehmen Wenn NET Framework und Visual C Run time Bib...

Страница 28: ...riff 6 Klicken Sie auf Gerätegruppe auf der Standort Leiste und klicken Sie unten auf E Gerätegruppe hinzufü gen Fenster erscheint Name Geben Sie einen Namen für die Gerätegruppe ein Standort Wählen Sie einen Standort für die Geräte gruppe aus Wenn Sie ein Gerät aus der Geräteliste auf der linken Seite auswählen wird es zur Liste der ausgewählten Geräte auf der rechten Seite hinzugefügt Klicken Si...

Страница 29: ...schirm Das Live Video des ausgewählten Standorts wird auf dem Bildschirm dargestellt Wiedergabe von Videoaufnahmen 1 Vergewissern Sie sich anhand der Standortliste dass das Gerät der Gerätegruppe hinzugefügt wurde 2 Klicken Sie auf die Registerkarte Abspielen unter den Registerkarten in der Leiste Wählen Sie einen Standort aus der Standort Liste mit der Sie eine Verbindung herstellten möchten Vers...

Страница 30: ...trator für weitere Einzelheiten Adresse Watch Geben Sie den Gerätenamen ein der bei der FEN Registrierung verwendet wurde Wenn die FEN Funktion nicht auf dem Gerät akti viert ist deaktivieren Sie das FEN Kontrollkästchen und geben Sie die IP Adresse des Geräts ein Für die Portnummer wird die Verwendung des Standard werts empfohlen Accounts Geben Sie die für das Gerätelogin verwen dete Benutzer ID ...

Страница 31: ...gang 4 Relaisausgänge NC NO Öffner Schließer 2 A 125 VAC 1 A 30 VDC Alarmrücksetzeingang 1 TTL Klemmleiste Integrierter Tongeber 78 dB bei 10 cm Netzwerkverbindung 10Mbps 100Mbps 1Gbps Ethernet Audioeingang 16x RCA Audioausgang 1x RCA Texteingabe POS Schnittstelle ATM Schnittstelle Anschluss Videoeingang Ethernet 1 Port FBAS 16 BNC Kamera Stromausgang FBAS 16 BNC Monitorausgang HDMI 1 HDMI VGA 1 D...

Страница 32: ...he de périphérique 39 Connexion 40 Mode live 40 Enregistrement vidéo 40 Enregistrement panique 40 Enregistrement audio 40 Lecture de l enregistrement vidéo 40 Tous les canaux de lecture 41 Configurations de système requises 42 Installation 42 Démarrer le programme 42 Connexion 42 Enregistrement de l appareil 43 Mode vidéo live 43 Lecture de vidéo enregistrée 44 Appareil Android OS 44 Appareil iOS ...

Страница 33: ...ent provoquer un incendie ou une dé charge électrique Ne renversez jamais de liquide quel qu il soit sur le produit 13 Réparation Ne pas réparer cet appareil vous même Veuillez vous adresser à un personnel d entretien qualifié 14 Dommages nécessitant une réparation Débranchez l appareil de la prise de courant et adressez vous au personnel qualifié pour les réparations dans les cas suivants A Lorsq...

Страница 34: ...ES LORSQUE L ÉQUIPEMENT EST UTILISÉ DANS UN ENVIRONNEMENT COMMERCIAL CET ÉQUIPEMENT GÉNÈRE ET UTILISE DES FRÉQUENCES RADIO QUI EN CAS D INSTALLATION ET D UTILISATION INCORRECTES PEUVENT ÊTRE À L ORIGINE D INTERFÉRENCES NOCIVES POUR LES COMMUNICATIONS RADIO L UTILISATION DE CET ÉQUIPE MENT DANS UNE ZONE RÉSIDENTIELLE EST SUSCEPTIBLE DE GÉNÉRER DES INTERFÉRENCES NOCIVES DANS CE CAS LES UTILISA TEURS...

Страница 35: ...e document peuvent faire l objet de modifications sans préavis Des éditions révisées ou nouvelles de la présente publication peuvent être publiées afin d incorporer de tels changements Le logiciel inclus dans ce produit contient des éléments Open Sources Vous pouvez obtenir auprès de nous le code source complet correspon dant Reportez vous au guide du code source libre disponible sur le CD du logi...

Страница 36: ...lti conduc teurs audio Vis de fixation pour ajouter des disques durs Câbles SATA2 Vue d ensemble Panneau avant 1 2 3 4 5 6 7 8 90 1 Touches caméras 2 Touche entrer 3 Touches fléchées 4 Touche Menu 5 Touche zoom 6 Touche PTZ 7 Touche Enregistre ment panique 8 DEL 9 Touche Affichage 0 Touche statuts Touche signet Touche Freeze Touche Alarme Touches de commande du mode Lecture Molette de sélection Jo...

Страница 37: ...Port de sortie HDMI Port de sortie VGA Port de sortie audio Port d alimentation Pour plus d informations sur les connexions du panneau arrière se référer au mode d emploi Connexions sur le panneau arrière Speaker VGA Monitor HDMI Monitor Network Camera Remote Monitoring Keyboard Sensor Alarm Power POS eSATA Storage Device Network Analog Camera Microphone ...

Страница 38: ...Touches caméras 7 Touche Mise au point rapproché éloigné 8 Touche Pré réglages Réglages visua lisation 9 Touche Zoom avant arrière 0 Touche menu Touche PTZ Touche fléchée Touche Entrer Touche zoom Touches panique Touches mode lecture Pour plus de détails sur les touches de commande à distance reportez vous au mode d emploi ...

Страница 39: ...ont appliquées qu après avoir cliqué sur suivant Configuration de la méthode d enregis trement Configuration de la qualité d enregistre ment vidéo Une qualité d enregistre ment supérieure utilise plus d espace disque Terminer l Assistant d installation Assistant de configuration du réseau Après avoir quitté l assistant rapide le réseau démarre automatiquement avec l Assistant réseau Démarrer l Ass...

Страница 40: ...ues 4 Nom indique le nom de la caméra 5 Statut identifie le statut d enregistrement de la caméra enregistrée ou non enregistrée Configuration avancée Vidéo In dans la configuration de l IP Si la caméra est en réseau mais pas scannée utilisez cette configuration Cette configuration permet de modifier les réglages du réseau de port de VIDEO IN de l enregistreur vidéo de réseau qui est le réseau envi...

Страница 41: ...Consultez le manuel pour plus d informations Enregistrement panique Sélectionnez Live ou recherche dans l icône enregistrement du menu panique ou appuyez sur la touche panique sur le panneau avant ou la télécommande pour commencer l enre gistrement de panique sur tous les appareils enregistrés Pour arrêter l enregistrement panique sélectionnez l icône enregistrement panique ou appuyez de nouveau s...

Страница 42: ...rmations suivantes dans la barre d adresse http IP adresse numéro de port numéro configuré sous réseau de port de l adresse IP du système d enre gistreur vidéo de réseau et le WebGuard générales valeur par défaut 12088 ou http FEN serveur adresse FEN nom nom FEN nom de l enregistreur vidéo de réseau configuré sur le serveur de la FEN ou http www dvronline net vous demandera d entrer l adresse IP o...

Страница 43: ...océder à l installation 3 Lorsque la fenêtre d installation apparaît cliquez sur suivant 4 Sélectionnez un chemin d installation pour le pro gramme puis cliquez sur Prochaine 5 Lorsque la fenêtre de confirmation d installation appa raît cliquez sur Prochaine NET Framework et les bibliothèques Runtime Visual C s installeront automatiquement cela peut prendre quelques minutes Si NET Framework et les...

Страница 44: ...lacement sélectionnez un emplacement pour le groupe d appareils concerné Lorsque vous sélectionnez un appareil de la liste de gauche il sera ajouté à la liste des appareils sélec tionnés se trouvant sur la droite Cliquez sur OK pour enregistrer le groupe d appareils 7 Assurez vous que l appareil a bien été ajouté au groupe d appareils Cliquez sur groupe d appareils sur le site et cliquez ensuite s...

Страница 45: ... entrez un nom de l appareil qui servira au RAS Mobile Info de connexion Utilisez FEN activez la case à cocher Décochez la case si FEN n est pas activé sur l appareil Si l appareil utilise un serveur supplémentaire de la FEN appuyez sur paramètres dans le menu de démarrage et entrez les informations de serveur FEN Site par défaut dvrnames net numéro de port par défaut 10088 Pour plus de détails co...

Страница 46: ...io 1 ligne RCA Entrée de texte Interface Point de vente Interface Distribu teur automatique Connecteur Entrée vidéo Ethernet 1 port composite 16 BNC Sortie alimentation de caméra Composite 16 BNC Sortie moniteur HDMI 1 HDMI VGA 1 DB15 Entrée audio 16 Connecteurs RCA Sortie audio 1 connecteur RCA Alarme Bloc de branchement Port Ethernet 1 RJ 45 Ports eSATA 2 ports eSATA Port série RS 232 Bloc de br...

Страница 47: ...46 ...

Страница 48: ...47 FR ...

Страница 49: ...distribution through spe cialised trade channels only VIDEOR E Hartig GmbH Carl Zeiss Straße 8 63322 Röder mark Germany Tel 49 0 6074 888 0 Fax 49 0 6074 888 100 www videor com www eneo security com Technical changes reserved Copyright by VIDEOR E Hartig GmbH 06 2016 ...

Отзывы: