


®
Outdoor Patio Heater Model No. GWU501E
Contact 1.800.762.1142 for assistance. Do not return to place of purchase.
page no.
4
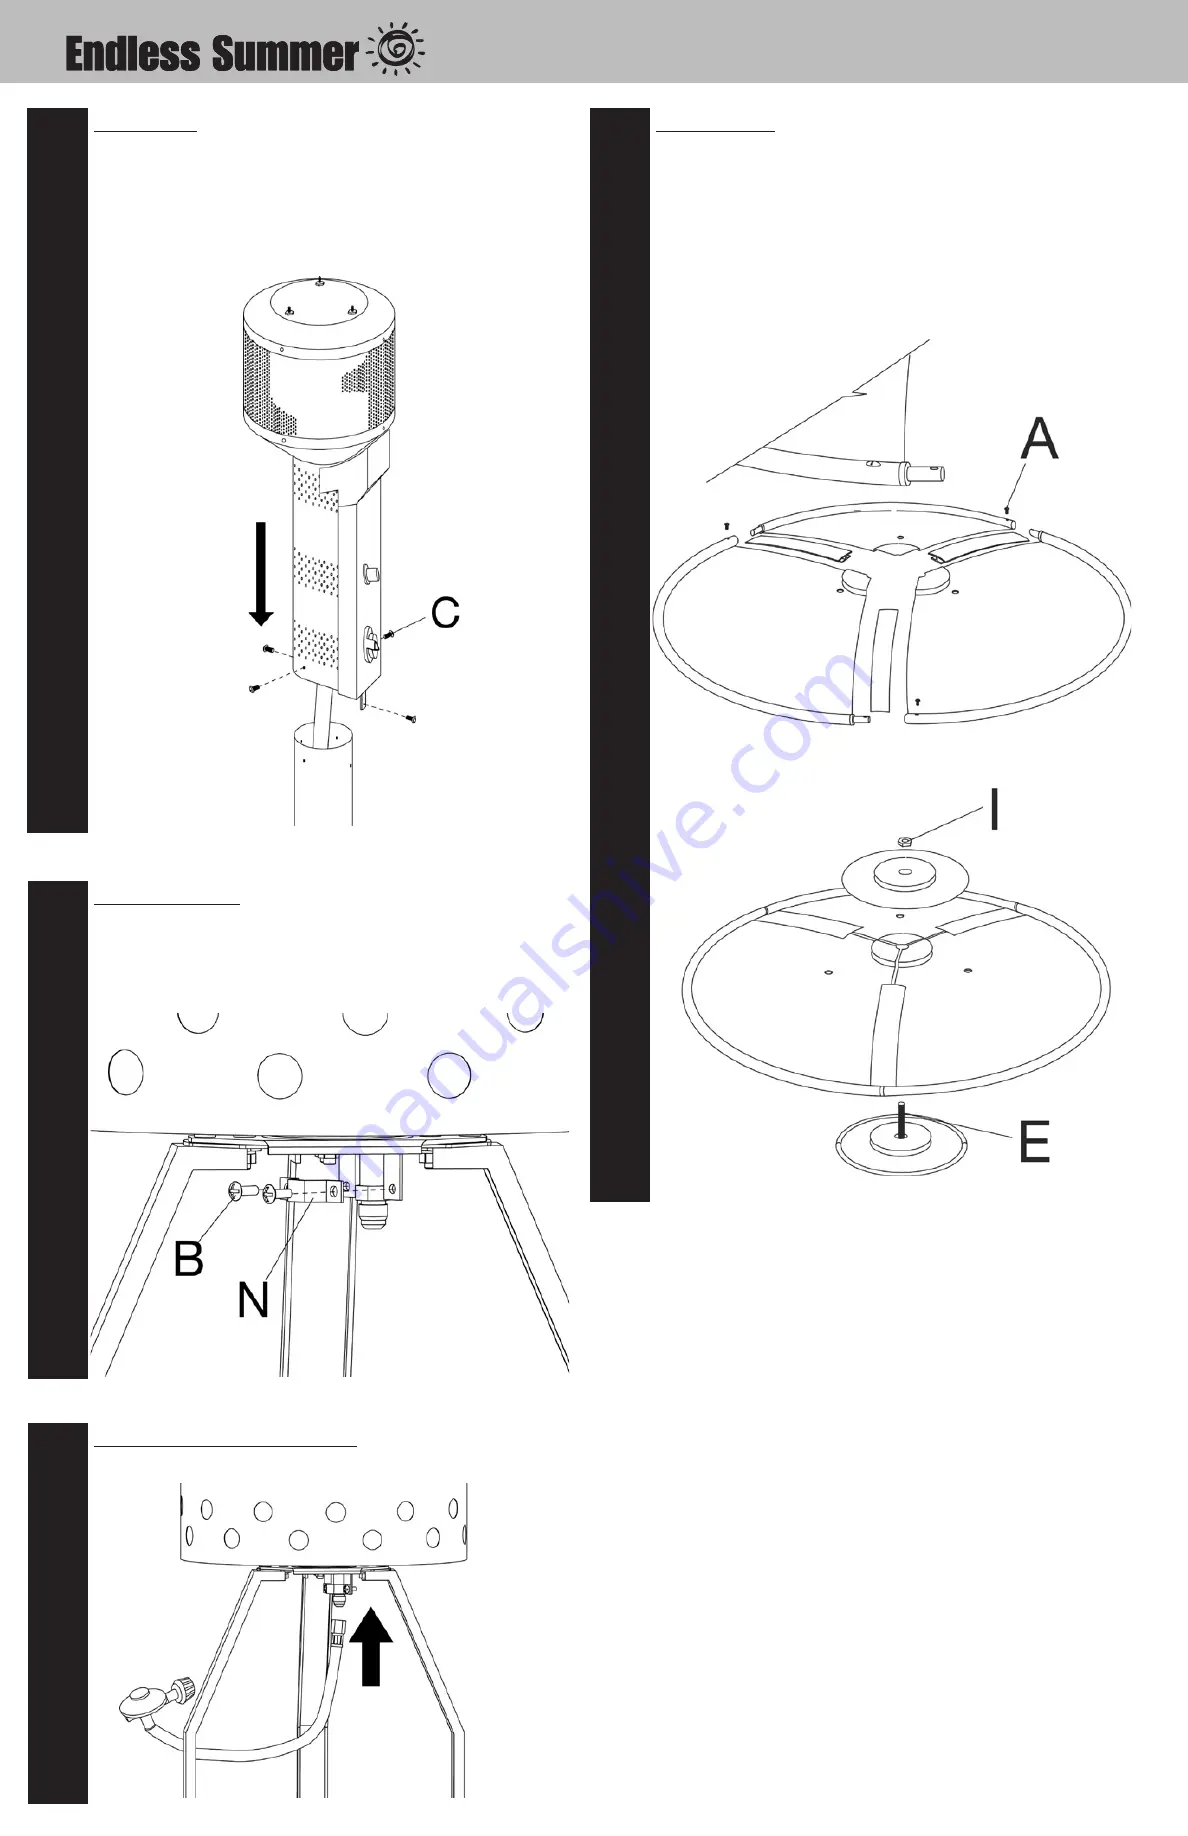
Step
7
Attach gas line clip
A. Lift shroud cover to expose platform.
B. Make sure gas line feeds through indent in gas line clip.
C. Attach gas line clip (N) to base platform using 2 medium screws (B), securing the
gas line without damaging the exposed bolts.
Step
8
Attach gas line/regulator assembly
Attach gas line/regulator assembly to gas line using 3/4” wrench.
Step
9
Assemble Dome
Note:
Each dome section has a pin mounted in the rolled bottom edge. If necessary
for proper alignment of dome sections, loosen each screw prior to assembly.
A. Slide dome rib onto pin side of dome panel.
B. Slide two dome panels togther. Secure with small screw (A).
C. Repeat procedure for all three dome panels.
D. Insert large bolt (E) through dome plate, dome, top dome plate, large nut (I).
E. Tighten all screws on dome panels.
Step
6
Attach engine
A. Lay engine assembly and base assembly on their side, using carton for support.
B. Insert gas line through pole.
Note:
Make sure gas line comes out bottom of pole before securing engine to pole.
C. Attach engine to post using 4 large screws (C).
Note:
Do not fully tighten screws until all screws are in place.