ENCAD 212528-05 Скачать руководство пользователя страница 14

NovaJet 500/630/700 Series Printer Quick Start Guide

14

Loading media

You can use either roll or single sheet media. To ensure straight paper loading
and avoid skewing, be sure to hold the media parallel to the platen. Use the load
lines on the platen as a guide to correctly align the media. Be sure to load from
the back only. Set the media guides to the width of the media.

!

IMPORTANT! 

It is very important to use only ENCAD QIS media with your

printer. Some third party media has been found to generate electrostatic dis-
charge in excess of 20 KV. Emissions of this level can cause arcing between the
lower roller and printer leg. These conditions can be temporary or permanent.

!

Depending on the model, the printer can use media up to 60" wide. The rolls can
be heavy, so you may want to have someone help you to load them.

!

If your roll media has wrinkled or damaged edges, cut off the damaged part of
the roll prior to loading to prevent the media from jamming in the printer.

To load roll media on the NovaJet 736

1

Mount the roll media on the back of the printer, orienting it as shown
in the following illustration. Slide the roll holders into the media core,
and tighten the thumbscrews on the roll holders to secure the roll.
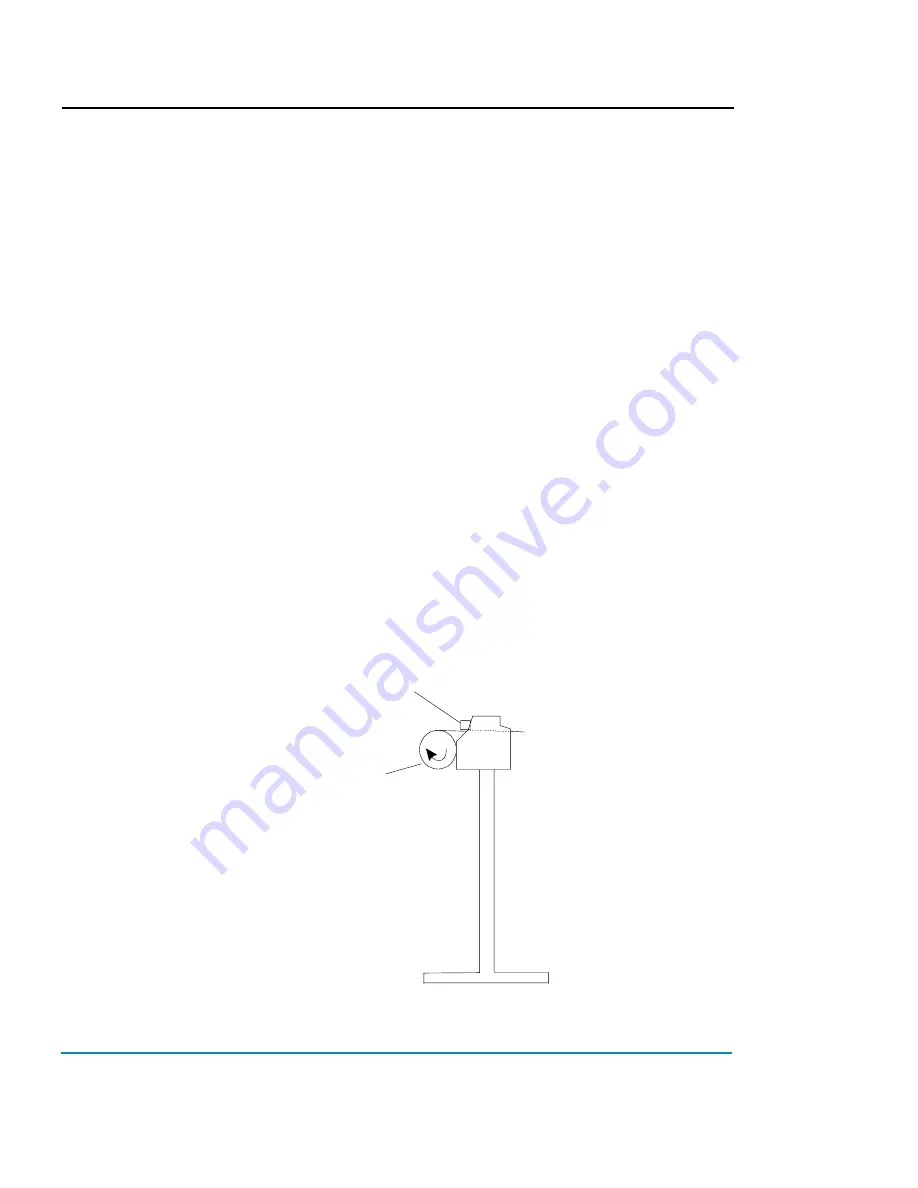
2

Insert the media's leading edge into the back of the printer, aligning
the paper edge with the alignment mark on the platen. The printer will
sense the presence of the media and feed it automatically.

Feed Roll

Left side view

Media presence  
                sensor

Loading roll media

Содержание 212528-05

Страница 1: ...operty of their respective owners No part of this manual may be copied or distributed transmitted transcribed stored in a retrieval system or translated in any human or computing language in any form...

Страница 2: ...s options Quality Primer a guide to help you get high quality output from your NovaJet printer HP GL 2 Guide provides reference information regarding the HP GL 2 features of your printer Maintenance G...

Страница 3: ...nal takeup roll 17 Moving the carriage 19 Installing the cutter 19 Filling the ink reservoirs 20 Inspecting the ink cartridges 21 Installing the 500 series ink cartridges 21 Priming the 500 series ink...

Страница 4: ...NovaJet 500 630 700 Series Printer Quick Start Guide 4 This page is intentionally blank...

Страница 5: ...r 700 printer it refers to all printer models within that series Any features or functionality unique to one printer model will be noted The NovaJet 700 Windows driver on the System CD is a 700 Series...

Страница 6: ...the connector from the access hole in the leg and remove the tiewrap holding the connector in place Attach the connector to the receptacle on the bottom of the print head Note The NovaJet 736 does no...

Страница 7: ...ou need to ship the printer 6 Check to be sure that the media sensor is plugged in to the connector on the right stand leg 7 On the NovaJet 736 attache the left and right roll guides to the back of th...

Страница 8: ...n the NovaJet 750 1 Remove the wing nut and mount the dryer assembly in the slots provided at the base of the stand Be sure fans will blow upward and toward the printer Position the dryer assembly to...

Страница 9: ...to the right lower rear edge of the dryer assembly bracket and tighten the thumbscrew securely so that the paint is penetrated ensuring a good ground Affix clamp to bottom edge of bracket and tighten...

Страница 10: ...nt the brackets as shown below Note The legs are shown below without the printer head Attach the dryer brackets after the printer head as been attached and the assembled printer removed from the packi...

Страница 11: ...no user serviceable parts inside Refer servicing to qualified service personnel only CAUTION This assembly emits heat by radiation CAUTION Once the dryer is plugged in there is continuous power to th...

Страница 12: ...the information accompanying the print server for installation instructions If you are using an optional hardware RIP refer to the information accompanying the RIP for installation instructions 1 Plu...

Страница 13: ...r the option you want and press OK to accept the selection Depending on the type of menu you can return to the previous menu level by pressing the OK or Exit button There is no way to immediately retu...

Страница 14: ...s can be temporary or permanent Depending on the model the printer can use media up to 60 wide The rolls can be heavy so you may want to have someone help you to load them If your roll media has wrink...

Страница 15: ...sensors for feed and takeup Feed roll Takeup roll Media presence sensor Loading roll media Note If you are going to use the optional takeup roll be sure that a media core is installed on it Attach th...

Страница 16: ...optional takeup and dryer system The optional takeup roll can also be used as a feed roll If you use the optional takeup roll as a feed roll you cannot use the takeup system If you want to use the op...

Страница 17: ...yer position it so that the fans blow on the media To use the takeup roll 1 Set the printer to Takeup mode by pressing Setup Menu Paper Options Menu Supply Type Takeup then press OK This enables the t...

Страница 18: ...the media is rolled onto the takeup core To unload the takeup roll 1 Press the Cut button to cut the media 2 Roll the printed or unused media onto the takeup 3 Slide the media and core out of the prin...

Страница 19: ...ll media The printer is shipped with the cutter installed Be careful when handling the cutter to avoid injury Cutting media with a worn cutter can cause the media to jam and create a ragged cut line R...

Страница 20: ...s are attached to the grey lines The bay under each of the left four reservoirs is numbered 4 3 2 1 4 Yellow Y 3 Magenta M 2 Cyan C 1 Black K Y Y M C K To fill the ink reservoirs 1 Open the cover on t...

Страница 21: ...ink cartridges NovaJet 500 series printers use only cartridges specifically designed for the 500 series printer model It is not compatible with cartridges designed for other printer models Use of othe...

Страница 22: ...ottoms out then retract it by approximately 1 8 3 Slowly press the bellows dispensing all of the ink into the ink cartridge 4 Recap the squeeze bottle 5 Hold the cartridge upright so no ink comes out...

Страница 23: ...more than one color of ink be sure to thoroughly wipe any excess ink from the ink primer before working with the next color to avoid the possibility of color cross contamination Work with only one ink...

Страница 24: ...e hole in the top of the ink cartridge Be sure the needle is tightly connected 5 Gently tighten the fitting about 1 4 turn to prevent air leaks Do not overtighten 6 Remove the cartridge from the carri...

Страница 25: ...heck for ink on the jet plate Continuous bleeding of the jet plate indicates a loss of vacuum in the cartridge or an air leak in the lines Correct this before proceeding 10 Insert the cartridge into t...

Страница 26: ...Be sure all cartridges and reservoirs use the same ink type i e GX VX GS Plus or GO To install the 630 700 series ink cartridges Do not touch the jet area or the flex contact area of the ink cartridg...

Страница 27: ...is a NovaJet 736 or 750 do not use this section for prim ing Refer to the following section for Installing needle assemblies and priming the NovaJet 736 or 750 ink delivery lines After filling the ink...

Страница 28: ...plugged into the same color connector as the ink reservoir 2 Press the button on the ink primer to activate the vacuum and draw ink from the reservoir into the needle 3 When ink is visible in the ink...

Страница 29: ...to ensure that there are no twists in the ink delivery line Check for ink on the jet plate Continuous bleeding of the jet plate indicates a loss of vacuum in the cartridge or an air leak in the lines...

Страница 30: ...ditional 5 seconds When removing the ink primer use the silicone tip to wipe and clean the jet plate Remember to clean the silicone tip of ink before moving to the next cartridge 13 Reprint the color...

Страница 31: ...efore continuing Refer to the Reference Guide on the System CD for information on installing batteries Switch Sight Tube Your printer is equipped with shutoff valves for the ink delivery lines on the...

Страница 32: ...e up 2 Insert the needle assembly connector into the fitting on the carriage There are two connectors for each cartridge one is blue and the other is gray Be sure that the needle assembly is plugged i...

Страница 33: ...button a few seconds to prevent leaking from the ink primer 7 Insert the cartridge needle into the hole in the top of the ink cartridge Be sure the needle is tightly connected by turning the fitting c...

Страница 34: ...nt free cloth 10 Insert the cartridge into the carriage 11 Repeat for each cartridge 12 Press Utility Menu Access Cartridge to return the carriage to the service station 13 Print the color test prime...

Страница 35: ...changing media Inspect to ensure proper pressure is maintained for each color 17 Re prime cartridges as necessary to remove clogs Manually bypass compensate clogged jets as necessary Manual compensati...

Страница 36: ...maged The only intervention needed is to verify that there are no clogged jets and then choose which print mode is most appropriate for your needs This is done by printing the Prime test pattern and t...

Страница 37: ...l provide compensation Clogged jets Clogged jets cannot be automatically detected and therefore must be cleared manually If a jet is clogged it will appear in the prime pattern as a gap in the sloping...

Страница 38: ...h you need to compensate 4 Press OK to accept the settings If you have manually compensated for jets in any cartridge be sure to clear the compensation when a new cartridge is installed by pressing Cl...

Страница 39: ...ll the same cartridge only Color Calibration needs to be performed To perform color deadband compensation on 630 700 series printers 1 With paper loaded press Utility Menu Calibration Menu Color DB Te...

Страница 40: ...tern If they are in register your calibration is correct If not perform the following steps to align the printer heads 2 Press Cyan Adjust Vertical 3 Examine the Vertical Head to Head Test Pattern and...

Страница 41: ...Test The printer prints two marks 3 Remove the media from the printer and measure the distance between the marks If you need accurate printing e g registering multiple panels or tiles you must use a v...

Страница 42: ...talled properly Install new cartridges if necessary To clear cartridge recognition error 1 Press Utility Menu Access Cartridge to move the carriage to the position which allows replacement of the ink...

Отзывы: