background image

– 9 –

SET CONTENT

Unpack the loudspeakers, crossovers and accessories and check if all parts are contained, as
listed below:

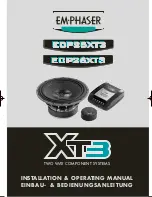
(2) mid / woofers ECP25XT3 / ECP26XT3
(2) plastic trim rings / metal grilles
(2) tweeters with mounting adapters
(2) crossovers ECP25XT3 / ECP26XT3
(1) set of wiring hardware for tweeters
(1) set of tweeter mounting hardware
(1) instruction manual

MID/WOOFER MOUNTING

The first step is to choose the best mounting location for the tweeters and mid/woofers of your
component speaker system. If you can not mount the mid/woofers to an existing factory cutout,
a good alternative is to buy a set of car specific doorboards made of MDF, so the mid/woofers
can be mounted to a solid surface. Otherwise you should consult your EMPHASER dealer and
ask for further assistance.

Remove the factory grilles of the door and remove the factory installed speakers. On  some oc-
casions, you will have to remove the complete doorpanels, to gain full access to the speaker
mounting platforms. If this is the case, you should also buy some spare plastic clips for remoun-
ting the panels, as these clips tend to break easily. A tight fit of the panels is important,  becau-
se the doorpanel may strongly vibrate and distort the sound of your speaker system when not
fixed properly. Before you proceed to mount the EMPHASER mid/woofers, check the installati-
on depth in the front doors of your car once more. The windows must be down when you hold
the mid/woofers in place. Insufficient mounting depth leads to impaired window function!

Now connect the speaker cable to the mid/woofer unit and route the speaker cable to the loca-
tion where the crossover will be installed. Pay attention to the polarity imprints, when connecting
the wire to the mid/woofer terminal or crossover!
When you tighten the mounting screws to fix the mid/woofer basket, be sure to go for an airtight
fit of the basket rim to the mounting surface. Once this is done, you can reinstall the factory pla-
stic grilles or the panels of the doors.

If you have chosen another location for your woofer/midrange drivers (other than factory cut-
out), you may also want to install the speaker protection grilles: Mount the mid/woofer directly
onto the plastic-injection trim ring using the provided screws and metal clips. Fix the metal-gril-
le to the plastic trim ring, and for a stronger fit of the grille, you can apply some of the black „che-
wing gum“ pieces contained in the mounting accessory bag.

ECP25/26XT3 Manual  16.01.2003  20:22 Uhr  Seite 9

Содержание ECP25XT3

Страница 1: ...INSTALLATION OPERATING MANUAL EINBAU BEDIENUNGSANLEITUNG TWO WAY COMPONENT SYSTEMS...

Страница 2: ...11 Testing the Installed System 12 Technical Specifications Technische Daten 13 Warranty Conditions Garantiebestimmungen 14 Warranty Card Garantiekarte 15 Herzlichen Gl ckwunsch Zum Kauf dieses EMPHAS...

Страница 3: ...LUMINIUM TR GER KUPFERBEDAMPFTER FLACHDRAHT NDFEB N40 NEODYMIUM MAGNET HOCHT NER GEH USE ADAPTER AUS ALUMINIUM NIEDRIGVISKOSES FERROFLUID FREQUENZWEICHE ECP XT3 4 STUFIGE HOCHTONPEGELABSENKUNG GLASFIB...

Страница 4: ...die vorhandene Einbautiefe f r den Tiefmittelt ner am vorgesehenen Ein bauort in den Vordert ren ausreicht Dies muss bei ge ffneten Seitenfenstern erfolgen Schliessen Sie die beiden Lautsprecherkabel...

Страница 5: ...aumontage des Tweeters Der Hocht ner f r Aufbaumontage besteht aus zwei Teilen dem flachen Montage Ring aus Aluminium und der eigentlichen Hocht ner Systemeinheit Beide Einheiten werden durch einen Ba...

Страница 6: ...ge z B bei verpoltem Anschluss von einem Tiefmittelt ner Es d rfen versuchsweise beide Hocht ner an der Frequenzweiche umgepolt angeschlossen werden Ein kurzer Klangvergleich der beiden Anschluss Opti...

Страница 7: ...oft an einer Verpolung von einem oder gar mehreren Lautsprechern berpr fen Sie alle Anschl sse an der Frequenzweiche und ev an der Endstufe erneut L sst sich das Pro blem nicht finden und beheben such...

Страница 8: ...DUSTCAP 2 LAYER COPPER CLAD ALUMINUM WIRE VOICE COIL 31 OR 36MM RED KAPTON VOICE COIL FORMER VENTED CAVITY BELOW SPIDER VENTED EXTENDED CENTER POLE SCREW TERMINAL BINDING POSTS INSULATED TINSEL LEAD W...

Страница 9: ...f the panels is important becau se the doorpanel may strongly vibrate and distort the sound of your speaker system when not fixed properly Before you proceed to mount the EMPHASER mid woofers check th...

Страница 10: ...side biasing effect where a proper staging of the sound on the dashbo ard can not be achieved and the music seems to stick to the speakers Flat Surface Mounting Two parts are needed for flat surface m...

Страница 11: ...ected by moving the jumper to either 0 dB 1dB 2dB 3dB position The jumper allows you to modify the tonal balance in the treble region The correct attenuation must be played by ear as you simply tune t...

Страница 12: ...eral or the soundstage appear to be messy you should double check all wires and connections on the crossover once more Keep in mind Tweeters are easily burned if they are accidentally connec ted to th...

Страница 13: ...al Impedance 4 Ohms 4 Ohms Sensitivity 88 dB 92 dB Frequency Response 3dB 65 Hz 25 kHz 55 Hz 25 kHz MOUNTING DIMENSIONS Mid Woofer Basket EURO DIN 5 13 cm 6 16 5 cm Mounting Depth 75 mm 79 mm Mounting...

Страница 14: ...e f r Ihren Verst rker Garantie Leistungen beanspruchen wenden Sie sich bitte direkt an den H ndler bei dem Sie das Ger t gekauft haben Bitte senden Sie keine Ger te an EMPHA SER Inc U S A Bei Schwier...

Страница 15: ...e Your name Your address City State ZIP or Postal Code Country Your phone number Limited Warranty 24 Months Valid with authorized Installation Approval only Dealer s address stamp Installed by authori...

Страница 16: ...Emphaser Inc Wyoming Michigan U S A...

Отзывы: