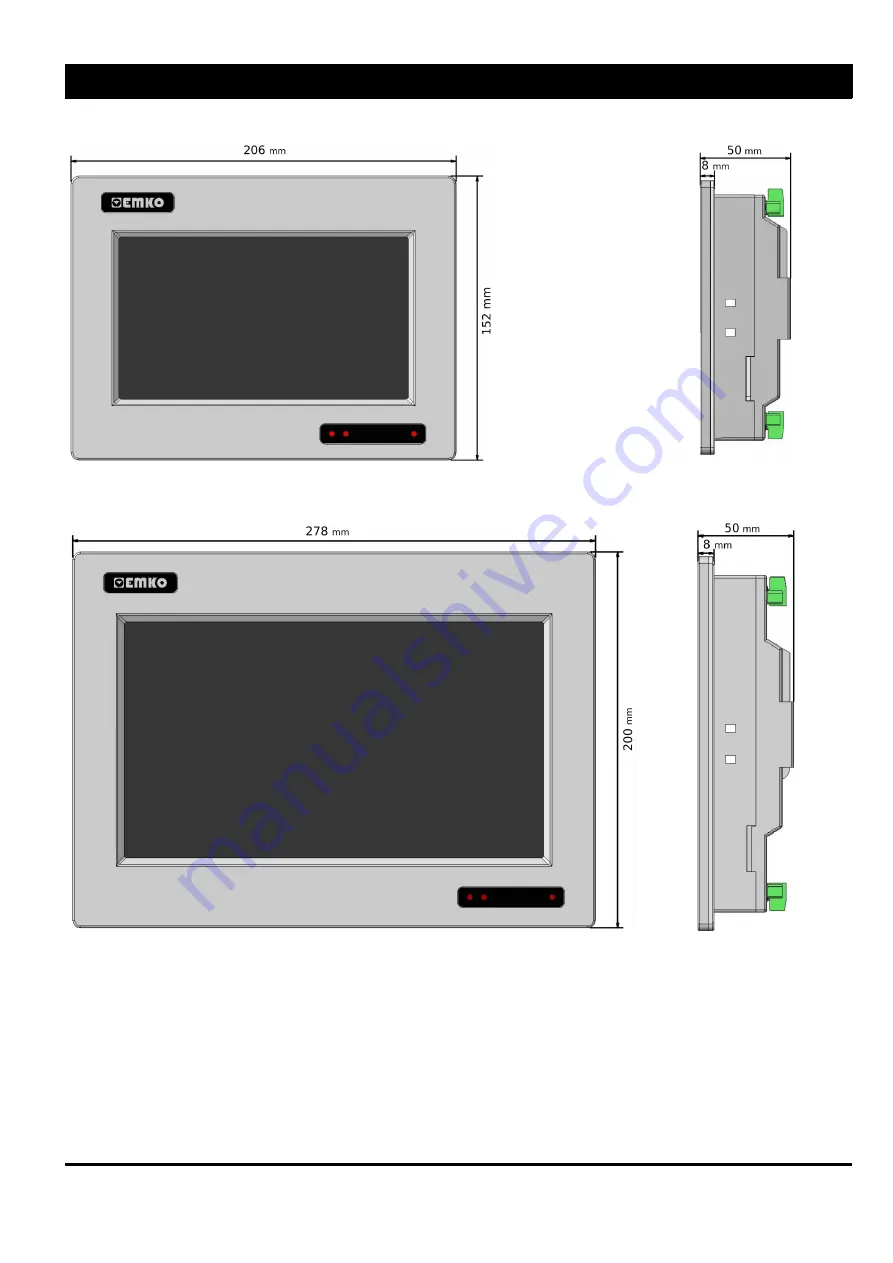
Dimensions
PROOP 7’’ Series
PROOP 10’’ Series
3
Quick Start Manual EN PROOP 03 V03 05/18
Страница 1: ...PROOP Quick Start Guide...
Страница 2: ...isplay Colors 260K colors Resolution 800 x 480 LCD Backlight LED Backlight Touch Method Resistive Analog Luminance cd m2 300 Backlight life hours min 50000 hours at 25 C MCU ARM Cortex A7 528Mhz Flash...
Страница 3: ...Terminal Seri Com 3 RS 232 Terminal Seri Com 4 RS 232 DB 9 Socket Ethernet N A 10 100 Mbps N A 10 100 Mbps 10 100 Mbps Digital Inputs N A 5x Digitals Digital Outputs N A 4x Digitals Analog Inputs N A...
Страница 4: ...Dimensions PROOP 7 Series PROOP 10 Series 3 Quick Start Manual EN PROOP 03 V03 05 18...
Страница 5: ...utout is of the right size 2 Check front panel gasket position 3 Insert the device through the cut out 4 Insert the mounting clamps to the holes of device 5 Screw up the fixing screws until the unit c...
Страница 6: ...e doing the montage If possible use shielded cable and shield must be connected to ground only one side Keep the power off until all of the wiring is completed so that electric shock and trouble with...
Страница 7: ...he installation by following the dialog boxes on the screen and choose where to install Step 4 After selecting the default folder click Next button If necessary you can retrieve individual steps with...
Страница 8: ...B Tx GND Tx Rx Tx GND COM1 COM2 For PROOP 10 COM3 For PROOP 10 Terminal Terminal Rx Rx Rx Tx Tx GND Tx GND A B GND Digital Inputs Outputs For PROOP 7 Terminal Comment Connection Sheme DO Digital Outp...
Страница 9: ...nputs DI4 DI3 DI2 DI1 NPN PNP Selection of Digital Inputs Analog Digital Outputs For PROOP 10 Terminal A klama Ba lant emas AO Analog Output Supply AO Analog Output Supply AO2 Analog Outputs AO1 DO Di...
Страница 10: ...ts Do not clean the case with hydrocarbon based solvents Petrol Trichlorethylene etc Use of these solvents can reduce the mechanical reliability of the device Other Informations Manufacturer Informati...