


This document may be photocopied for personal use.
Visit our website at http://www.emerson.com for the latest technical documentation and updates.
Join Emerson Technical Support on Facebook. http://on.fb.me/WUQRnt
For Technical Support call 770-425-2724 or email [email protected]
The contents of this publication are presented for informational purposes only and they are not to be construed as warranties or guarantees, express or implied, regarding the products or services described
herein or their use or applicability. Emerson Retail Solutions, Inc. and/or its affiliates (collectively “Emerson”), reserves the right to modify the designs or specifications of such products at any time without
notice. Emerson does not assume
responsibility for the selection, use or maintenance of any product. Responsibility for proper selection, use and maintenance of any product remains solely with the purchaser and end-user.
026-4045 Emerson is a trademark of Emerson Electric Co. ©2018 Emerson Retail Solutions, Inc. All rights reserved.
Document Part # 026-4045 Rev 0
Page 3 of 3
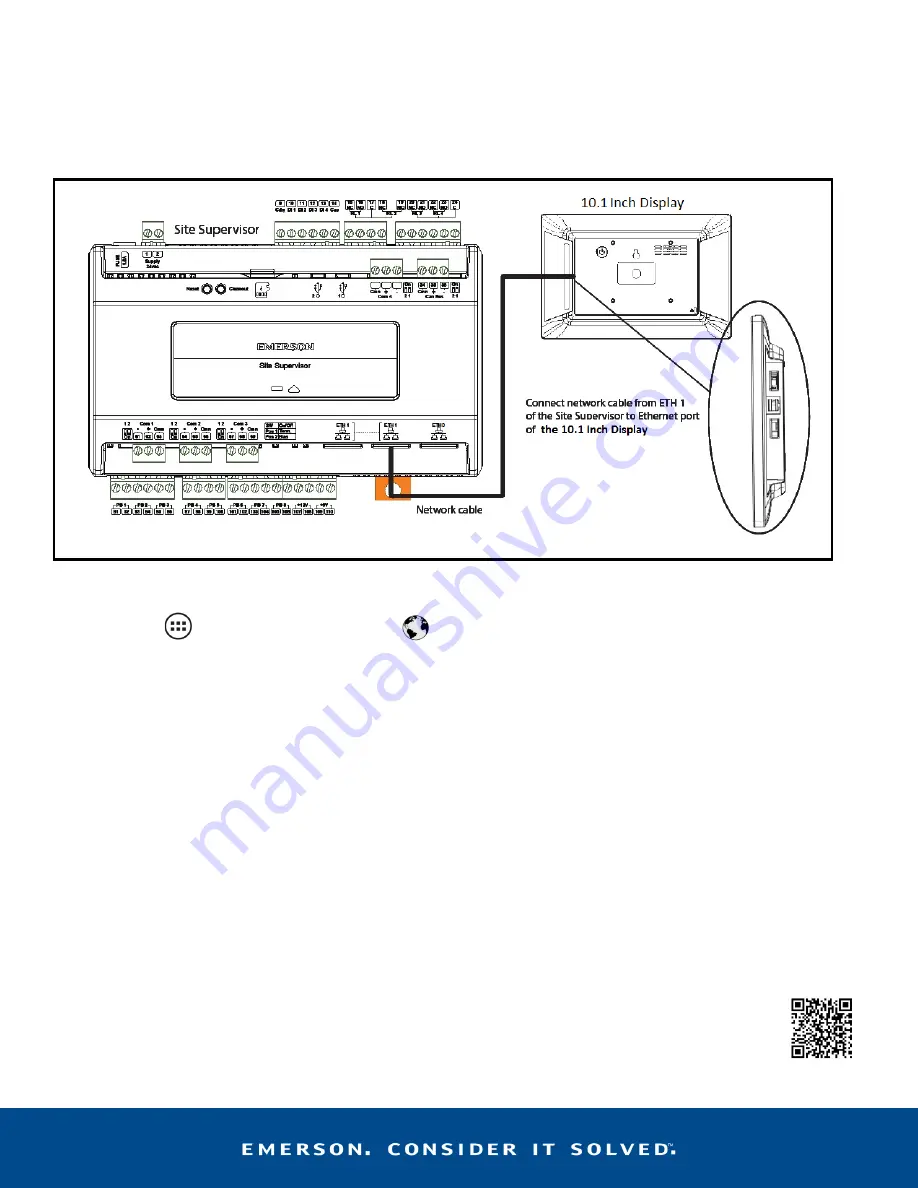
Direct Connect to Site Supervisor
1. Connect the power supply to the Display.
2. Connect one end of the network cable to ETH1 of the Site Supervisor and the other to the Ethernet port of the
10.1 Inch Display.
3. Once you have connected the network cable to the Site Supervisor and 10.1 Inch Display, press the
menu icon
and then press the browser icon
. You will now have access to the Site Supervisor through the Display.
Note: If the Site Supervisor has already been set up, you can skip steps 4-6 and log into your Site Supervisor. If this is the initial
setup of the Site Supervisor, continue following the steps to set up the Site Supervisor.
4. Once you have accessed the Site Supervisor via the 10.1 Inch Display, you will be prompted to log in.
The username will be “user” and the password will be “pass.”
Note: Look at the lower right of the screen to see the version of the Site Supervisor. If the version is 2.06 or above, you will be
prompted to change the password.
5. Once you have changed the password, you will be on the Localization menu in the Setup Wizard.
Press the
Next
arrow key at the top right of the screen.
6. This will take you to the General Setup Parameter where you will need to enter a Site Name. Once the Site Name
has been entered, you will be able to log into the Site Supervisor.
Direct Connect Display to Site Supervisor


