background image

1

TO PREVENT FIRE OR SHOCK HAZARD,  DO NOT USE  THIS  PLUG  WITH  AN
EXTENSION  CORD,  RECEPTACLE  OR  OTHER  OUTLET  UNLESS  THE  BLADES
CAN BE FULLY INSERTED TO PREVENT BLADE EXPOSURE. TO PREVENT FIRE
OR SHOCK HAZARD, DO NOT EXPOSE THIS APPLIANCE TO RAIN OR MOISTURE.

IMPORTANT SAFETY INSTRUCTIONS

  1.) Read these instructions. Keep these instructions. Follow all instructions. Heed all warning.

  2.) Do not use this apparatus near water.

  3.) Clean only with dry cloth.

  4.) Do not block  any ventilation  openings.  Install  in  accordance  with  the  manufacturer's

instructions.

  5.) Do  not  install  near  any  heat  sources  such  as  radiators,  heat  registers,  stoves,  or  other

apparatus  (including  amplifiers)  that  produce  heat.

    6.) Do  not defeat the safety purpose of the polarized or grounding-type plug. A polarized plug has

two blades with one wider than the other. A grounding type plug has two blades and a third
grounding prong. The wide blade or the third prong is provided for your safety. If the provided
plug does not fit into your outlet, consult an electrician for replacement of the obsolete outlet.

7.) Protect the power cord from being walked on or pinched particularly at plugs, convenience

receptacles, and the point where they exit from the apparatus.

8.) Only use attachments / accessories specified by the manufacturer.
9.) Unplug this apparatus during lightning storms or when unused for long periods of time.

10.) Refer all servicing to qualified service personnel. Servicing is required when the apparatus

has been damaged in any way, such as power-supply cord or plug is damaged, liquid has
been spilled 

or objects 

have 

fallen 

into 

the 

apparatus, 

the 

apparatus 

has 

been 

exposed 

to 

rain

or 

moisture, 

does 

not 

operate 

normally, 

or 

has 

been 

dropped.

11.) This 

appliance 

shall 

not 

be 

exposed 

to 

dripping 

or 

splashing 

water 

and 

no 

object 

filled 

with

liquids 

such 

as 

vases 

shall 

be 

placed 

on 

the 

apparatus.

13.) Do not overload wall outlet. Use only power source as indicated.

14.) Use replacement parts as specified by the manufacturer.

15.) The product may be mounted to a wall only if recommended by the manufacturer.

16.) Upon completion of any service or repairs to this product, ask the service technician to

perform safety checks.

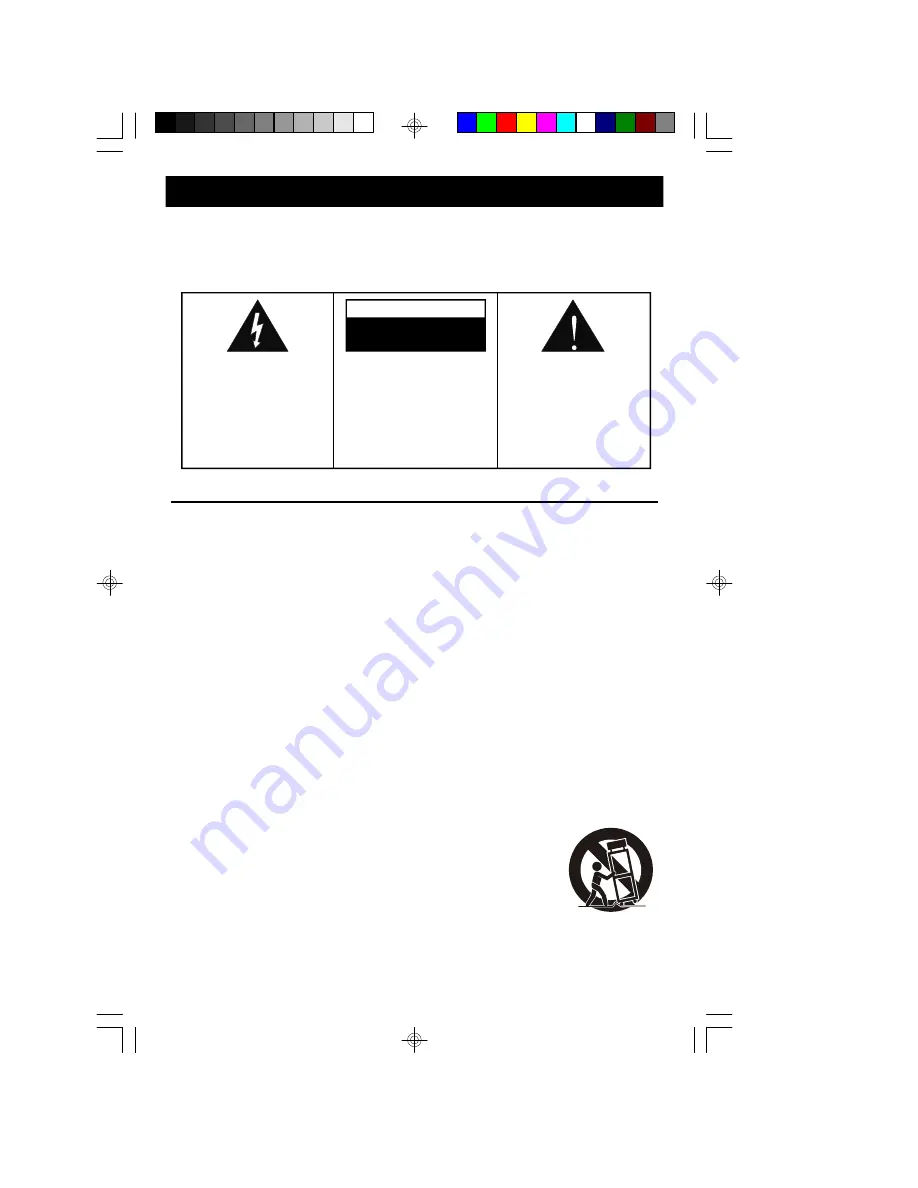
C AU T I O N

RISK  OF  ELECTRIC  SHOCK

DO  NOT   OPEN

The exclamation point within
an  equilateral  triangle  is  in-
tended  to  alert  the  user  to
the  presence  of  important
operating  and  maintenance
(s er vi ci ng)  ins tr uc ti ons  in
the  liter ature  accompany-
ing  the  appl ianc e.

WARNING: TO REDUCE THE
RISK OF ELECTRIC SHOCK
DO  NOT  REMOVE  COVER
( O R   B A C K ) ,   N O   U S E R
SERVICEABLE   PARTS   INSIDE
R E F E R   S E R V I C I N G   T O
Q U A L I F I E D   S E R V I C E
PERSONNEL.

C A U T I O N

MS9903TT_ib080503.p65

5/8/2003, 11:44

1

The  lightning flash with arrow-
head  symbol,  within  an  equi-
lateral  triangle  is  intended  to
alert  the  user  to  the presence
of  uninsulated dangerous voltage
within the product s enclosure
that    may    be    of    sufficient
magnitude  to  constitute  a  risk
of  electric  shock  to  persons.

12.) Use only with the cart, stand, tripod, bracket, or table specified by the

manufacturer, or sold with the apparatus. When a cart is used, use
caution when moving the cart/apparatus combination to avoid injury
from tip-over.

Содержание MS9904TTC

Страница 1: ...ER S MANUAL MS9904TTC Home Audio System with 3 CD Changer Belt Drive Turntable Dual Cassette deck and Remote Control Visit our web site at www emersonelectronics ca MS9903TT_ib080503 p65 5 8 2003 11 44 30 ...

Страница 2: ...aged in any way such as power supply cord or plug is damaged liquid has been spilled or objects have fallen into the apparatus the apparatus has been exposed to rain or moisture does not operate normally or has been dropped 11 This appliance shall not be exposed to dripping or splashing water and no object filled with liquids such as vases shall be placed on the apparatus 13 Do not overload wall o...

Страница 3: ...y If you experience any problems with the set up or operation of this system please do not return it to the retail store Please call the Emerson Customer Service Hotline toll free at 1 800 663 5954 and one of our service technicians will attempt to diagnose and correct the problem for you Once again thanks for purchasing this Emerson audio product The serial number of your system is located on a l...

Страница 4: ... for a Class B digital device pursuant to Part 15 of the FCC Rules These limits are designed to provide reasonable protection against harmful interference in a residential installation This equipment generates uses and can radiate radio frequency energy and if not installed and used in accordance with the instructions may cause harmful interference to radio communications However there is no guara...

Страница 5: ... radiate radio frequency energy and if not installed and used in accordance with the instructions may cause harmful interference to radio communications However there is no guarantee that interference will not occur in a particular installation If this equipment does cause harmful interference to radio or television which can be determined by turning the equipment off the user is encouraged to try...

Страница 6: ...1 44 4 NOTE This product is designed to operate on normal 120V 60Hz AC only Connecting this system to any other power supply could result in damage to the unit which is not covered by your warranty You will note that this system is equipped with a polarized AC power plug having one blade wider than the other This is a safety feature If this plug does not fit into your existing AC outlet do not try...

Страница 7: ...ypes of oil based furniture polishes wood preservatives or cleaning sprays may cause the rubber feet to soften and leave marks or a rubber residue on the furniture To prevent any damage to your furniture we strongly recommend that you purchase small self adhesive felt pads available at hardware stores and home improvement centers everywhere and apply these pads to the bottom of the rubber feet bef...

Страница 8: ...7 FRONT VIEW LOCATION OF CONTROLS AND INDICATORS MS9903TT_ib080503 p65 5 8 2003 11 44 6 1 2 3 4 5 6 7 8 9 10 11 12 13 14 15 16 17 18 19 20 21 22 23 24 ...

Страница 9: ...0 STOP Button 11 PROGRAM Button 12 SKIP SEARCH Reverse Button 13 SKIP SEARCH Forward Button 14 TUNING Control 15 BALANCE Control 16 VOLUME Control 17 HI SPEED DUBBING FM MONO ON OFF Button 18 Cassette DECK A Door 19 Cassette DECK A Control Keys 20 Cassette DECK B Door 21 Cassette DECK B Control Keys 22 CD Tray Open Close Button 23 Disc 1 2 3 Select Button 24 CD Tray MS9903TT_ib080503 p65 5 8 2003 ...

Страница 10: ...9 1 2 3 1 FM Wire Antenna 2 Speaker L R Jacks 3 AC Power Cord BACK VIEW MS9903TT_ib080503 p65 5 8 2003 11 44 8 ...

Страница 11: ...STANDBY ON PROGRAM SKIP SEARCH PLAY PAUSE STOP 1 2 3 4 5 6 7 8 9 10 11 MS9903TT_ib080503 p65 5 8 2003 11 44 9 Battery Precautions Replacement of batteries must be done by an adult Do not mix old and new batteries Do not mix alkaline standard carbon zinc or rechargeable nickel cadmium batteries The supply terminals are not to be short circuited Non rechargeable batteries are not to be recharged Exh...

Страница 12: ...to the right until the volume from both of the speakers sounds the same at your normal listening position Hi Speed Dubbing ON OFF FM Mono Selector This button is used to select between the FM STEREO and FM MONO operation modes It is also used to select either Normal Speed or High Speed tape pe dubbing To receive FM Stereo broadcasts this switch must be set to the STEREO position However if you are...

Страница 13: ... ON button to shut the power Off Antenna Information AM The AM antenna is inside the cabinet IF AM reception is unsatisfactory try rotating the entire unit until you find the position that provides the best reception FM For best FM reception the FM lead wire antenna located on the back of the set should fully unwound and extended NOTE If you are listening to a weak FM Stereo station you can usuall...

Страница 14: ...ditional disc in the open pocket if desired NOTES Keep the CD disc tray closed when the system is not in use to prevent dirt and dust from entering the CD mechanism Never place more than one CD in the same pocket of the CD tray If two discs are loaded in the same pocket the CD mechanism may jam and or the discs themselves may be damaged MS9903TT_ib080503 p65 5 8 2003 11 44 12 5 Press the Open Clos...

Страница 15: ...control to select the desired disc and then press the PLAY PAUSE button Or press the appropriate disc button DISC 1 DISC 2 DISC 3 on front panel for the disc you wish to start Playback will begin on Track 1 of the selected disc It stops automatically after finished playing all discs 2 Adjust the VOLUME and EQ control as desired 3 To temporarily stop playback press the PLAY PAUSE button again The i...

Страница 16: ...ert two new discs while the third disc continues to play After loading two new discs in the tray press the Open Close button to close the drawer SKIP SEARCH Buttons s To skip forward or back to the beginning of a particular track during playback press the or SKIP SEARCH buttons repeatedly until the desired track number appears on the display Playback will begin on the desired track To search for a...

Страница 17: ...ators program 01 disc 01 appears in the display 2 Press the DISC button on remote control or one of the three DISC buttons to select the disc on front panel which contains the first track you wish to program Example Disc 2 3 Press the or buttons to select the first track you wish to program m Example Track 8 4 Press the PROGRAM button again to store the desired disc and track number into memory lo...

Страница 18: ...hat the information has been stored correctly 8 Press the PLAY PAUSE button to begin programmed playback Playback will start at the first disc and track which you have programmed and will continue until all programmed discs and tracks up to a total of 32 have been played NOTE If you press the or buttons during programmed playback the player will skip forward or back to the next track and disc whic...

Страница 19: ...ack repeat The selected track will begin playing It will repeat continuously until repeat function is cancelled One Disc Repeat 1 Press the REPEAT button until the REPEAT 1 DISC Indicator appears on the display Press the DISC button on remote control to select the disc you wish to play 2 Press the PLAY PAUSE button The selected disc will begin to play starting with Track 1 When the final track on ...

Страница 20: ... Discs Repeat playback press the REPEAT button until the Indicator no longer appears in the Display Programmed Repeat Playback You can use the Program and Repeat features together to continuously repeat a programmed sequence of tracks First program the desired tracks according to Steps 1 through 7 in previous page When Programmed Playback begins press the REPEAT button until the REPEAT ALL DISC In...

Страница 21: ...BLE FROM DAMAGE DURING TRANSPORTATION A SILVER TRANSIT SCREW IS LOCATED AT THE UPPER HAND CORNER OF THE TURNTABLE PLATFORM BEFORE PLAYING PLEASE USE A SCREWDRIVER TO TURN THE TRANSIT SCREW IN CLOCKWISE DIRECTION SCREW GOING DOWN COMPLETE LY TO UNLOCK THE TURNTABLE TO LOCK THE TURNTABLE AGAIN FOR TRANSPORTATION PLEASE TURN THE SCREW IN COUNTER CLOCKWISE DIRECTION 1 2 3 5 6 7 8 4 MS9903TT_ib080503 p...

Страница 22: ...laying Adjust the Volume and Equalizer setting as desired 7 To pause during playback use the Cue Control lever to lift the Tone Arm from the record To resume playback gently move the Cue Control forward to lower the Tone Arm back on to the record 8 At the end of the record the Tone Arm will automatically return to its rest and the turntable stops however the system power is still On 9 If you are f...

Страница 23: ... the VOLUME and EQ controls as desired 7 When the tape ends the Automatic Stop System releases the Play key and shuts off the tape motor Press the Stop Eject key to open the cassette door and remove your tape To stop the tape before it ends press the Stop Eject key at any time Fast Forward and Rewind Controls Press or key to advance or rewind the tape rapidly When you reach the desired portion or ...

Страница 24: ...US PLAYBACK OF TWO CASSETTES 1 Insert prerecorded tapes into both cassette compartments with the tape you want to play first in DECK B 2 Press the Play key of DECK B to begin playback 3 Press Pause key and then Play key of DECK A A 4 When the tape in DECK B ends it stops and the Pause key of DECK A will be released automatically to begin playback on DECK A MS9903TT_ib080503 p65 5 8 2003 11 44 23 ...

Страница 25: ...y blank tape into DECK A with the exposed tape facing down and the full reel on the left side Close DECK A door 2 Select the source you wish to record PHONO TUNER CD or TAPE Tape Dubbing and operate that source as you normally would 3 Press the Record key on DECK A to begin recording NOTE When recording from Cassette B to Cassette A you can press the HI SPEED DUBBING button to ON to select high sp...

Страница 26: ...king If later you do wish to record on side A of the cassette cover the tab opening with a piece of cellophane tape This will allow the Record key to function again CASSETTE CARE Two common causes of trouble experienced when using cassettes are 1 Tape jamming Leading to uneven speed in playback and 2 Tape tangling Where the tape wraps itself around vital parts of the mechanism To reduce the likeli...

Страница 27: ...ect key to openthecassettedoor andpressthe Play key Cleanthetapeheads pinchroller and capstan with a soft cloth or cotton pad dampenedin isopropylalcohol or special tape head cleaner DECK A DECK B MS9903TT_ib080503 p65 5 8 2003 11 45 26 If the cassette feels tight while performing operation shown see Fig 2 the tape may be jamming due to ridges formed in the winding of the tape visible through the ...

Страница 28: ...ffect on reproduction quality Clean the disc periodically with a soft lint free dry cloth Never use detergents or abrasive cleaners to clean the disc If necessary use a CD cleaning kit Never write on or affix labels to the surface of compact discs CARE OF THE CABINETS If the cabinets become dusty wipe them with a soft dry dust cloth Do not use any wax or polish sprays on the cabinets If the front ...

Страница 29: ...ransmission line power line voltage or liquid spillage g Any product received without appropriate model serial number and CSA cUL cULus cETL cETLus markings h Any products used for rental or commercial purposes i Any installation setup and or programming charges Should this EMERSON product fail to operate during the warranty period warranty service may be obtained upon delivery of the EMERSON prod...

Страница 30: ...EMERSON RADIO CORP EMERSON PART NO 16 2910EF 606 01 PRINTED IN CHINA MS9903TT_ib080503 p65 5 8 2003 11 44 29 ...

Отзывы: