background image

13

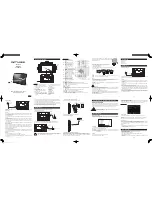
Press and hold the ALARM

SET button to enter the alarm

Time setting mode. The front

panel display will change from

current time to alarm time.

Note: The POWER switch must

be set to the ‘Off’ position to

adjust the Alarm time.


While continuing to hold the 

ALARM SET  button press

the HOUR  button repeatedly

until the display shows the 

desired wake-up hour. Be 

sure to observe the AM/PM

indicator to confirm that you are

setting the alarm time correctly.


Press the ALARM ON/OFF 

button to activate the alarm.

The ALARM indicator on the

front panel will turn ‘On’.

Set the FUNCTION selector

to the desired alarm mode,

Radio or Buzzer.


14

11

12

13

14

While continuing to hold the

ALARM SET button press 

the MINUTE button repeatedly 

to se the desired wake-up 

minute. When the desired

wake-up time appears on the

display release all the buttons.


SETTING THE ALARM

OPERATING INSTRUCTIONS(CONTINUED)

N

E

P

O

N

E

P

O

N

E

P

O

N

E

P

O

N

E

P

O

N

E

P

O

N

E

P

O

N

E

P

O

N

E

P

O

N

E

P

O

N

E

P

O

N

E

P

O

N

E

P

O

N

E

P

O

N

E

P

O

AM

.

ALARM

AM

.

ALARM

AM

.

AM

To stop the alarm sooner, 

press the ALARM ON/OFF 

button once. The alarm stops

immediately but the alarm 

indicator remains ‘On’ and the

alarm will turn on again on the

following day. To deactivate 

the alarm so that it does not

repeat on the following day

press the ALARM ON/OFF

button once more. The alarm 

indicator goes ‘Off’. 

15

At the selected time the unit will turn 

on to the Radio or Buzzer.


The Radio will play for one hour and 

then shut off automatically.


The Buzzer alarm will continue for 3 

minutes and then stop.


IMPORTANT!

Even though the buzzer sound 

stops after 3 minutes the power 

remains ‘on’ for an additional 57 

minutes until the alarm time is over. 

During this period you cannot turn 

the power ‘off’ by just pressing the 

POWER ON/OFF button. 

To turn the power ‘off’ immediately 

you must first press the 

ALARM ON/OFF button to shut off 

the alarm, then press the 

POWER ON/OFF to shut the power 

‘off’ completely.

Содержание fYi iP100

Страница 1: ...ink Color Visit our web site at www emersonradio com The Perfect Portable Speaker System with Stereo Radio and Digital Alarm Clock and iPod Docking Station Made for all iPod models including iPod nano iPod shuffle and iPod mini R iP100_050307 p65 3 5 2007 10 04 10 ...

Страница 2: ...pply cord or plug is damaged liquid has been spilled or objects have fallen into the apparatus the apparatus has been exposed to rain or moisture does not operate normally or has been dropped 11 This appliance shall not be exposed to dripping or splashing water and no object filled with liquids such as vases shall be placed on the apparatus 12 Use only with the cart stand tripod bracket or table s...

Страница 3: ... and a digital alarm clock that can wake you to the radio or an electronic buzzer Finally we have also included an auxiliary input jack so that you can also connect non dockable iPod such as the first generation models or the iPod Shuffle or even other brands of MP3 players and portable CD players to this system The required connection cable is included of course We have taken great care to ensure...

Страница 4: ...tructions may cause harmful interference to radio communications However there is no guarantee that interference will not occur in a particular installation If this equipment does cause harmful interference to radio or television reception which can be determined by turning the equipment off and on the user is encouraged to try to correct the interference by one or more of the following measures R...

Страница 5: ...C house current with the included AC adapter In addition this unit requires 2 AA batteries for the clock and alarm memory back up We recommend that you use a well known brand of alkaline batteries for longest life and best performance Attempting to operate this system from any other power source may cause damage to the system and such damage is not covered by your warranty PREPARATION FOR USE Batt...

Страница 6: ...becomes weak and distorted during battery operation it is probably time to change the 6 C batteries Try operating the system with the AC adapter If the sound is normal with the AC adapter this confirms that the batteries are weak and should be replaced as soon as possible If exhausted batteries are left in the unit they may eventually leak and cause damage to the unit When changing the 6 C batteri...

Страница 7: ...AC adapter while your hands are wet Protect Your Furniture This model is equipped with non skid rubber feet to prevent the product from moving when you operate the controls These feet are made from non migrating rubber material specially formulated to avoid leaving any marks or stains on your furniture However certain types of oil based furniture polishes wood preservatives or cleaning sprays may ...

Страница 8: ...r Indicator 12 Right Speaker 13 ALARM ON OFF Button 14 ALARM SET Button 15 TIME SET Button 16 MINUTE Button 17 HOUR Button 18 AUX IN Jack 19 PHONES Jack 20Battery Compartment 21 Backup Battery Compartment 22 23 POWER Mode Pod AUX Buzzer RADIO AC Adapter Jack iPod holder 2 inserts LOCATION OF CONTROLS AND INDICATORS 1 3 2 7 6 5 4 13 1415 16 17 1819 8 9 10 11 12 20 21 22 OPEN OPEN OPEN 23 ...

Страница 9: ... CLOCK Make sure the POWER switch is set to the Off position The time or alarm time cannot be set or adjusted while the unit is On Press and hold the TIME SET button While holding the TIME SET button press the HR SET button to adjust the hour While holding the TIME SET button press the MINUTE SET button to adjust the minute Release all buttons to complete time setting 2 3 1 2 3 OPEN OPEN OPEN OPEN...

Страница 10: ... clockwise to select higher numbered frequencies or counter clockwise to select lower numbered frequencies The FM STEREO indicator will light when you tune to an FM Stereo station 1 Rotate the VOLUME control to increase or decrease the volume level If you want to increase the bass response set the DBBS button to the On positon Note If you are listening to music that contains heavy bass at high vol...

Страница 11: ...system Refer to the chart below to select the proper adapter insert for your particular model of dockable iPod Note If you have a earlier non dockable iPod or an iPod Shuffle please refer to the next section to connect you device to the Auxiliary Input jack iPod inserts Your unit comes with 2 removable inserts to ensure your iPod fits properly in the dock on the front of the system 1 Place the pro...

Страница 12: ...ong or album that you wish to play on your iPod using the click wheel navigation controls as usual Use the VOLUME control on this system to increase or decrease the speaker volume level The volume control on your iPod has no effect on the speaker volume level When you are finished listening press the POWER button to turn this system Off The display lighting will turn off If you are using the AC ad...

Страница 13: ...LUME When you are finished listening set the POWER button to the Off position Remember to shut off the power to your portable audio player as well Important Note Remember to disconnect the stereo connection cable from the Aux Jack before inserting an iPod in the docking station R R R R R R Listening To A Non Docking iPod Or Other Portable Music Player Some early iPod models and the iPod Shuffle do...

Страница 14: ...UCTIONS CONTINUED N E P O N E P O N E P O N E P O N E P O N E P O N E P O N E P O N E P O N E P O N E P O N E P O N E P O N E P O N E P O AM ALARM AM ALARM AM AM To stop the alarm sooner press the ALARM ON OFF button once The alarm stops immediately but the alarm indicator remains On and the alarm will turn on again on the following day To deactivate the alarm so that it does not repeat on the fol...

Страница 15: ...wrong iPod insert Make sure the dock insert is the proper fit for the iPod iPod did not install properly Remove the iPod from the dock and check for obstruction on the connections in the dock and on the iPod Then reseat it in the dock iPod does not respond to the unit iPod is not installed properly Remove the iPod from the dock and check for obstruction on the connectors in the dock and on the iPo...

Страница 16: ...sive cleaners or cleaning pads as these will damage the finish of your unit TO FIND THE LOCATION AND PHONE NUMBER OF YOUR NEAREST SERVICE CENTER PERMITTED TO PERFORM WARRANTY CALL TOLL FREE 1 800 695 0098 SERVICE FOR CUSTOMER SERVICE PLEASE WRITE TO Emerson Radio Corp Consumer Affairs Dept 5101 Statesman Drive Irving TX 75063 FOR ADDITIONAL SET UP OR OPERATING ASSISTANCE PLEASE CALL 1 800 898 9020...

Страница 17: ...California residents to cover shipping and handling costs and enclose a copy of your proof of purchase Send your unit to Emerson Radio Corp 5101 Statesman Drive Irving TX 75063 This warranty does not cover damage from negligence misuse abuse accident failure to follow operating instructions commercial use rental repairs by an unauthorized facility or products purchased used serviced or damaged out...

Страница 18: ...EMERSON Part No 16 3006 705 04 Printed in China R iP100_050307 p65 3 5 2007 10 04 9 ...

Отзывы: