


Working with Photos
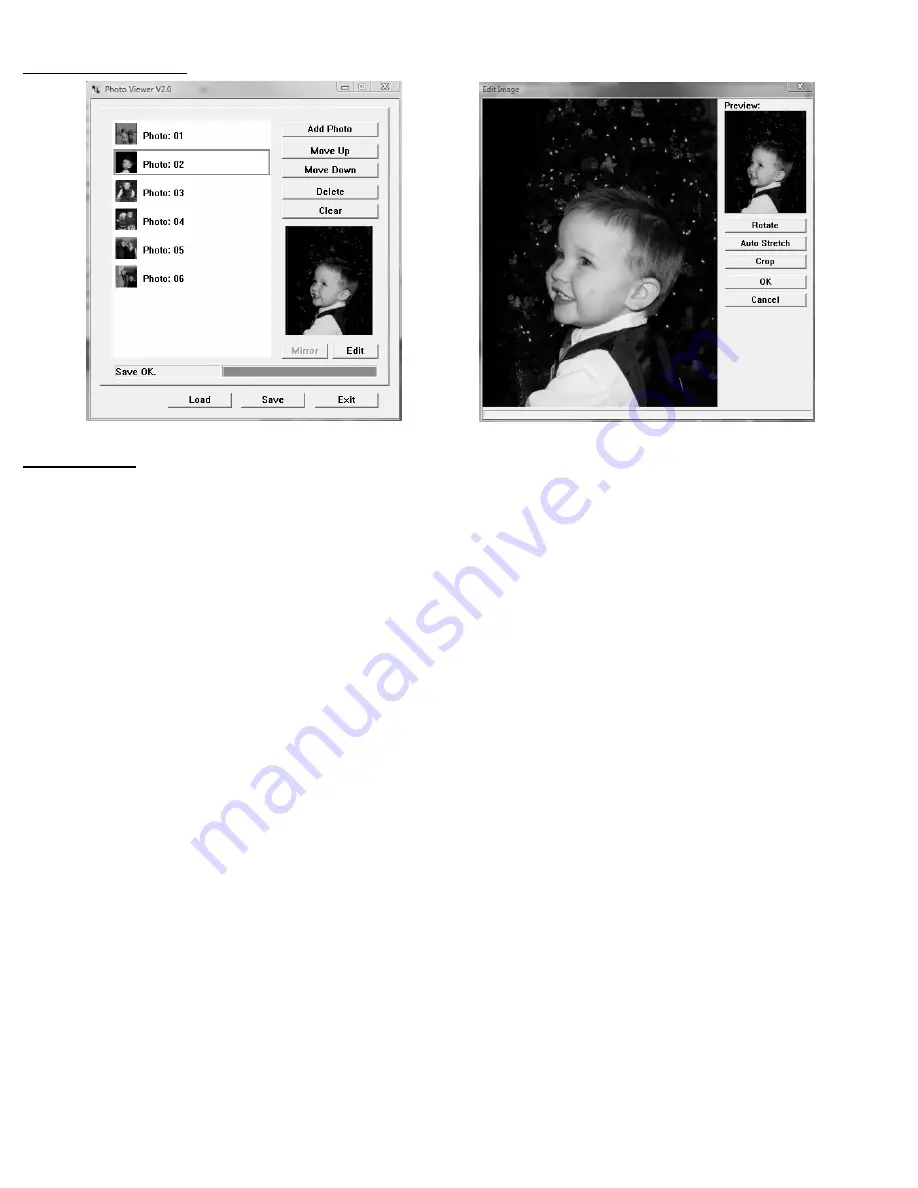
Photo Viewer V2.0 Window
Edit Image Window
Adding Photos
1.
Before starting, please rotate your pictures to the proper orientation based on your frame style.
2.
Plug the USB cable into the back of the Digital Photo Album and into an available USB port on your computer.
3.
Turn the Digital Photo Album on.
4.
Scroll down to the “Update Photo” using the “Down” button then push the “Menu” button.
*Note: After 10 seconds the unit will default to automatically playing slideshow.
5.
After a few seconds Photo Viewer 2.0 software application will appear on your computer.
6.
Use the “Add Photo” button in the upper Right hand side of the dialog box and navigate folders on your
computer and select photos to add. The Photo Viewer Image Editor recognizes images in JPG, GIF, and BMP
formats.
7.
Select the photo(s) in the file list that you wish to add to the Digital Photo Album.
*Note: you can select multiple pictures by holding the “control” (Ctrl) button down while making selections.
8.
Once you have the photo(s) you wish to add selected click on the “open” button.
9.
Now you can position them in the sequence you wish them to appear in the slide show mode by using the
“Move Up” and “Move Down” buttons.
10.
If you wish to delete a particular photo select the photo you wish to delete and click on the “Delete” button.
11.
If you wish to delete all photos in the photo album click on the “Clear” button. When the dialog box asking
“Are you sure?” appears click on “Yes”.
12.
You can rotate photos in 90° increments by selecting the photo on the left so that it appears on the right then
clicking the “Edit” button below the picture on the right. The “Edit Image” window will then appear. In the
“Edit Image” window click on the “Rotate” button as necessary to get the desired orientation.
13.
If you wish to crop a picture, click on the “Edit” button under the photo on the right and click on the “Crop”
button in the “Edit Image” window. Drag the cropping box to the desired size pulling the sides of the box with
your cursor. You can reposition the cropped area by putting your cursor in the middle of the box then clicking
and dragging to the desired position. Once the cropped box is the size and position you desire click on the
“Crop” button on the right side of the “Edit Image” window. You can preview the changes made to the photo in
the “Preview” box in the upper right-hand corner of the “Edit Image” window. To undo any cropping to the
photo click on the “Auto Stretch” button in “Edit Image” window.
14.
Once you have added/deleted/modified all desired photos click on the “Save” button on the bottom of the dialog
box to save all changes.
15.
Once the status bar at the bottom of the dialog box reads “Save OK” you can then exit the program.
16.
In order for updates to take effect the Digital Photo Album must be turned off then turned back on to reset the
memory.


