


24
User's Manual // Programming Instructions
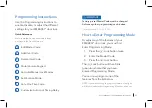
How to Set Auto Lock or
Manual Lock Mode
1. Enter Programming Mode (page 22)
2. Press button
5
A. To enable Auto Lock Mode: Press
1
(Default delay is 30 seconds.)
Timing is adjustable.
B. To enable Manual Lock Mode: Press
2
(Lock will not lock automatically).
3. Press the
Lock button to confirm.
NOTE: Manual Lock Mode is the default setting.
How to Customize the
Timing of Auto Lock
1. Enter Programming Mode (page 22)
2. Press button
8
3. Using the keypad, enter a number
of seconds from 10 to 99.
4. Press the
Lock button to confirm.
EXAMPLE: Pressing 1 and 5 and then the
Lock button
will set your Auto Lock timing delay to 15 seconds.
How to Set a One-Time Code
1. Enter Programming Mode (page 22)
2. Press button
7
3. Enter One-Time Code (4-10 digits)
followed by the
Lock button.
4. Enter One-Time Code again, followed
by the
Lock button to confirm.
NOTE: Only one (1) One-Time Code can be added.
After it is used, it is automatically deleted and a new (or
same) One-Time Code must be programmed.
How to Set Vacation Mode
1. Enter Programming Mode (page 22)
2. Press button
6
3. Press the
Lock button to confirm.
NOTE: Setting Vacation Mode will restrict all User Codes until your
Master Code is entered on the keypad. Using the physical key or
the thumbturn will unlock the door and sound the lock’s alarm.
To Deactivate Vacation Mode, enter the Master Code.