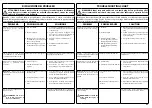
EMAK ALLROAD EXA4 SERIES Скачать руководство пользователя страница 20

36

49

50

51

52

Italiano

English

Français

UTILIZZO

USE

UTILISATION

  NORME DI SICUREZZA

 Attenzione: non usare la macchina quando c'è un rischio 

di fulmini. 

 - Non usate mai il rasaerba su erba bagnata o su altre 

superfici sdrucciolevoli; tenere saldamente l'impugnatura 

(Fig. 49); camminate, non correte mai.

 - Su terreni in pendenza, si taglia trasversalmente, mai in 

salita o in discesa netta; non tagliate su pendenze troppo 

forti (Fig. 50).

 - Tagliate soltanto alla luce del giorno o con una forte 

illuminazione artificiale

 - Assicurarsi che il deflettore posteriore sia sempre 

posizionato correttamente (Fig. 51).

 - Se si urta un oggetto, fermate il motore e rendersi ben 

conto dei danni subiti dal rasaerba; non ripartite mai senza 

avere riparato tali eventuali danni (Fig. 52).

 - Non inclinate il rasaerba all'avviamento: la lama esposta 

potrebbe causare dei danni.

 - Non mettersi mai davanti al rasaerba con il motore avviato: 

qualcuno potrebbe attivare accidentalmente la frizione.

 - Fermate il motore se dovete attraversare un sentiero, un 

camminamento e simile e quando si trasporta il rasaerba 

da un’area di taglio all’altra.

 - Non effettuare regolazioni con il motore avviato.

 - Mantenere sempre una posizione stabile sui pendii 

(Fig. 53). Non tagliare o sostare in prossimità di banchine, 

fossi o argini. La macchina potrebbe ribaltarsi 

improvvisamente, se una ruota supera il bordo di un 

dirupo o fosso oppure se la banchina cede.

 - Usare estrema attenzione quando si cambia direzione sui 

pendii e quando si trasporta il rasaerba da un’area di taglio 

all’altra.

 - Assicurarsi che siano utilizzati solo dispositivi di taglio 

originali (Fig. 54).

 - Usare estrema cautela nell’invertire la direzione o tirare il 

rasaerba verso di sé.

 - Non toccare le lame prima di scollegare la macchina 

dall’alimentazione e prima che le lame siano ferme 

completamente (Fig. 55).

  SAFETY PRECAUTIONS

 Warning:  don’t use the machine when there is a risk of 

lightning. 

 - Do not mow on wet grass or other slippery surfaces; keep 

a firm hold on the handle and walk behind the mower 

(Fig. 49), never run.

 - Do not mow up or down a slope, but always across it; if the 

slope is too steep, do not mow (Fig. 50).

 - Mow only in daylight or under strong artificial lighting.

 - Always check that rear deflector is properly in place 

(Fig. 51).

 - If you strike an object, stop the engine and check for any 

damage; do not restart the engine before carrying out the 

necessary repairs (Fig. 52).

 - Do not tilt the mower when starting: the blade could 

cause injuries.

 - Never stand in front of the mower when the engine is 

running; somebody could activate the clutch accidentally.

 - Stop the engine when crossing paths, drives and when 

transporting the lawnmover to and from the area to be 

mowed.

 - Do not make adjustments while the engine is running.

 - Always maintain a secure footing on slopes (Fig. 53). Do 

not mow or stop near verges, ditches or banks. The 

machine could overturn suddenly if a wheel goes over the 

edge of a drop or ditch, or if an edge gives way.

 - Exercise extreme caution when changing direction on 

slopes and when transporting the lawnmover to and from 

the area to be mowed.

 - Ensure that only replacement cutting means of the right 

type are used (Fig. 54).

 - Exercise extreme caution when reversing or pulling the 

lawnmower towards you.

 - Not to touch the blades before the machine is 

disconnected from the supply and the blades have come 

to a complete stop (Fig. 55).

  NORMES DE SECURITE

 Attention: ne pas outilizer cette tondeuse s’il y a des 

foudres dans les environs. 

 - Ne pas utiliser la tondeuse dans l’herbe humide ou sur 

d’autres surfaces glissantes. Tenir fermement les poignées 

(Fig. 49). Toujours marcher, ne jamais courir.

 - Ne jamais tondre dans le sens de la pente mais toujours en 

travers de la pente. Ne pas tondre les pentes très raides 

(Fig. 50).

 - Tondre uniquement à la lumière du jour ou avec un 

éclairage artificiel convenable.

 - S'assurer que le déflecteur-écran protecteur est bien en 

position (Fig. 51).

 - Arrêter le moteur après avoir heurté un objet et 

débrancher le fil de la bougie avant d'inspecter 

soigneusement la tondeuse pour déceler les dommages 

éventuels. Réparer tout dommage avant de redémarrer la 

tondeuse (Fig. 52).

 - Ne pas incliner la tondeuse au démarrage: la lame exposée 

pourrait causer des dommages.

 - Ne pas se placer devant la tondeuse lorsque le moteur 

tourne, quelqu'un pouvant accidentellement actionner le 

levier d'embrayage.

 - Arrêter le moteur avant de traverser un sentier ou une 

allée ou en transportant la tondeuse d’une zone de taillage 

à l’autre.

 - N'effectuer aucun réglage lorsque le moteur est en marche.

 - Toujours garder une position stable sur les pentes (Fig. 53). 

Ne pas couper ou stationner à proximité de talus, fossés 

ou berges. La machine pourrait se retourner à l'improviste, 

si une roue dépasse le bord d'un ravin ou si un talus cède.

 - Faire très attention lors des changements de direction sur 

les pentes et lors du transport de la tondeuse d’une zone 

de taillage à l’autre.

 - S’assurer que soient utilisé seulement dispositifs de 

taillage originaux (Fig. 54).

 - Changer de direction ou tirer la tondeuse vers soi avec 

précaution.

 - Ne pas toucher les lames avant de débrancher la tondeuse 

et avant qu'elles ne soient à l'arrêt complet (Fig. 55).

Содержание ALLROAD EXA4 SERIES

Страница 1: ...F GB E SK OWNER S MANUAL MANUALE USO E MANUTENZIONE BETRIEBS UND WARTUNGSANLEITUNG MANUEL D UTILISATION ET D ENTRETIEN MANUAL DE USO Y MANTENIMIENTO NÁVOD NA POUŽITIE A ÚDRŽBU Pubbl 66070988B rev 2 Ott 2022 ...

Страница 2: ...ich Der Hersteller behält sich das Recht vor eventuelle Veränderungen vorzunehmen ohne jeweils vorher eine Anpassung der vorliegenden Bedienungsanleitung vorzunehmen E INTRODUCCION TRADUCCIÓN DE LAS INSTRUCCIONES ORIGINALES Para una correcta utilización del cortacesped y para evitar accidentes no empiece a trabajar sin haber leído atentamente este manual Ud encontrará las explicaciones de funciona...

Страница 3: ...ATION OF CONFORMITY____ 58 MAINTENANCE CHART____________ 60 TROUBLE SHOOTING CHART_______ 63 WARRANTY CERTIFICATE__________ 66 EXPLICACION SIMBOLOS Y ADVERTENCIÂS DE SEGURIDAD____ 4 COMPONENTES DE EL CORTACESPED__ 7 NORMAS DE SEGURIDAD__________ 12 INDUMENTOS DE SEGURIDAD______ 15 MONTAJE______________________ 17 PUESTA EN MARCHA_____________ 23 UTILIZACION____________________ 37 PARADA MOTOR_____...

Страница 4: ...3 D 1 Betriebsanleitung vor der Inbetriebsnahme lesen 2 ACHTUNG Das Annähern von Unbefugten an die Maschine während der Arbeit ist untersagt Gefahr projezierter Gegenstände 3 Bevor Sie den Mäher reinigen oder reparieren ziehen Sie den Zündkerzenstecker ab 4 Wenn die Maschine läuft Hände und Füße vom Mähwerkzeug fernhalten ACHTUNG Die Messer bleiben auch nach dem Abschalten des Motors noch einige S...

Страница 5: ...Niveau de puissance acoustique garanti 9 Numéro de série 10 Label CE de conformité 11 Année de construction 12 Type de machine TONDEUSE 13 Relâchez le levier avant rouge pour éteindre le moteur 14 En poussant le levier arrière noir vers le guidon la machine avance D 6 Marke und Maschinenmodell 7 Technische Daten 8 Garantierter akustischer Schalleistungspegel 9 Seriennummer 10 CE Zeichen 11 Baujahr...

Страница 6: ...AS DE SEGURIDAD F EXPLICATION DES SYMBOLES ET REGLES DE SECURITE SK VYSVETLIVKY A BEZPEČNOSTNÉ UPOZORNENIA I 15 Ricaricare entro 6 mesi dall acquisto GB 15 Recharge within 6 months of purchase F 15 Recharger dans les 6 mois après l achat D 15 Innerhalb von 6 Monaten nach dem Kauf aufladen E 15 Recarga dentro de los 6 meses posteriores a la compra SK 15 Doplňte do 6 mesiacov od nákupu ...

Страница 7: ... de hauteur du guidon 10 Volet latéral 11 Commande variateur uniquement pour les modèles qui en sont équipés 12 Bouton de démarrage Clé de sécurité uniquement pour les modèles qui en sont équipés D BAUTEILE DES RASENMÄHERS 1 Motorbedienung 2 Kupplungshebel 3 Griffholm 4 Grasfangbehälter 5 Deflektor 6 DrehgriffzurzentralenSchnitthöheneinstellung 7 Startergriff 8 Motorstopphebel 9 Knopf zur Höhenver...

Страница 8: ...wner or the user is responsible for any accidents or damage to third parties or their property 14 Always stop the engine and disconnect the spark plug lead whenever the machine is left unattended before clearing obstructions from the blade or the outlet when removing the grass bag before commencing any cleaning or repair operation if the machine starts vibrating abnormally inspect immediately or a...

Страница 9: ...y effects in case of accident Consult your trusted supplier to choose an adequate equipment The clothing must be proper and not an obstacle Wear adherent protective clothing Protective jackets Fig 1 and dungarees Fig 2 are ideal Safety boots or shoes having skid proof sole and anti piercing insert Fig 3 4 Wear protective goggles or face screens Fig 5 6 Use protections against noises for example no...

Страница 10: ...s D with nuts E Finally rotate handles D Fig 4 5 to secure handlebar The clamping force exerted can be adjusted by tightening or loosening nuts E The handlebar can be released from the frame in order to fold it for easy transport and storage Fig 7 Mount upper part of handlebar assembling two halves of support F Fig 6 with four screws G and four nuts H Fit screw L washer M and lever N Rotate lever ...

Страница 11: ...plied ties Fig 8B 8C 8D Assembly plate on the plastic top handle Assembling the starter switch only on models that are so equipped Fix the start switch Fig 8F on the handlebar with the two screws A Fig 8E RIGID BOX GV Assemble the box using in hooks and screws Fig 8G Raise the deflector A and position the basket in the upper part of the body Fig 8H Monter l accélérateur comme le montrent les Fig 8...

Страница 12: ...r The handlebar rail must be pushed fully home and locked Fig 12 NB the locking action is accompanied by an audible click Now assemble the mesh part D Fig 13 of the catcher with the rigid top E by securing the relative catches F Fig 14 Begin at the rear and finish with the two sides POSITIONING OF GRASS CATCHER Fig 15 16 Lift rear deflector G Attach the two hooks H onto the deflector support shaft...

Страница 13: ...und the cap Tighten fuel cap securely after refueling Unit vibration can cause an improperly tightened fuel cap to loosen or come off and spill quantities of fuel Wipe spilled fuel from the unit Move 3 metre away from refueling site before starting engine Fig 20 Never attempt to burn off spilled fuel under any circumstances Do not smoke while handling fuel or while operating the machine Store fuel...

Страница 14: ...e or two months Store gasoline in a tightly closed container in a cool dry place NOTE We recommend using Emak ADDITIX 2000 fuel additive code 001000972A Fig 26 FILLING THE TANK Fig 27 Agitate the fuel can before refuelling the lawnmower Fig 28 WARNING Before starting the engine make sure the blade is not in contact with a foreign body WARNING Over exposure to vibrations can result in blood vessel ...

Страница 15: ...aution when pouring fuel into the tank 4 Prior to replacing the fuel cap clean and inspect the gasket 5 Immediately replace fuel cap and hand tighten Wipe up any fuel spillage WARNING Check for fuel leaks if any are found correct before use Contact a Servicing Dealer if necessary Engine is Flooded Engage a suitable tool in the spark plug boot Fig 34 Pry off the spark plug boot Unscrew and dry off ...

Страница 16: ... wires etc from the area to be mowed Fig 34B Carefully read the Safety Rules listed in this Manual Exhaust gases are highly poisonous never start an engine in a closed or poorly ventilated area Before starting the engine make sure the blade is free to turn Do not tilt the mower when starting the blade could cause injuries Never pick up the lawnmower while the engine is running Start the engine car...

Страница 17: ...5 36 2A MODELS WITH ACCELERATOR LEVER FIG 37 38 Put the accelerator lever in the START position Pull the starting cord with a firm snap Once started put the accelerator lever in the position between MIN and MAX Fig 39 40 and let the motor warm up To start work bring the throttle lever to the MAX position Fig 41 taking care not to reach the limit position which would otherwise activate the choke an...

Страница 18: ... red charging light does not come on remove the battery pack and reinstall Make sure the battery is firmly seated in the battery charging bay Red light indicates battery is charging normally A Fig 43 Green light indicates battery is fully charged B FLASHING red light indicates the battery is either too hot or too cold C and will not accept a charge Leave the battery connected and when normal opera...

Страница 19: ...p of engine Make sure battery pack is securely installed Note To wake up a new battery a First Time quick charge of approximately ten 10 seconds is required See the When to charge battery section see pag 28 2 Put the accelerator lever in the MAX Fig 46 position 3 Hold the engine stop lever A Fig 47A against the handle B Then turn the electric start key to the 1 position Fig 47B 4 Once started put ...

Страница 20: ... of the mower when the engine is running somebody could activate the clutch accidentally Stop the engine when crossing paths drives and when transporting the lawnmover to and from the area to be mowed Do not make adjustments while the engine is running Always maintain a secure footing on slopes Fig 53 Do not mow or stop near verges ditches or banks The machine could overturn suddenly if a wheel go...

Страница 21: ...hing to make a real mulching the mulching plug C Fig 57 is needed OPTIONAL as to obtain maximum crumble of the cut grass The mulching plug C Fig 58 59 p n 66110127R cutting width 46 cm p n 66070096R cutting width 51 cm can be mounted by inserting it into the hole below the rear deflector D always keeping the rear deflector closed NOTE this is not possible on models with cutting width of 41 cm NOTE...

Страница 22: ...the mulching plug see MULCHING section on page 38 To fit the side deflector A Fig 67 press the safety catch E Fig 66 lift the side flap B and attach the two clips C Fig 67 68 to the rod D Now release side flap B Fig 69 so that its spring loading system holds deflector A in position WARNING incorrect assembly of the side discharge deflector kit could result in serious injury to the operator or to b...

Страница 23: ...ans that the grass catcher is collecting grass cuttings When the flap is in its lowered position Fig 72 page 41 this means that the grass catcher is full and must be emptied PROHIBITED USES The lawnmower must not be used for cutting other materials particularly materials above ground level that require the lawnmower to be raised above the ground The lawnmower must not be used to shred branches nor...

Страница 24: ... D Fig 77 to the right or to the left to lower or raise the lawnmower Model EXA 4 Grip handle A Fig 78 pressing release lever E to raise or lower the lawnmower There are 5 alternative height settings as shown on slide F Fig 79 ENGINE STOPPING 1 Put the throttle lever on the MIN position Fig 75 76 2 Before stopping the engine put the lever V Fig 73A on the slower position The speed control lever ha...

Страница 25: ...Clean the bottom part of the machine after each use but never do so using jets of water Check the good condition of the mower Keep all nuts screws and bolts tight Put some grease or oil on parts subject to rust Store the mower in a dry place possibly on a cement floor protect against humidity by putting under it some boards or a plate The procedures for returning the machine to service following w...

Страница 26: ...d result in possible malfunctions of the emissions control system to a point where the legal requirements applicable are not respected in such case a prompt action must be taken in order to rectify the system s malfunctions and restore the applicable requirements Examples not exhaustive of incorrect operation use or maintenance are Forcing or breaking the devices for metering the fuel Use of fuel ...

Страница 27: ...isable to inspect the machine by a specialized technician at an authorized service network at the end of season if used intensively and every two years if with normal use WARNING Any maintenance operations not specifically dealt with in this manual must be carried out by an authorised service centre To ensure that your lawnmower continues to function correctly use only ORIGINAL REPLACEMENT PARTS A...

Страница 28: ...sharpened A poorly sharpened blade pulls out the grass and makes the lawn turn yellow If the blades are damaged or crooked they have to be replaced Sharpening the blades is a very delicate operation If their perfect balance is not taken into consideration Fig 82 they can cause abnormal vibrations that cause the blades to become loose with consequent danger for the operator The blades must be assem...

Страница 29: ...and disconnect the spark plug before removing the grass catcher and before clearing the grass outlet Check frequently that the grass catcher is properly fitted and not damaged Check that the mesh is not clogged If clogged carefully wash with water and completely dry the catcher before assembly If you mow with a damaged catcher or with clogged mesh the grass catcher will never fill completely On th...

Страница 30: ... 100 min 1 N velocità N of speed N vitesse Geschwindigketsstufen N velocidades Počet rýchlostí 1 1 VARIABILE VARIABLE VARIABLE SCHWAHKEND VARIABLE VARIABILNÝ Velocità d avanzamento a 2900 g min Running speed at 2900 rpm Vitesse d avancement a 2900 g min Geschwindigkeit bei 2900 u min Velocid de avance con motor a 2900 v min Rýchlosť pojazdu pri 2900 ot min 3 6 km h 3 6 km h min 2 5 km h max 4 5 km...

Страница 31: ... ISO 5395 1 EN ISO 5395 2 EN ISO 3744 95 0 96 0 Incertezza Uncertainty Incertitude Unsicherheit Incertidumbre Tolerancia dB A 1 0 1 0 Livello potenza acustica garantita Guaranteed sound power level Niveau puissance acoustique assuré Garantierter akustischer Schalleistungspegel Nivel potencia acústica garantizado Zaručená hladina akustického výkonu dB A LWA 2000 14 EC EN ISO 5395 1 EN ISO 5395 2 EN...

Страница 32: ...e undersigned Je soussigné Der Unterzeichnende im Namen der El abajo firmante Dolupodpísaný dichiara sotto la propria responsabilità che la macchina declares under its own responsibility that the machine déclare sous sa propre responsabilité que la machine erklärt auf eigene Verantwortung daß die Maschine declara bajo su responsabilidad que la máquina Vyhlasuje na svoju výhradnú zodpovednosť že st...

Страница 33: ...évaluation de la conformité Verfahren zur Konformitätsbeurteilung durchgeführt Procedimientos utilizados para determinar la conformidad Použitý postup posudzovania zhody Livello di potenza acustica misurato Measured sound power level Niveau de puissance acoustique mesuré Schallleistungspegel gemessen Nivel de potencia acústica medido Nameraná hladina akustického výkonu Livello di potenza acustica ...

Страница 34: ...to Ispezionare danni e usura X Sostituire X Candela Controllare distanza elettrodi X Sostituire X Ogni 6 mesi Sacco raccogli erba e deflettore posteriore Co n t ro l l a re s e u s u r a t i o danneggiati X X MAINTENANCE CHART Please note that the following maintenance intervals apply for normal operating conditions only If your daily work requires longer than normal or harsh cutting conditions ar...

Страница 35: ...enza Autorizzato Il motore parte e funziona ma la lama non ruota ATTENZIONE non toccare mai la lama quando il motore è in funzione Spegnere immediatamente il motore e contattare un Centro Assistenza Autorizzato TROUBLESHOOTING CHART WARNING Always stop unit and disconnect spark plug before performing all of the recommended remedies below except remedies that require operation of the unit When you ...

Страница 36: ...lubricants and fuels have been used non original spare parts and accessories have been fitted work has been done on the machine by unauthorised personnel 5 The warranty does not cover consumables or parts subject to normal wear 6 The warranty does not cover work to update or improve the machine 7 The warranty does not cover any preparation or servicing work required during the warranty period 8 Da...

Отзывы: