Chapter 1
17
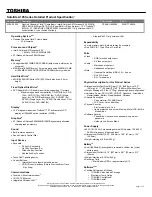
Memory Combinations
NOTE:
Above table lists some system memory configurations. You may combine DIMMs with various
capacities to form other combinations. On above table, the configuration of slot 1 and slot 2 could be
reversed.
LAN Interface
Wireless Module 802.11b/g
Hard Disk Drive Interface
Slot 1
Slot 2
Total Memory
0MB
512MB
512MB
0MB
1024MB
1024MB
0MB
2048MB
2048MB
512MB
512MB
1024MB
512MB
1024MB
1536MB
512MB
2048MB
2560MB
1024MB
0MB
1024MB
1024MB
512MB
1536MB
1024MB
1024MB
2048MB
1024MB
2048MB
3072MB
2048MB
0MB
2048MB
2048MB
512MB
2560MB
2048MB
1024MB
3072MB
2048MB
2048MB
4096MB
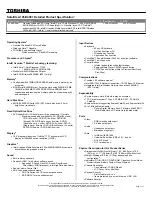
Item
Specification
LAN Chipset
AR8132L
Package
48pin QFN (6 x 6 mm)
LAN connector type
RJ-45
Feature
Support10/100
Interface
PCI Express bus
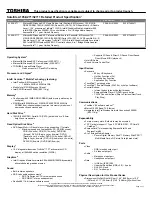
Item
Specification
Manufacturer
• Foxconn FOX_ATH_XB63 Foxconn Atheros XB63 minicard b/g
• Liteon Wireless LAN Reltek RTL8191SE (WN6605LH) (1x1)
Model
Atheros xb63
Reltek RTL8191SE
IEEE Standard
b/g
N/A
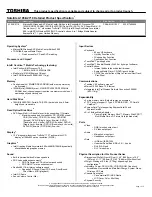
Item
Specification
Vendor & Model
Name
SEAGATE
TOSHIBA
WD
HGST
Capacity (MB)
500, 250
320, 250, 160
500, 320, 250,
160
160, 250, 320,
500
Bytes per sector
512
512
512
512
Data heads
4, 2
4, 2, 2
4, 4, 3, 2
N/A
Drive Format
Disks
2, 1
2, 1, 1
2, 2, 2, 1
Spindle speed
(RPM)
5400
5400
5400
5400
Performance Specifications
Содержание G430 Series
Страница 6: ...VI ...
Страница 10: ...X Table of Contents ...
Страница 13: ...Chapter 1 3 System Block Diagram ...
Страница 68: ...58 Chapter 3 4 Disconnect the following four 4 cables from the Mainboard A B C D ...
Страница 81: ...Chapter 3 71 4 Using both hands lift the Thermal Module clear of the Mainboard ...
Страница 83: ...Chapter 3 73 4 Lift the CPU Fan clear of the Mainboard as shown ...
Страница 89: ...Chapter 3 79 5 Lift the LCD Panel clear of the module ...
Страница 97: ...Chapter 3 87 9 The Antennas and cables appear as shown when correctly installed ...
Страница 102: ...92 Chapter 3 2 Replace the four 4 screws and screw caps provided ...
Страница 107: ...Chapter 3 97 5 Replace the FFC and press down as indicated to secure it to the Upper Cover ...
Страница 112: ...102 Chapter 3 4 Replace the three 3 screw caps as shown 5 Connect the following cables to the Mainboard A B C D ...
Страница 118: ...108 Chapter 3 17 Replace the two 2 screws securing the LCD Module to the Lower Cover ...
Страница 126: ...116 Chapter 3 ...
Страница 154: ...144 Chapter 6 eMachines G630 G430 Exploded Diagrams Main Assembly 1 2 3 4 5 ...
Страница 165: ...Chapter 6 155 ...
Страница 186: ...Appendix A 176 ...
Страница 192: ...182 Appendix B ...
Страница 194: ...184 Appendix C ...
Страница 198: ...188 ...


