Screen Setup
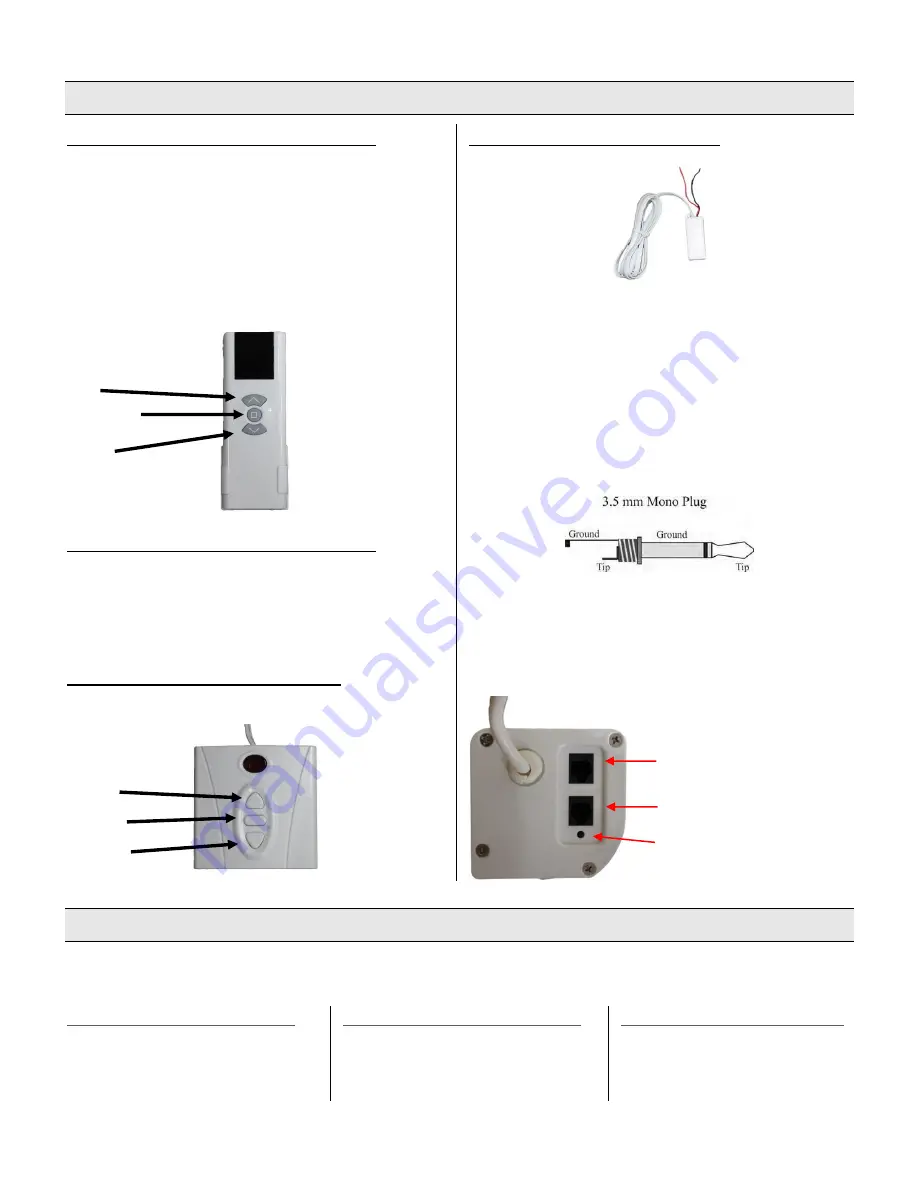
PAIRING THE IR REMOTE CONTROL
The IR remote control has been set up at the factory and
should work right away. If this is not the case, you will need
to use the learn function to program the remote. Connect the
wall control to the screen to assure it’s working properly.
Press the learn button (stop button) on the wall control and
hold for 5 seconds. An LED will flash which indicates pairing
mode has been entered. Point the IR remote directly at the
receiver and press the stop button. When the LED stops
flashing and turns solid, the remote pairing function is
complete.
RESETTING THE REMOTE CONTROL
To reset the remote control, repeat the pairing process. If the
above steps don’t work, press the stop button on the remote
control and hold for 10 seconds. The LED on the remote will
flash which indicates the remote has been reset and can be
re-programmed.
WALL CONTROL INSTALLATION
Insert the wall control cable into the port shown above.
12V TRIGGER INSTALLATION
The 12V trigger is an optional feature which allows the screen
to be automatically be lowered when the projector turns on
and retracted when the projector turns off. Insert the cable of
the wired trigger into the port as shown below. Most
projectors require a 3.5mm mono jack for the 12V trigger
–
this is not always the case and occasionally the wires by itself
are sufficient. If a 3.5mm mono jack is needed, the red and
black wires will need to be connected to it which will need to
be supplied by the user. Please check your device
specifications.
Remove the plastic or metal covering from the mono plug so it
looks like the diagram above. The red wire is 12V and should
be attached to the tip. The black wire is common and should
be connected to ground. Replace the cover so the wires are
inside and plug it into your projector.
Screen Operation
Operating the screen with the wall control and the IR remote have the same controls. The IR remote should be pointed at the IR
receiver which is located at the left side of the housing.
L
OWERING THE
P
ROJECTION
S
URFACE
Press the bottom button on the control
unit and the projection surface will lower
itself. When it is fully extended it will
stop automatically.
R
ETRACTING THE
P
ROJECTION
S
URFACE
Press the top button on the control unit
and the projection surface will retract
into its case. When it is fully retracted it
will stop automatically.
S
TOPPING THE
P
ROJECTION
S
URFACE
Press the middle button on the
control unit to stop manually at an
intermediate position.
Up
Stop/learn
Down
Wired trigger port
Wall control port
Learn key
Up
Stop
Down


