background image

www.prolight.co.uk

Evora CMY300 Zoom Spot


User Manual

14

Operating instructions

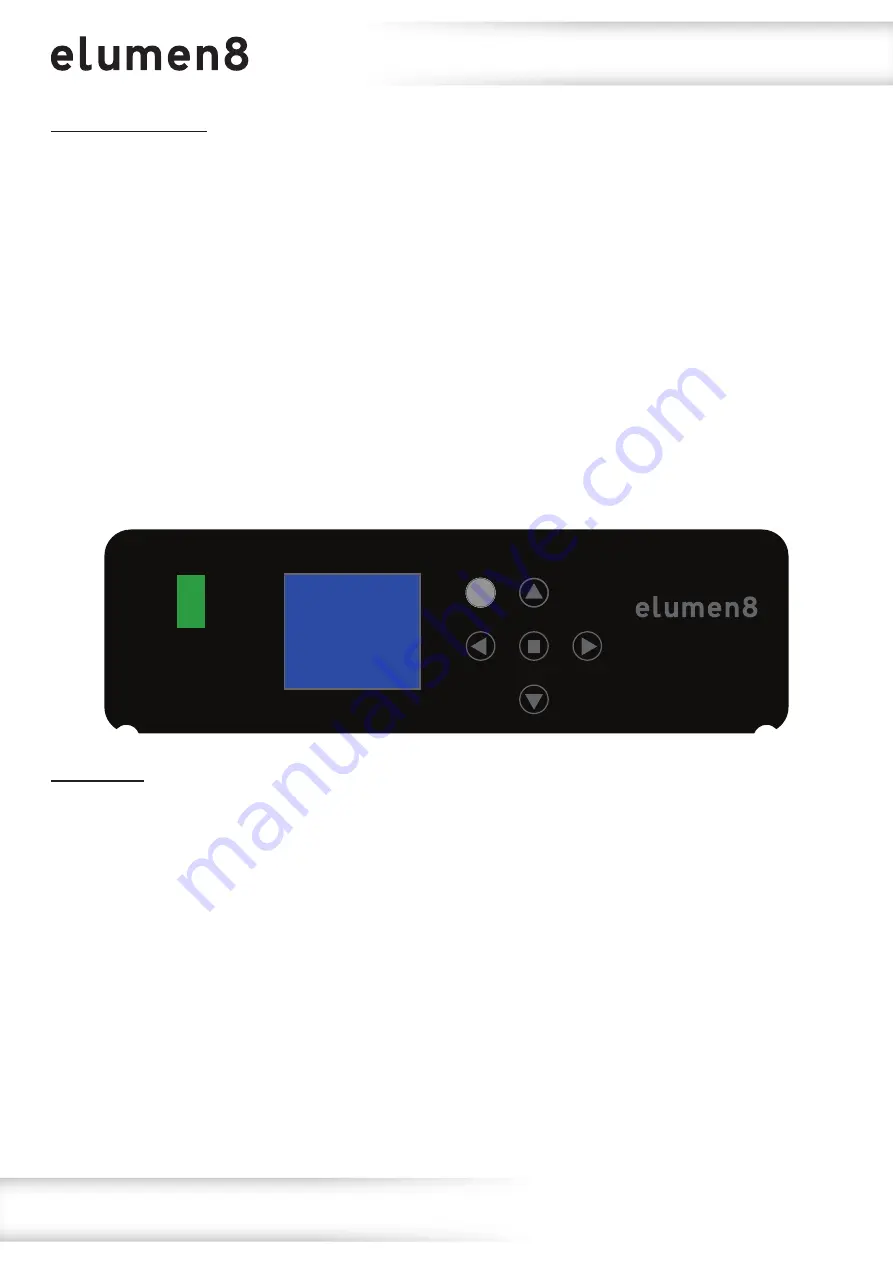
Control Panel Menu:

The LCD control panel situated on the front of the fixture allows the user to access the menu system to  
adjust the fixtures settings. 
When the unit has been powered on the display will show 

“Software Update”

 followed by 

“eLumen8 

Evora CMY300 Zoom Spot” 

and then 

“Ethernet Reset Please Wait...” 

followed by 

“Motor Reset Please 

Wait...”

. The fixture will then return to its home screen.

Pressing the 

“MENU”

 button once will take the user to the fixtures main menu. Using the 

“UP”

 and 

“DOWN”

 buttons you can then navigate between the different options in the main menu. Pressing the 

“ENTER”

 button on one of these options allows you to access the sub menu where you can use the 

“LEFT”

 and 

“RIGHT”

 buttons to select option/value required. Once the option/value has been selected 

press the 

“ENTER”

 button once more to confirm the setting.  

To exit out of any of the above options, press and hold the 

“MENU”

 button. 

The LCD control panel can be used via the internal battery. To access this press and hold the  

“MENU”

 button for 5 seconds until the fixtures home screen is displayed. The LCD display will 

automatically shut off after 20 seconds of inactivity.


Error Codes:

When the unit is powered on the unit will automatically perform a motor reset. If there is a problem with 
any of the motors the display will flash and display 

“Error:”

 along with a list of motor errors on the LCD 

control panel. Please power the unit off and on to reset the motors again.  
(The full list of errors codes can be found on the next page).

MENU

USB

DRIVE

UP

LEFT

ENTER

RIGHT

DOWN

Evora CMY300

Zoom Spot

Содержание ELUM027

Страница 1: ...Order codes ELUM027 Evora CMY300 Zoom Spot User Manual ...

Страница 2: ...t the mains power supply immediately and have a qualified engineer inspect the equipment before operating again If the equipment has been exposed to drastic temperature fluctuation e g after transportation do not connect power or switch it on immediately The arising condensation might damage the equipment Leave the equipment switched off until it has reached room temperature If your product fails ...

Страница 3: ...armful to the eyes Avoid looking directly into the light source CAUTION If the lens gets damaged ie cracks or deep scratches so the output is impaired then it must be replaced CAUTION The maximum ambient temperature Ta of 40 must not be exceeded CAUTION To avoid damage to internal parts ie optics colour filters gobos prisms frost filters iris shutters motors belts wiring or LEDs never expose the f...

Страница 4: ...M Remote Device Management 6 push button menu with 1 8 LCD display Display battery backup for offline configuration Supplied with quick release omega clamps USB port firmware updates Temperature controlled fan Supplied with an additional 8 rotating gobos Evora CMY300 Zoom Spot Specifications Evora CMY300 Zoom Spot Power consumption 437W Fuse T5A 250V Power supply 100 240V 50 60Hz Dimensions 600 x ...

Страница 5: ...www prolight co uk Evora CMY300 Zoom Spot User Manual 5 Technical specifications 422mm 442mm 600mm 507mm 103mm 230mm 278mm 370mm 355mm 220mm 100mm ...

Страница 6: ...2 Function buttons 03 5 Pin DMX input 04 5 Pin DMX output 05 EtherCON input 06 EtherCON output 07 PowerCON TRUE1 input 08 PowerCON TRUE1 output 09 Fuse T5A 250V 10 Wireless DMX Antenna 11 Fans In the box 1 x fixture 2 x omega clamps 1 x gobo pack 1 x power cable 11 03 05 10 09 01 02 08 07 06 04 11 ...

Страница 7: ...odic safety inspections of the fixture and installation material If you do not have the relevant experience and or qualifications please do not attempt the installation yourself The installation should be checked annually by a qualified person The eLumen8 Evora CMY300 Zoom Spot can be operated where the base of the fixture is horizontally orientated this includes standing the fixture upright on a ...

Страница 8: ...ga clamp quick lock fasteners with the respective holes on the bottom of the unit 3 Tighten both locking fasteners clockwise on each omega clamp ensuring they re fully secure 4 Mount the fixture onto your truss system via the clamps and tighten to ensure secure 5 Pull the safety cable through the safety cable holes located on the metal base plate on the underside of the fixture and around the trus...

Страница 9: ...ora CMY300 Zoom Spot User Manual 9 LOCKED UNLOCKED Pan mechanism lock and release every 45 45 4 5 4 5 45 4 5 4 5 4 5 4 5 Pan Tilt Lock Mechanism LOCKED UNLOCKED 45 4 5 4 5 45 4 5 4 5 Tilt mechanism lock and release every 45 ...

Страница 10: ...face ensuring you are indoors in a dust free location Disconnect and isolate from power and let the unit cool for at least 15 minutes Engage the pan and tilt locks shown above 2 Use a Phillips head screwdriver to loosen the four screws on each side of the head casing These are twist lock screws and do not come free of the casing 3 Remove the safety clips securing the casings to the head chassis Ro...

Страница 11: ...screw see yellow box above Disconnect this connector This will help improve access to the gobo wheel module 5 Loosen the thumbscrews on the prism module these do not come free of the prism module Carefully slide the prism module out of its runners Put the prism module to one side for reinstallation after the gobo s have been replaced Rotating Gobo Replacement ...

Страница 12: ...nd 4 pin connector located behind 3 capacitors see yellow box above disconnect this connector 7 Loosen the thumbscrews on the gobo wheel module these do not come free of the gobo wheel module Carefully slide the gobo wheel module out of its runners Place the gobo wheel module to on a flat surface ensuring you are indoors in a dust free location Rotating Gobo Replacement ...

Страница 13: ...the gobo holder towards you away from the gobo wheel pictured right 9 Place the gobo on a flat surface with the gear side down Locate the tab of the spring clip using a precision pick or similar and push the spring clip inwards to release it and remove the spring clip Carefully remove the gobo from the holder avoiding scratching the gobo Install the new gobo and follow the previous steps in revers...

Страница 14: ... the sub menu where you can use the LEFT and RIGHT buttons to select option value required Once the option value has been selected press the ENTER button once more to confirm the setting To exit out of any of the above options press and hold the MENU button The LCD control panel can be used via the internal battery To access this press and hold the MENU button for 5 seconds until the fixtures home...

Страница 15: ... PCB This error may also be displayed if the yoke was blocked during a reset function Tilt Cyan The movement is not located in the default position after the reset This message will appear if the sensor has failed or magnet is missing or if there is a motor failure defective motor or a defective motor IC drive on the main PCB Magenta Yellow Colour RotGobo RotGoboInd Gobo Prism1 Prism1Rot Prism2 Pr...

Страница 16: ...xx 002 000 000 002 IP Address Setting PIN Required Subnet Mask xxx xxx xxx xxx 255 000 000 000 IP Subnet Mask Setting PIN Required DMX Output OFF Output network signal via DMX ON Wireless W DMX OFF Activate deactivate W DMX ON Transmit Receive Transmit Configure W DMX as a transmitter receiver Receive W DMX Protocol G3 G3 Transmission Standard G4S G4S Transmission Standard Tx Rx Link Link Link wit...

Страница 17: ...ine Colour Macros CMY Mode Cyan Cyan Fine Magenta Magenta Fine Yellow Yellow Fine High CRI Rot Gobo Gobo Index Index Fine Fixed Gobo Strobe Dimmer Dimmer Fine Zoom Zoom Fine Focus Focus Fine Iris Frost Prism Prism 1 Rot Prism 2 Rot Programs Program 1 Speed 000 255 Internal Programs Fade 000 255 Program 2 Speed 000 255 Fade 000 255 Program 3 Speed 000 255 Fade 000 255 Program 16 Speed 000 255 Fade ...

Страница 18: ...3 seconds to unlock ON DispFlash OFF Display Flash Setting When No DMX Signal ON Power Saver Hibernation OFF Hibernation Setting 01M 099M DMX Fail Blackout DMX Fail Setting Hold Programs Manual Dim Mode Standard Dimming Curve Speed Stage TV Architectur Theatre Frequency 900Hz LED Refresh Rate Setting 1000Hz 1100Hz 1200Hz 1300Hz 1400Hz 1500Hz 2500Hz 4000Hz 5000Hz 10kHz 15kHz 20kHz 25kHz Pan Tilt Pa...

Страница 19: ...e PIN 050 Pan 000 255 Calibration Settings Tilt Cyan Magenta Yellow High CRI Colour Colour 0 1 Colour 1 2 Colour 2 3 Colour 3 4 Colour 4 5 Colour 5 6 Colour 6 7 Colour 7 8 Colour 8 0 Gobo GoboRot 1 GoboRot 2 GoboRot 3 GoboRot 4 GoboRot 5 GoboRot 6 GoboRot 7 GoboRot 8 FocusGoboR1 FocusGoboR2 FocusGoboR3 FocusGoboR4 FocusGoboR5 FocusGoboR6 FocusGoboR7 FocusGoboR8 Fixed Gobo FocusFixG1 FocusFixG2 Foc...

Страница 20: ...lt Head USB Update OFF USB Update ON Factory OFF Factory Settings ON Information Runtime Total Time Runtime Information CurrentTime Password PIN 050 Reset Temperature Head xxx Temperature Information Base xxx Units C F Fan Speed Head 1 xxxxRPM Fan Speed Information Head 2 xxxxRPM Base 1 xxxxRPM Base 2 xxxxRPM Model eLumen8 Evora CMY300 Zoom Spot Model Information RDM UID 0x09A5 xxxxxxxx RDM UID Fi...

Страница 21: ...ur 6 042 047 Colour 7 048 053 Colour 8 054 192 Colour wheel indexing 193 223 Scroll clockwise fast slow 224 Stop 225 255 Scroll anti clockwise slow fast 5 when split colour is enabled in the menu see page 5 Colour Wheel split colour enabled 000 005 Open 000 006 010 Open Colour 1 011 015 Colour 1 016 020 Colour 1 Colour 2 021 025 Colour 2 026 030 Colour 2 Colour 3 031 035 Colour 3 036 040 Colour 3 ...

Страница 22: ...3 081 105 Macro 4 106 130 Macro 5 131 155 Macro 6 156 180 Macro 7 181 205 Macro 8 206 230 Macro 9 231 255 Macro 10 7 CMY Mix Mode 000 127 Full 000 128 255 Effect Macros 8 Cyan Full 000 255 Cyan 0 100 000 Effect Macros 000 170 Cyan 0 100 000 171 189 Cyan 100 open 190 221 Scroll clockwise fast slow 222 223 Stop 224 255 Scroll anti clockwise fast slow 9 000 255 Cyan Fine 000 10 Magenta Full 000 255 M...

Страница 23: ... 040 Rotating Gobo 5 041 047 Rotating Gobo 6 048 054 Rotating Gobo 7 055 061 Rotating Gobo 8 062 077 Rotating Gobo 1 Shake slow fast 078 093 Rotating Gobo 2 Shake slow fast 094 109 Rotating Gobo 3 Shake slow fast 110 125 Rotating Gobo 4 Shake slow fast 126 141 Rotating Gobo 5 Shake slow fast 142 157 Rotating Gobo 6 Shake slow fast 158 173 Rotating Gobo 7 Shake slow fast 174 189 Rotating Gobo 8 Sha...

Страница 24: ...bo 4 Shake slow fast 132 140 Gobo 5 Shake slow fast 141 149 Gobo 6 Shake slow fast 150 158 Gobo 7 Shake slow fast 159 167 Gobo 8 Shake slow fast 168 176 Gobo 9 Shake slow fast 177 185 Gobo 10 Shake slow fast 186 217 Scroll clockwise fast slow 218 223 Stop 224 255 Scroll anti clockwise fast slow 19 Strobe 000 031 LED off 000 032 063 LED on 064 095 Strobe slow fast 096 127 LED on 128 159 Pulse strob...

Страница 25: ... 1 Indexing Rotation 000 127 Prism 1 Indexing 000 128 189 Clockwise Prism Rotation fast slow 190 193 Prism 1 rotation stop 194 255 Anti clockwise Prism Rotation slow fast 30 Prism 2 Indexing Rotation 000 127 Prism 2 Indexing 000 128 189 Clockwise Prism Rotation fast slow 190 193 Prism 2 rotation stop 194 255 Anti clockwise Prism Rotation slow fast 31 Dimming Modes 0 20 Standard dimming mode 000 21...

Страница 26: ...ld 5s 065 072 Fan auto hold 3s 073 080 Fan low hold 3s 081 088 Fan high hold 3s 089 096 900Hz hold 3s 097 104 1000Hz hold 3s 105 112 1100Hz hold 3s 113 120 1200Hz hold 3s 121 128 1300Hz hold 3s 129 136 1400Hz hold 3s 137 144 1500Hz hold 3s 145 152 2500Hz hold 3s 153 160 4000Hz hold 3s 161 168 5000Hz hold 3s 169 176 10kHz hold 3s 177 184 15kHz hold 3s 185 192 20kHz hold 3s 193 200 25kHz hold 3s 201...

Страница 27: ...olour Wheel 1 50 split 50 split 0 Open 2 100 50 split 0 Open 3 50 split 100 0 Open 4 33 split 33 split 0 Open 5 0 50 split 50 split Open 6 0 50 split 100 Open 7 0 100 50 split Open 8 0 33 split 33 split Open 9 50 split 50 split 50 split Open 10 33 split 33 split 0 Yellow Operating instructions ...

Страница 28: ... Ramp Effect 0 second fade time 1 second fade time Rise time ms Down time ms Rise time ms Down time ms Standard default 0 0 0 0 Stage 780 1100 1540 1660 TV 1180 1520 1860 1940 Architectural 1380 1730 2040 2120 Theatre 1580 1940 2230 2280 0 0 255 255 Operating instructions ...

Страница 29: ...Ø Image size 12 5mmØ Gobo thickness 0 5mm Max thickness if replaced 1mm Rotating gobos included additional pack Gobo size 15 6mmØ Image size 12 5mmØ Gobo thickness 0 5mm Max thickness if replaced 1mm Static gobos Colour wheel FLAME RED BRIGHT BLUE FERN GREEN BRIGHT PINK YELLOW DEEP AMBER FULL CTO ORANGE CONGO BLUE ...

Страница 30: ...wing all makes and models of different manufactures to be linked together and operate from a single controller as long as all fixtures and the controller are DMX compliant To ensure proper DMX data transmission when using several DMX fixtures try to use the shortest cable path possible The order in which fixtures are connected in a DMX line does not influence the DMX addressing For example a fixtu...

Страница 31: ...a cable adaptor must be used The diagram below details the correct cable conversion 5 pin XLR female Pin 1 GND screen Pin 2 Signal Pin 3 Signal Pin 4 N C Pin 5 N C 3 pin XLR female Pin 1 GND screen Pin 2 Signal Pin 3 Signal 3 pin XLR male Pin 1 GND screen Pin 2 Signal Pin 3 Signal 5 pin XLR male Pin 1 GND screen Pin 2 Signal Pin 3 Signal Pin 4 N C Pin 5 N C DMX setup Termination reduces signal tra...

Страница 32: ... be connected via a 13A mains input is 4 fixtures 240V or 2 fixtures 120V including the first fixture After the maximum number of fixtures are connected a new power run will need to be started Please note Caution should be used when power linking other fixtures to the Evora CMY300 Zoom Spot as the power consumption of other fixtures will vary Fixtures fitted with lamps often require 2 3 times more...

Страница 33: ...www prolight co uk Evora CMY300 Zoom Spot User Manual 33 ...

Страница 34: ...www prolight co uk Evora CMY300 Zoom Spot User Manual 34 ...

Страница 35: ...www prolight co uk Evora CMY300 Zoom Spot User Manual 35 ...

Страница 36: ... possible harm to the environment or human health from uncontrolled waste disposal please separate this from other types of wastes and recycle it responsibly to promote the sustainable reuse of material resources Household users should contact either the retailer where they purchased this product or their local government office for details of where and how they can take this item for environmenta...

Отзывы: