background image


Elo LCD Touchmonitor User Guide- 10 


User Controls 

(The following is an excerpt taken from pages 10  – 12 of the NEC user manual)


Chapter 3 – Operation (Continued)


AUTO

BNC/D-SUB:

 Allows you to change between the BNC and D-SUB signal inputs.

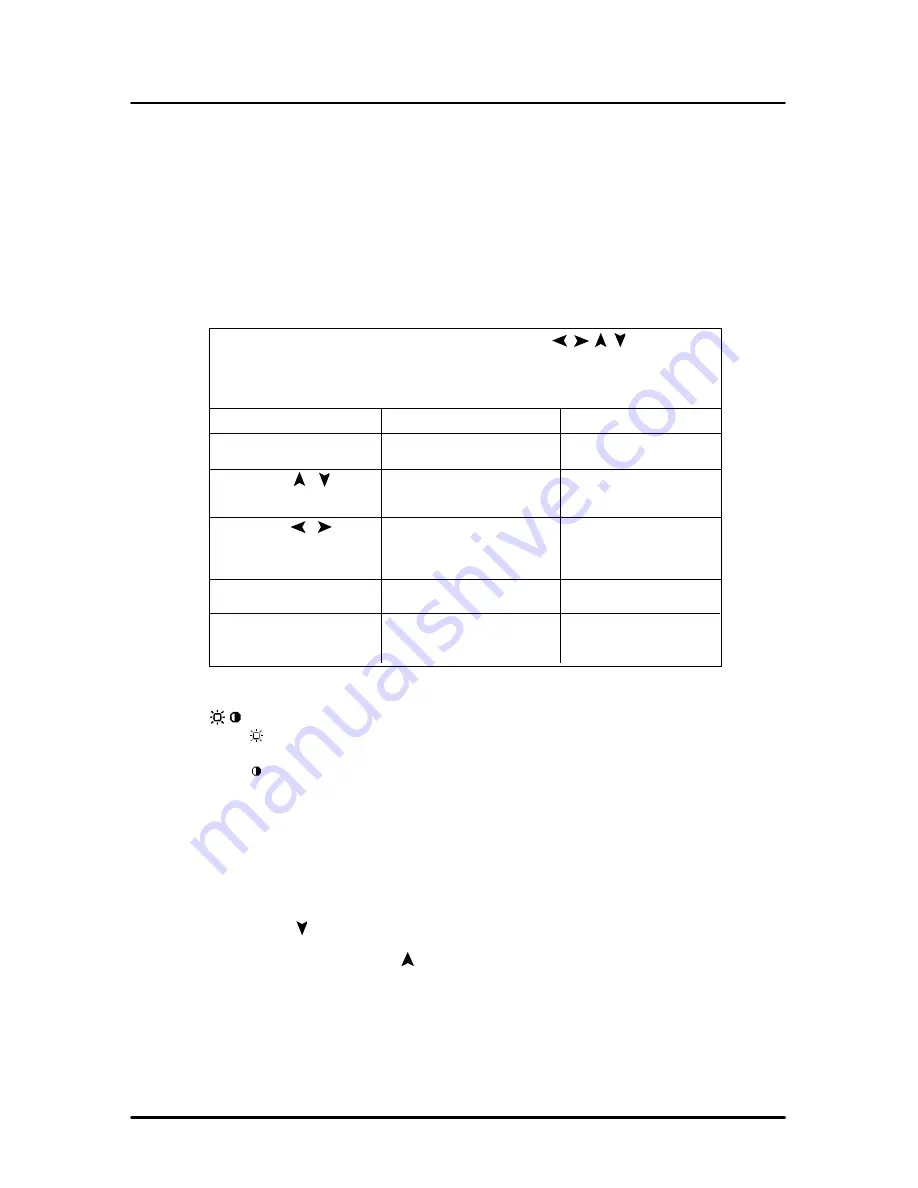
OSM™ (On-Screen Manager) control buttons on the front of the
monitor function as follows:

To access OSM menu, press any of the control buttons (    ,    ,    ,   ) or the
PROCEED or EXIT button.
To rotate OSM between Landscape and Portrait modes, press the RESET button.
NOTE: OSM menu must be closed in order to rotate.

Main Menu

Sub-Menu

EXIT

Exits the OSM controls.

Exits to the OSM main
menu.

CONTROL 


/

Moves the highlighted

Moves the highlighted

area up/down to select

area up/down to select

one of the controls.

one of the controls.

CONTROL    /

Moves the highlighted area

Moves the bar left/

left/right to select control

right to increase or

menus.

decrease the
adjustment.

PROCEED

Has no function

Activates Auto Adjust
and ALL RESET functions.

RESET

Resets the highlighted

Resets the highlighted

control menu to the factory

control to the factory

setting.

setting.

NOTE: When 

RESET

 is pressed in the main and sub-menu, a warning window

will appear allowing you to cancel the 

RESET

 function by pressing the EXIT button.

Brightness/Contrast Controls

BRIGHTNESS

Adjusts the overall image and background screen brightness.

CONTRAST

Adjusts the image brightness in relation to the background.

AUTO ADJUST CONTRAST
Adjusts the image displayed for non-standard video inputs.
OSM LOCK OUT

The OSM LOCK OUT control completely locks out access to all OSM control
functions. When attempting to activate OSM controls while in the LOCK OUT
mode, a screen will appear indicating that OSM controls are locked out.
• To enter the LOCK OUT mode, simultaneously press the PROCEED and

     button. The LOCK OUT window will appear.

• To activate the LOCK OUT function, simultaneously press and hold down

the PROCEED and     button. The OSM window will disappear within
seconds and the LOCK OUT function will be activated.

Содержание Entuitive ET1825L-7SWA-1

Страница 1: ...User Guide For 18 LCD Touchmonitor Version 1 0 P N 80 8025 01 A 1800L Series Models ET1825L 8SWA 1 ET1825L 7SWA 1 ET1866L 8SNA 1 ET1866L 7SNA 1 ET1886L 8SNA 1 ET1886L 7SNA 1 Elo TouchSystems Inc 1 800...

Страница 2: ...ems makes no rep resentations or warranties with respect to the contents hereof and specifically disclaims any implied warranties of merchantability or fitness for a particular purpose Elo TouchSystem...

Страница 3: ...MS DOS and Windows 3 1 Drivers 8 Chapter 3 Operation 9 About Touchmonitor Adjustments 9 Using the On Screen Display Menus 9 Auto Adjustment 10 First OSD Menu 10 Contrast 10 Horizontal Position 11 Ver...

Страница 4: ...See Chapter 5 Care and Handling of your Touchmonitor for more information on touchmonitor safety About the Product Your LCD Touchmonitor is a 18 1 Analog TFT Active matrix LCD color display with the f...

Страница 5: ...cking Your Touchmonitor Carefully unpack your touchmonitor Check that you have everything you need and that none of the components have been damaged during shipping Save the box and packaging in case...

Страница 6: ...splay To ensure the LCD display works well with your computer configure the display mode of your graphic card to make it less than or equal to 1280 x 1024 resolution and make sure the timing of the di...

Страница 7: ...s If Windows detects your touchmonitor follow the instructions on the screen to install a generic plug and play monitor Installing the Serial Touch Driver for Windows 2000 95 98 and NT 4 0 Note For Wi...

Страница 8: ...ults INSTALL creates directories as necessary and warns you if they exist 4 If you are updating your software you may wish to specify the paths containing the earlier versions and overwrite the obsole...

Страница 9: ...er to Appendix A All adjustments you make to the controls are automatically memorized This feature saves you from having to reset your choices every time you unplug or power your touchmonitor off and...

Страница 10: ...unction Activates Auto Adjust and ALL RESET functions RESET Resets the highlighted Resets the highlighted control menu to the factory control to the factory setting setting NOTE When RESET is pressed...

Страница 11: ...in color will appear on screen and the direction increase or decrease will be shown by the bars Tools OSM H POS OSM V POS You can choose where you would like the OSM control window to appear on your s...

Страница 12: ...o alleviate image persistence turn the monitor off for as long as an image was displayed If an image was on the monitor for one hour and a ghost of that image remains the monitor should be turned off...

Страница 13: ...endix C Technical Specifications Keep your touchmonitor dry Do not wash it with a wet cloth or pour fluid into it Check your touchmonitor for condensation If condensation develops do not power your to...

Страница 14: ...ng it dry and wipe the cabinet to remove any detergent residue Safety This manual contains information that is important for the proper setup and maintenance of your touchmonitor Before setting up and...

Страница 15: ...ame terms XGA input video has a format of 1024 pixels horizontally by 768 pixels vertically When the input pixels contained in the video input format match the native resolution of the panel there is...

Страница 16: ...Vertical 56 76 Hz Automatically Environmental Operating Temperature 5 C to 35 C 41 F to 95 F Storage Temperature 10 C to 60 C 14 F to 140 F Humidity 80 max Altitude 0 to 10 000 Touchscreen Connector D...

Страница 17: ...Elo LCD Touchmonitor User Guide 17 Appendix C Mechanical Specifications Elo LCD Touchmonitor User Guide 17 Appendix C Mechanical Specifications ET1825LModels ET1866LModels ET1886LModels...

Страница 18: ...ler to be defective Modification or repair of Products may at Seller s option take place either at Seller s facilities or at Buyer s premises If Seller is unable to modify repair or replace a Product...

Страница 19: ...ce Voice 800 356 8682 Toll Free in United States 510 651 2340 Pacific Time 49 1 8161 670 42 Europe excepting Germany 0180 530 41 70 Germany FAX 510 651 3511 49 1 8161 660 43 Europe Technical Support V...

Отзывы: