Changing Various Settings on the Setting Item Screen (Continued)
140
2
Set the schedule date.
Select “Add” on the Schedule Recording screen, and press [ENTER].
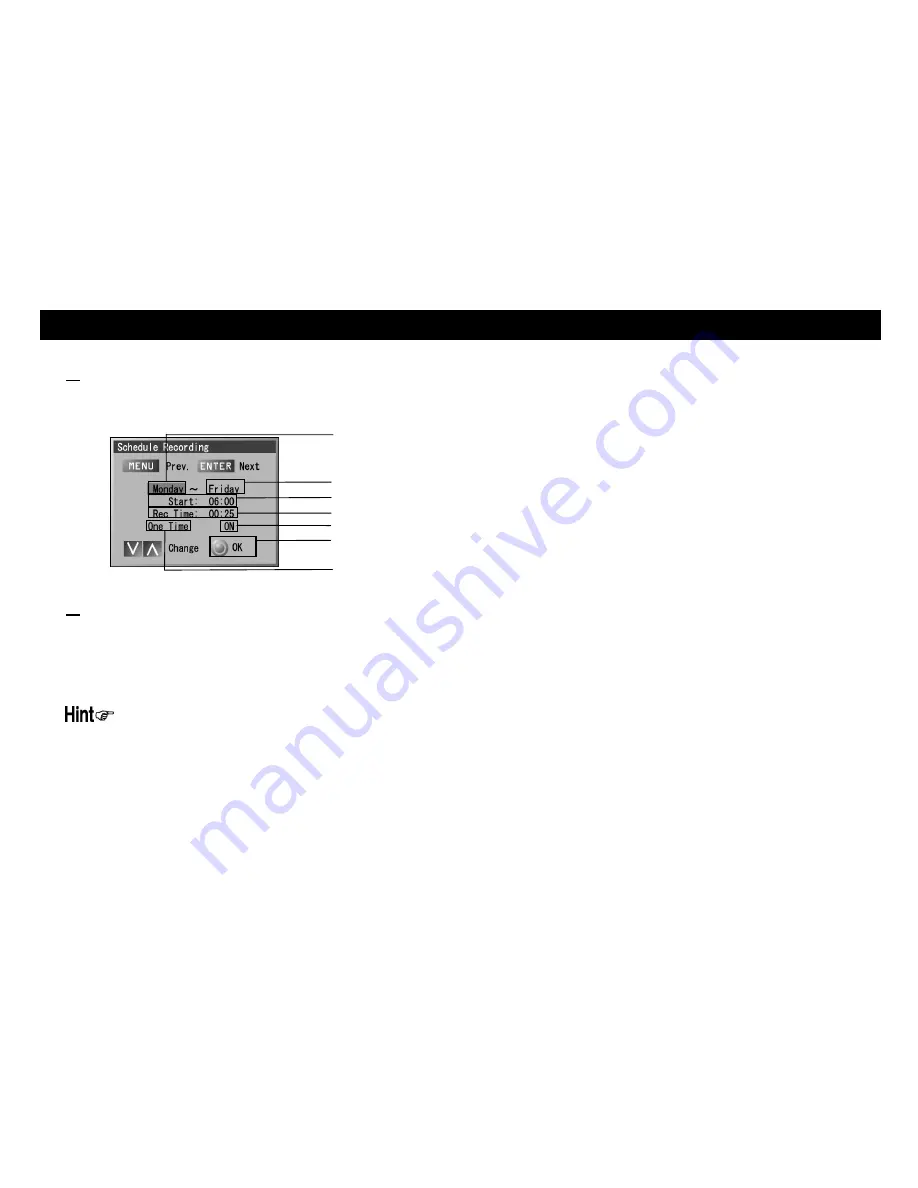
Press [ENTER] to move the cursor on the Schedule Recording OSD, set each item, and press [REC].
3
Set the schedule recording.
Hold down [REC] on the Schedule Recording screen.
Then, the [REC] LED blinks and the setting is completed.
※
If the execution of the programmed recording has been set to “OFF” for a specific item, recording of such item will not start.
[Canceling the settings of the schedule recording]
●
Hold down [ENTER] when the schedule recording has been set, and the setting will be cancelled.
Upon the start of the schedule recording, the LCD monitor of the system is turned ON. However, by setting the Power-saving mode to
“ON” beforehand, the power consumption required for recording can be saved.
Start day of the week: “Sun
Æ
Mon
Æ
Tue
Æ
…
Æ
Sat”
End day of the week: “Sun
Æ
Mon
Æ
Tue
Æ
…
Æ
Sat”
Recording start time
Recording time
Execution of
schedule
recording: “ON/OFF”
Schedule
Recording Setting menu: “OK/Cancel”
Recording frequency: “One time/Repeat (week)”


