Page 4
M1XRF2H Installation Manual
General Installation and Setup
1. Mounting
- Two (2) #6 x 1/2" screws (not provided), one on each side of the housing should be used for mounting. The
receiver connects to the M1's Keypad data bus and may be remotely located up to several thousand feet away from the
control. Mounting inside a metal enclosure or on metalized wallpaper is NOT RECOMMENDED! Try and mount at least
10 feet away from any electrical device that generates noise including the M1 Control as electrical noise may reduce the
receiver sensitivity. For increased signal coverage or redundancy additional M1XRF Receivers (up to 11 max.) may be
connected to the same M1 Controller. See Appendix C.
2. Wiring Connections
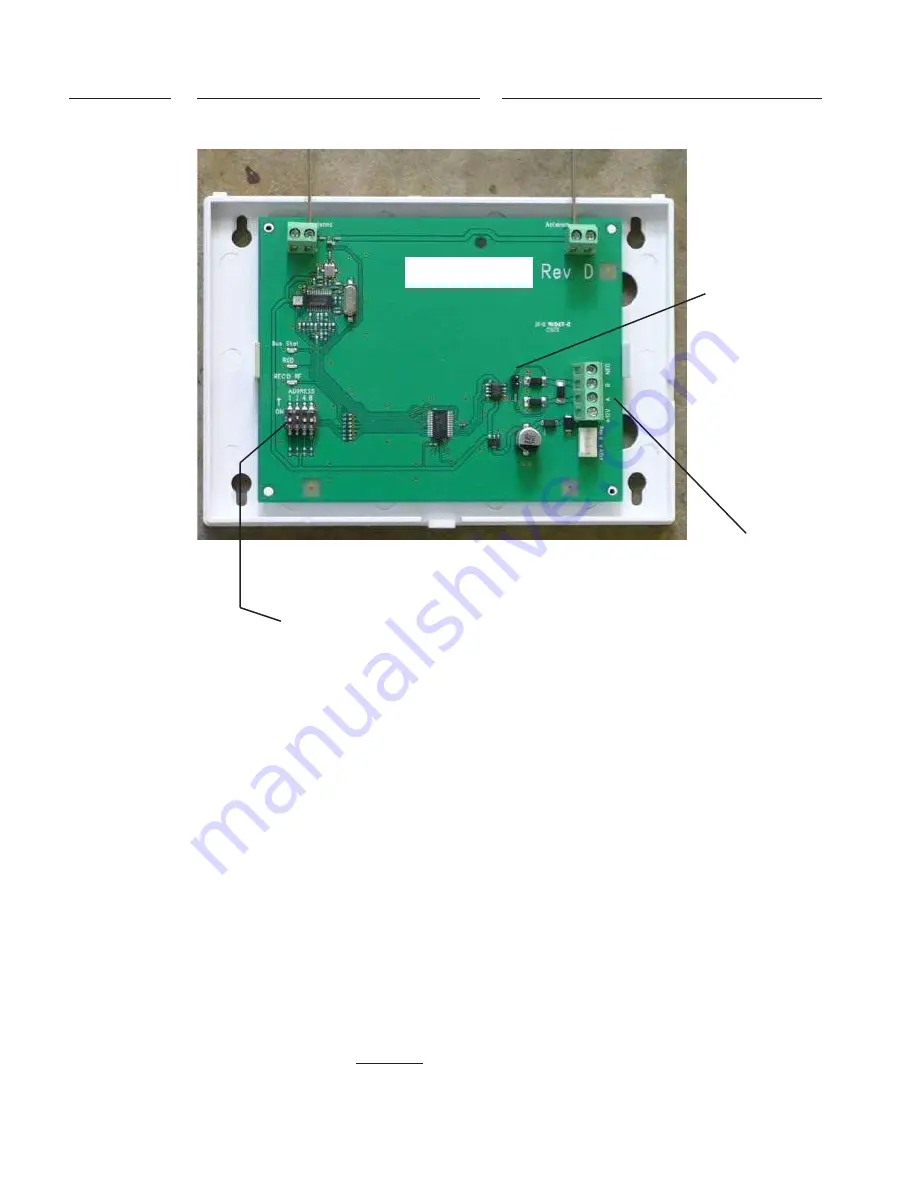
- Before making any wiring connections, turn the power Off on the Control Panel. Connect
ter12V, A, B, and Neg from the receiver to the M1's Keypad Data Bus (terVKP, Data A, Data B, & Neg).
NOTE: Refer to the M1 Installation Manual and the M1DBH information in this manual about proper
connections of data bus devices with multiple homerun cables.
3. Antenna Installation
The receiver is supplied with two (2) antennas. These should be installed into the top locations marked Antenna. Dual
antennas ensure signal diversity which helps eliminate RF dead spots.
NOTE: Each antenna location has a two (2) position screw terminal block. MAKE SURE to insert and tighten the
antennas into the screw terminals marked ANTENNA. Do not use the adjacent screw terminal.
INSTALL UNIT * SET ADDRESS AND OPTION JUMPERS * ACTIVATE M1 BUS ENROLLMENT PROCESS
RS-485
Data Bus
Connections
Data Bus Address Switches
Dual Antennas
Antenna 2
NOTE: Jumper JP1makes it convenient to terminate the RS-485 Data Bus if this is the last installed device.
ELK-M1XRF2H
Antenna 1
ELK-M1XRF2H
JP1 Bus
Terminating
Jumper
Содержание ELK-M1XRF2H
Страница 16: ...Page 16 M1XRF2H Installation Manual...


