background image


Page 33 of 130 


Doc No.

T202001005   


www.elibot.cn


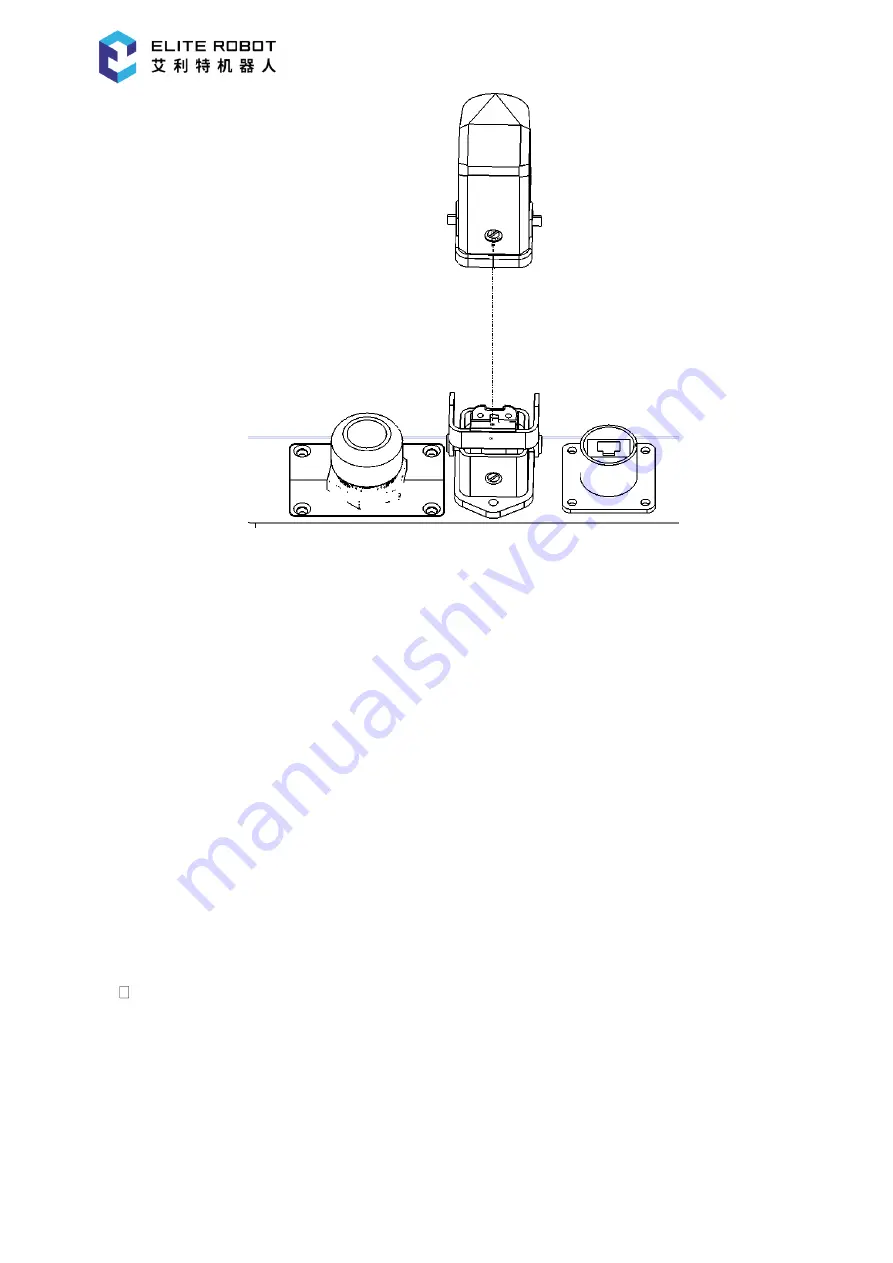
Figure 7-3 Diagram of the power interface of the control box   

DANGER


1.  Please make sure that the robot is grounded correctly (electrical connection to ground). The 

grounding conductor should have at least rated current of the highest current in the system.   

2.  Please make sure that all cables are correctly connected before the control box is powered 

on. Always use the original power cord correctly.   


WARNING


1.  Do not disconnect the robot cable when the robot arm is turned on 
2.  Do not extend or modify the original cable. 


7.2 Robot Power-on 

7.2.1 Preparations before power-on 

  • 

Check whether the robot is well connected with the control box. 


• 

Check whether the teach pendant is well connected with the control box. 


• 

Check whether the power cable of the control box is well connected. 


• 

The power master switch of the control box is OFF when the power supply is  turned 

off.     


• 

The control box and the emergency  stop  switch  of the teach pendant  are in  bouncing 

state. 

Содержание EC66

Страница 1: ...Elite Robot User Manual Doc Name EC66 User Manual Suzhou Elite Technology Co Ltd www elibot cn January 18 2020 ...

Страница 2: ...pear in the new version The contents or information herein is subject to change without prior notice Suzhou Elite Robot Co Ltd shall assume no liability for any errors which will occur in the manual probably Suzhou Elite Robot Co Ltd shall assume no liability for the accident or indirect injury as a result of using this manual and the product mentioned herein Please read this manual before install...

Страница 3: ...pter 3 Maintenance Repair and Disposal 20 3 1 Maintenance and Repair 20 3 2 Disposal 21 3 3 Maintenance 21 Chapter 4 Quality Assurance 22 4 1 Product Quality Assurance 22 4 2 Disclaimer 22 Chapter 5 Robot Hardware Composition 24 Chapter 6 Robot Installation 26 6 1 Brief Installation Steps 26 6 2 Important Safety Instructions 26 6 3 Workspace of the Robot 26 6 3 1 Mechanical dimensions of the robot...

Страница 4: ...54 8 7 6 Tool communication I O 55 Chapter 9 Teach Pendant 56 9 1 Programming Pendant Display 57 9 1 1 Main Menu Area 58 9 1 2 General purpose Display Area 61 9 1 3 Monitoring Area 63 9 1 4 Information Prompt Area 65 9 1 5 Status Control Area 65 9 1 6 Coordinate Area 66 9 1 7 Status Display Area 68 9 1 8 Submenu Area 69 9 2 Robot Axes and Coordinates Systems 69 9 2 1 Basic Operations 69 9 2 2 Coor...

Страница 5: ...tion 108 9 8 5 Authority 111 9 8 6 Speed Parameters 113 9 8 7 Limit Parameters 113 9 8 8 System Configuration 114 9 9 Backup and Upgrade 115 9 9 1 Software Information 116 9 9 2 Local to USB 116 9 9 3 Local from USB 117 9 9 4 System Upgrade 117 Appendix 121 A Glossaries 121 B Certification and Detection 123 C Stopping Time and Stopping Distance 125 D Reference Standards 126 E Technical Specificati...

Страница 6: ...int modular design and uses a developer oriented robot system The user may develop his own robot control system in accordance with an application program interface provided by a ELITE collaborative robot platform In addition the ELITE collaborative robot is equipped with a dedicated programmable interface in this way the user may observe a running state of the robot in real time through the interf...

Страница 7: ...ne set of complete EC66 robot is shown in the table below More Information If you require more information please visit the website www elibot cn Name Quantity Robot body 1 Control box including teach pendant 1 Power cord 1 Base Optional 1 User manual disk 1 Thin walled wrench 1 ...

Страница 8: ...implement the specifications and requirements in this manual The user and the integrator must have sufficient safety awareness and comply with ISO 10218 Industrial Robots Safety Specification 1 2 Safety Warning Symbols The safety related contents in this manual are illustrated with the following warning symbols The descriptions related to the warning symbols in this manual represent the important ...

Страница 9: ...ment Indicating a potentially hazardous situation which if not avoided could result in personnel injury or serious damage of the equipment As for the items marked with this symbol the major consequence would probably occur sometimes in accordance with the specific situation Indicating a situation which if not avoided could result in personnel injury or damage of the equipment As for the item marke...

Страница 10: ...hall try to describe various situations However it seems impossible to record all the cases that cannot be done in accordance with so many possibilities 1 3 2 Usage Notice The following basic information must be understood and followed when starting the robot or the robot system for the first time and other safety related information shall be introduced in other parts of the manual However it seem...

Страница 11: ...nt records kept 3 Only the authorized personnel could set and change the safety parameters and the passwords or the isolation measures must be used to prevent the unauthorized personnel from changing or setting the safety parameters When the safety factors are revised the related safety functions must to be analyzed 4 When the robot is trapped in accident or runs abnormally the emergency stop swit...

Страница 12: ...ds or create new hazards Always make an overall risk assessment for the complete installation When different safety and emergency stop performance levels are needed always choose the highest performance level Always read and understand the manuals of all equipments to be used during installation 10 Never modify the robot A modification might create hazards that are unforeseen by the integrator The...

Страница 13: ...although it seems to have stopped Even in this state the robot should be regarded as being in action 4 Lines should be drawn on the floor to mark the range of action of the robot in this way the operator may know the range of action of the robot including the clamping tool the manipulator the tool and so on 5 Make sure that the safety measures for example guardrails ropes or protective screens are...

Страница 14: ...ents for industrial robots Part 2 Industrial robot system and integration RIA TR R15 306 2014 Technical report of industrial robots and robot systems Safety requirements and task based risk assessment method ANSI B11 0 2010 Safety of machinery General requirements and risk assessment The ELITE robot integrator should perform but not limited to following responsibilities Make a comprehensive risk a...

Страница 15: ...oint The danger caused by bumping against the robot The danger because the robot or the tool connected to the end is not fixed in place The danger due to impact between the payload of the robot and the hard surface The integrator must measure this type of risks and the related risk levels through the risk assessment then confirm and implement the corresponding measures as to reduce the risks to th...

Страница 16: ...in accordance with the risk assessment Namely on the premise that no safety protective device and the on site sensor are used anticipated or accidental contact between the staff and the ELITE collaborative robot or its end effector or the part would not constitute the unacceptable risk and the anticipated or accidental contact with other objects the tool the equipment the surface and so on in the ...

Страница 17: ...on should meet the requirements of IEC 60947 5 5 The EC66 is equipped with the emergency stop buttons on the control box and the teach pendant The button should be pressed only when meeting the dangerous situations or emergencies as shown in following figure The control box is equipped with the external emergency stop button port and the integrator or the user can use it in accordance with the act...

Страница 18: ...rsonnel does not want to use the power supply In this way the robot joints are forced to move through the following method Forced reverse drive push or pull the robot arm hard at least 700N as to force the joints to move Forced manual movement of the robot arm should be operated only in case of emergency however the joints may be damaged 1 7 4 Over strong force safety protection of the robot arm T...

Страница 19: ...Page 18 of 130 Doc No T202001005 www elibot cn robot arm The function may reduce the damage as a result of impact and the risk assessment must be implemented when used for other purposes ...

Страница 20: ...he installation position from the packing material of the robot the robot should be supported until all bolts of the robot base are tightened completely After fixing the robot is powered on and the pose of the robot should be adjusted to the appropriate position with the dragged teaching function of the robot An original package should be kept upon completion of transportation The packaging materi...

Страница 21: ... the parameters are not backed up the parameters should be set again If the robot joints or the tool needs to be replaced the dynamics of the robot needs to be re identified with the identification method introduced in the instructions of the control system Maintenance must be implemented by authorized system integrator or Suzhou Elite Robot Co Ltd When the parts are returned to Suzhou Elite Robot...

Страница 22: ... off 5 Prevent water or dust from entering into the robot arm or the control box Cautions 1 Replace the parts trapped in failure with new parts with the identical part number or the corresponding parts approved by Suzhou Elite Robot Co Ltd 2 Reactivate all prohibited safety measures immediately upon completion of the work 3 Record all maintenance operations in written form and save these records i...

Страница 23: ...rcumstances shall not be covered by the warranty 1 Installation wiring and connection to other control equipments are not in line with the industrial standards or not implemented in accordance with the requirements of the user manual 2 Outside the specification or standards shown in the user manual during use 3 This product is applied to the non designated purposes 4 The storage mode and operating...

Страница 24: ...iciencies occurring in the products and the parts sold to the dealers As for any other explicit or implied warranties or liabilities including but not limited to any implied warranty for marketability or specific use Suzhou Elite Robot Co Ltd shall not bear the related liability to guarantee In addition Suzhou Elite Robot Co Ltd shall not be responsible for the related liabilities in allusion to a...

Страница 25: ...ng one degree of freedom As shown in Figure 5 2 the robot joint includes a substrate joint 1 a shoulder joint 2 an elbow joint 3 a wrist 1 joint 4 a wrist 2 joint 5 and a wrist 3 joint 6 The substrate is used to connect the robot body with the base and the tool end effector is used to connect the robot with the tool Arm tube connection between shoulder and elbow and between elbow and wrist Through...

Страница 26: ... The EC63 provides multiple IO interfaces and the tool flange of the robot end is equipped with four digital input and output interfaces and two analog input and output interfaces The control box can communicate with the robot arm through the high speed dedicated bus The teach pendant provides the user with a visual operation interface The user may test program and simulate the robot through the t...

Страница 27: ...e robot is installed on a hard surface The surface should be able to bear at least ten times of the complete torsion of the base joints and at least five times of the weight of the robot arm In addition the surface should be free from vibration Please refer to the appendix for the specific bearing capacity The safety assessment must be implemented upon completion of each installation of the robot ...

Страница 28: ... range of motion of the EC66 namely a sphere with a radius of 914mm except the cylindrical space directly above and directly below the base When choosing the installation position of the robot the cylindrical space directly above and directly below the robot must be considered as to avoid the tool from being moved toward the cylindrical space as far as possible In addition the rotation angle of th...

Страница 29: ... base the robot body is fixed on the base with four M8 bolts It is recommended to install the pins with two holes as to improve the installation accuracy The mechanical dimensions are shown in Figure 6 4 Figure 6 4 Dimensions of installation holes on the base with unit of mm 1 When installing on the base the robot should closely contact with a contact surface of the base and the surface should be ...

Страница 30: ...obot may overturn and cause damage Installation Requirements of the Robot Arm The robot arm having a 6KG load runs normally without bumping against the outside in which a center of gravity of the load is deviated from a central axis of the tool end for 100mm Three ways of installation forward installation hoisting and vertical installation are available and it is recommended that the minimum anti ...

Страница 31: ...e center of gravity The offset of the center of gravity is the distance from the center of the flange plate of the tool end effector to the center of gravity of the tool WARNING 1 The load conditions should fall within the scope shown in the chart 2 The payload shown in the diagram indicates a maximum payload which should not exceed a maximum weight shown in the diagram under any circumstances 3 T...

Страница 32: ...ion 2 The teach pendant can be hung on the control box Make sure that the cable will not cause tripping hazard DANGER 1 Make sure the control box the teach pendant and the cables do not come into contact with liquids The wet control box may cause casualties 2 The control box and the teach pendant should not be exposed to the dust or the humid place exceeding the level of IP54 Pay close attention t...

Страница 33: ...and lock the connector after tight insertion as shown in the following figure Figure 7 2 Connection of the robot cable to the control box 7 1 2 2 Connection of the control box to the mains supply There is a heavy load rectangular plug at the end of the mains cable of the control box Connect the local dedicated mains cable to the heavy load rectangular plug Pay attention to the insertion direction ...

Страница 34: ... Always use the original power cord correctly WARNING 1 Do not disconnect the robot cable when the robot arm is turned on 2 Do not extend or modify the original cable 7 2 Robot Power on 7 2 1 Preparations before power on Check whether the robot is well connected with the control box Check whether the teach pendant is well connected with the control box Check whether the power cable of the control ...

Страница 35: ...obot and the teach pendant Normal exit exit the program and press the software closing button in the upper right corner of the operation interface of the teach pendant Forced shutdown long press the starting button in the upper left corner of the teach pendant for about 3 seconds to turn off a blue light and turn off the power supply of the teach pendant and the robot 2 Turn off the power supply o...

Страница 36: ...obot application is designed and installed Furthermore observe these warnings and cautions as well when implementing maintenance DANGER 1 Never connect the safety signals to a PLC which is not a safety related PLC with the proper safety level Failure to follow the warning may result in serious injury or even death as certain safety stop function is invalid please separate the safety interface sign...

Страница 37: ...control box with the reliable GND with the dedicated power supply socket of the control box 4 Please be careful when installing the interface cable to the robot I O A metal plate on the back of the box is intended for the interface cables and connectors Please remove the metal plate before drilling holes Make sure that all matte sides are removed before reinstalling the metal plate Remember to use...

Страница 38: ...ges and currents are in direct current DC unless otherwise specified 8 3 Controller I O This chapter describes how to connect the equipment to the I O inside the control box The I O is extremely flexible and may be applied to various different equipments including the pneumatic relay the PLC and the emergency stop button The layout of the electrical interfaces inside the control box is shown in th...

Страница 39: ...s J102 J103 J104 J105 Configurable digital input DI J109 J110 J111 J112 J113 General purpose digital DO J108 J107 General purpose analog I O The following chapters shall describe how to use the digital I O This section describes the common specifications that must be followed ...

Страница 40: ...via the internal 24V power supply The configurable I O is defined that the digital input may be configured to two input modes including NPN and PNP which may implement selection with J22 on the IO plate The NPN input is default namely J22 short circuit 24V and the intermediate terminal Furthermore the short circuit may be implemented for the GNDP and J22 intermediate terminal with a short circuit ...

Страница 41: ...V DINx Current 8 30V 2 8 5 mA DINx Function PNP Type DINx IEC 61131 2 3 Type Digital input safety input DINx x_STOPx Voltage 10 26 V DINx x_STOPx OFF region 22 26 V DINx x_STOPx ON region 10 19 V DINx x_STOPx Current 10V 19V 1 10 mA DINx x_STOPx Function NPN Type DINx x_STOPx IEC 61131 2 3 Type NOTE The word Configurable is intended for the input which may be configured as the NPN input or PNP inp...

Страница 42: ... Reset Manual Automatic or manual Frequency of use Infrequent Once within each cycle Requires re initialization Brake released only No Stop category IEC 60204 1 2 Performance level ISO 13849 1 PLd PLd The emergency stop output and other safety I O functions may be set with the configurable I O Some examples about how to use the safety I O are given in the section below DANGER 1 Never connect the s...

Страница 43: ...each pendant is equipped with the emergency stop button the equivalent circuit is shown below and the short circuit is required to implement for E_STOP1 and GNDP when the E_STOP1 enabling is not configured in the software 8 3 2 2 Connecting with the emergency stop button Most applications require one or more additional emergency stop buttons The operational principle the E_STOP1 function enabling ...

Страница 44: ...signal can be re established from the inside of the safety perimeter 8 3 3 General purpose digital I O This section introduces the general purpose 24V I O The common specifications in section 4 3 1 must be followed The general purpose I O may be used to directly drive the equipment such as the pneumatic relay or to communicate with other PLC systems All digital outputs may be disabled automaticall...

Страница 45: ... a connection way of the load controlled by the digital output See the figure below 8 3 4 Digital input from a button This example shows a connection way of a simple button and the digital input 8 3 5 General purpose analog I O The analog I O interface can be used to set or measure the voltage 10V 10V in and out of other equipments ...

Страница 46: ...shielded cable to the GNDP terminal on the Power terminal The electrical specifications are shown below Terminal Parameter Min Type Max Unit Analog input AINx GNDPA Voltage 10 10 V AINx GNDPA Resistance 100 Kohm AINx GNDPA Resolution 12 bit Analog output AOUTx GNDPA Voltage 10 10 V AOUTx GNDPA Resistance 10 ohm AOUTx GNDPA Resolution 12 bit The following example shows a way of using the analog I O...

Страница 47: ...ernet interface can be applied to the following applications Remote access and control The electrical specifications are shown below Parameter Min Type Max Unit Communication speed 10 100 Mb s 8 5 Mains Connection The mains cable of the control box has a standard rectangular heavy load plug at the end Connect the local dedicated mains socket or cable to the rectangular heavy load plug ...

Страница 48: ... with at least following accessories Connection to ground Mains fuse Residual current device It is recommended to install a mains switch to the power supply of all equipments in the robot application in order to facilitate lockout and tagout during repair The electrical specifications are shown in the table below Parameter Min Type MaxUnit Input voltage 90 240 VAC External mains fuse when the volt...

Страница 49: ...urrent device RCD and the appropriate fuse 3 The lockout and tagout should be implemented for all power supplies when the robot needed to complete all services is installed and set The robot I O should not be powered by other equipments when the system is locked 4 Please make sure that all cables are connected correctly before the control box is powered on Always use the original power cord 5 The ...

Страница 50: ...en the robot arm is started 2 Do not extend or modify the original cable 8 7 Tool I O A 12 pinned connector is arranged near the tool flange of the collaborative robot end for providing the different grippers and sensors connected to the robot with the power supply and the control signals NOTE ...

Страница 51: ...ion plug is HR10A 10R 12P of HRS company Pin No Function description 1 Digital ground GND 2 Digital output interface 1 DO1 3 Digital output interface 2 DO2 4 Digital input interface 1 DI1 5 Digital input interface 2 DI2 6 Analog input interface AI1 7 Analog output interface AO1 8 RS485 9 RS485 10 24V power output 11 Blank no connection therein 12 Blank no connection therein Herein the electrical s...

Страница 52: ...e robot can provide the external tool with a 24V power supply 8 7 2 Tool digital input The implementation mode of the digital input interface is shown in the figure below The electrical specifications are shown in the table below Parameter Min Type Max Unit Input voltage 0 5 26 V Logical low voltage 10 V Parameter Min Type Max Unit 24V supply voltage 23 5 24 24 8 V 24V supply current 800 1000 mA ...

Страница 53: ...tivated and the level state is in a high impedance breaking state when the output port is not activated The electrical specifications of the digital output port are shown below Parameter Min Type Max Unit Voltage when open 0 5 26 V Voltage when sinking 1A at 25 C 0 19 0 24 V Sinking current 0 600 1000 mA Using the tool digital output This example illustrates how to open and use a load of the inter...

Страница 54: ...Page 53 of 130 Doc No T202001005 www elibot cn Caution Even when the load is off voltage is still present between the power connector and the shield ground ...

Страница 55: ...log input are illustrated in the following section Using the tool analog input non differential This example illustratesan analog sensor connection with a non differential output Using the tool analog input differential This example illustrates an analog sensor connection with a differential output Work in the same way as the non differential sensor after connecting a negative output end to the GN...

Страница 56: ...equests RS485 signals use internal fail safe biasing If the connected device is not compatible with this fail safe the signal biasing must either be done in the connected tool or added externally by adding a pull up resistor to RS485 and a pull down resistor to RS485 The latency is 2ms to 4ms from writing in data to be sent on a robot controller to the start of sending the data on the RS485 The la...

Страница 57: ...ion and pose parameters and so on but facilitate operations of the user All operations may be completed by directly clicking the screen The housing of the teach pendant is designed in combination with aesthetics and ergonomics and the back thereof is equipped with a nylon rope and two hanging rings The nylon rope is used to hold the teach pendant and the teach pendant can be suspended on an electr...

Страница 58: ...differ in status control area coordinate area and sub menu area Could click to switch status pop up dialog box etc While it only changes status no pop up dialog boxes when using keyboard After clicking in the input box the number or character will be recognized automatically and corresponding full keyboard or numeric keyboard pop up Manipulator can be operated only by pendant keys clicking in the ...

Страница 59: ...isplayed when the information prompt area is activated 5 The monitoring area and information prompt area in the three display areas can be hidden When the monitoring area or information prompt area is displayed the general purpose display area will be automatically reduced to half display When the monitoring area or information prompt area is hidden the general purpose display area is automaticall...

Страница 60: ...import System Upgrade Expert user System Configuration Robot configuration Root Network configuration Root Language configuration Root Institutional Information General user Software information General user Program Edit First Level Menu Second Level Menu Operation Authority Copy Line copy Expert user Block copy Cut Line cut Block cut Paste Delete Line delete Block delete Search Replace Logic inst...

Страница 61: ...ator Permission Switch user General user Change password Expert user Monitoring First Level Menu Second Level Menu Operation Authority Coordinate Joint coordinates General user Cartesian coordinates Variable Variable B Variable I Variable D Variable P IO Input Output Virtual input Virtual output Motor Impulse Motor speed Absolute position Operational monitoring ...

Страница 62: ...ble operation Administrator can modify the home position Program home position Expert user Home position calibration Expert user User processes Corresponding process setting menu will display under the user processes option according to the actual configuration of the system 9 1 2 General purpose Display Area The general purpose display area is mainly used to display program list program editing i...

Страница 63: ...Page 62 of 130 Doc No T202001005 www elibot cn Program list Program editing Speed parameter setting ...

Страница 64: ... monitoring area is mainly used to display the robot coordinates variable values IO port status motor running status etc All the options under the Monitor menu are displayed in the monitoring area as shown in the following figure the half width display and full frame display of the monitoring area ...

Страница 65: ...Page 64 of 130 Doc No T202001005 www elibot cn Half display of the monitoring area Full display of the monitoring area ...

Страница 66: ...olding unfolding coordinate system selection joint cartesian tool user cylinder operation cycle selection single step single cycle continuous cycle synchronized unsynchronized state switching reset etc The area can be operated by directly clicking the icon or clicking the corresponding button The coordinate and operation cycle need to be selected finally in the pop up window and can only be operat...

Страница 67: ...ordinate Area The coordinate area will display the corresponding icon according to the selected coordinate system The icon of the coordinate area can only be displayed when the servo is enabled For joint coordinates display from top to bottom are J1 J2 J3 J4 J5 J6 For Cartesian Tools User Coordinates display from top to bottom are X Y Z RX RY RZ For Cylinder Coordinates display from top to bottom ...

Страница 68: ...Page 67 of 130 Doc No T202001005 www elibot cn Joint coordinates Cartesian User Tool coordinates ...

Страница 69: ...stem time external axis etc as shown below Permissions Display the current permissions can open the permission settings window by touching screen Running status Display the current running status of the robot including stop pause run alarm etc Running mode Display the current running mode of the robot including TEACH PLAY REMOTE mode Speed Display the current speed The same speed in PLAY and REMOT...

Страница 70: ...focus area The submenu area can be operated by clicking the icon or by the corresponding key The submenu area shows as below when program list is focused 9 2 Robot Axes and Coordinates Systems 9 2 1 Basic Operations 9 2 1 1 Security Confirmation Before operating please read the chapter Note for Safe Operation of this manual again to eliminate the potential dangers of the manipulator system and per...

Страница 71: ...ill pop up the menu which displays the options of JOINT CARTESIAN TOOL USER CYLINDER and then select the coordinate system 9 2 1 5 Speed Selection The speed contains manual teach speed play speed and remote speed The play speed and remote speed are the same There are three ways to adjust the speed 1 Loosen the enable switch press the coordinate area select the speed icon or drag the slider to adju...

Страница 72: ...ble button in the bottom right corner of the programming pendant At this time the SERVO indicator in the upper left corner of the programming pendant is on In REMOTE mode the servo is turned on automatically 9 2 1 7 Axis Operations In the TEACH mode with the servo on pressing an axis key in the teach mode makes it possible to move the respective axis of the manipulator and station to a desired pos...

Страница 73: ... Rx Ry Rz can also be performed Rx rotates around the X axis Ry rotates around the Y axis and Rz rotates around the Z axis respectively following the right hand rule Taking a manipulator of 6 axes as an example the directions of motion are as shown below 9 2 2 3 Tool Coordinates The tool coordinates are defined at the tip of the tool assuming that the effective direction of the tool mounted on the...

Страница 74: ...workpieces User can set the tool coordinates number 0 7 according to the actual tool conditions 9 2 2 4 User Coordinates The user coordinates are defined by teaching the manipulator three points and the manipulator moves parallel to each axis of the coordinates which are set by the user The user can set the user coordinates number 0 7 as needed ...

Страница 75: ... 2 2 6 Control Points Remain Unchanged The operation in which the control point remains unchanged means that the position of the tool tip point control point is not changed and only the axis operation of the tool posture is changed Turning of each wrist axis differs in each coordinate system In Cartesian or cylindrical coordinates wrist axis rotations are based on the X Y or Z axis In the Cartesia...

Страница 76: ... Doc No T202001005 www elibot cn In tool coordinates wrist axis rotations are based on X Y or Z axis of the tool coordinates In user coordinates wrist axis rotations are based on X Y or Z axis of the user coordinates ...

Страница 77: ...d the teach pendant are function correctly Verify the emergency stop button is pressed ensure the servo power supply is disconnected and whether the manipulator alarms When an external emergency stop button is connected you should also ensure that the emergency stop button is valid 9 3 1 2 Mechanical Zero Verification Each point data of the manipulator is the angle value related to each axis based...

Страница 78: ...ame Select the program that need to be renamed in the program list and press RENAME Enter the required new file name in the pop up dialog box and press OK Delete Select the program that needs to be deleted in the program list and press DELETE In the pop up confirmation prompt box press OK to delete press CANCEL to cancel deletion the previously opened program is in activated status and cannot be d...

Страница 79: ... main menu bar are enabled The current file name the total number of lines and the current line number will be displayed at the bottom of the general purpose display area The sub menu displays the corresponding program editing options Each program file starts with NOP and ends with END The line where the cursor locates will be displayed in blue 9 3 2 2 Interpolation Type and Play Speed When perfor...

Страница 80: ...he linear interpolation is used to teach a robot axis the move instruction is MOVL Linear interpolation is used for work such as welding The manipulator moves automatically changing the wrist position as shown in the figure below Circular Interpolation The manipulator moves in an arc that passes through three points When circular interpolation is used for teaching a robot axis the move instruction...

Страница 81: ...e desired option to switch the instruction mode The electronic handwheel is disabled by default in the program editing page after booting Push the electronic handwheel inward to switch between the enable mode and the disable mode Inserting Move Instructions Whenever one step is taught one move instruction is inserted When inserting a move instruction without using P variables the current position ...

Страница 82: ...w elibot cn 4 After selecting the move instruction edit the contents of its additional items and press OK to insert it The Enable switch must be hold when inserting the move instructions Otherwise the move instruction cannot be inserted ...

Страница 83: ...re the instruction to be inserted Then press EDIT INSTRUCTIONS under the main menu or QUICK INSTRUCTIONS in the submenu area to select the instruction to be inserted After editing the additional items press OK to insert the instruction QUICK INSTRUCTIONS in the submenu area contains only part of the instructions and all instructions can be found by pressing EDIT INSTRUCTIONS under the main menu Se...

Страница 84: ...the program editing page Then press MODIFY in the submenu area and the instruction editing window will pop up For the non motion instructions only UPDATE PARAMETERS can be used After modifying the instruction press UPDATE PARAMETERS to use the modified instruction Press CANCEL to exit the modification operation ...

Страница 85: ... be used only when holding the Enable switch 9 3 2 4 Checking Steps After completing the program editing the manipulator can be moved ahead in step number sequence manually in order to check in advance whether the motion paths of the manipulator are correct Forward Operation The forward operation can be used to move the manipulator to the position of the taught steps in order to check whether the ...

Страница 86: ...otion instructions can only be executed in PLAY mode 9 3 2 5 Editing Programs When editing the program the Program Edit option under the main menu provides many convenient and quick operations copying cutting pasting deleting searching replacing customizing quick instructions resetting etc Copying There are two types of copy operations LINE COPY and BLOCK COPY LINE COPY only copies the instruction...

Страница 87: ... specifying the range of the instruction lines to be deleted Press OK to complete the delete operation Searching Press SEARCH and the search window will pop up The items can be searched are the additional items of each instruction Note that the items displayed for each instruction in the normal instruction mode and advanced instruction mode are different Select the item to search and input the cor...

Страница 88: ... specified value at once Customizing Quick Instructions In the program editing page QUICK INSTRUCTIONS in the submenu area can be pressed to customizing the quick instructions for editing the program The frequently used instructions can be added to the quick instructions for easy use Press CUSTOMIZING QUICK INSTRUCTIONS to enter the customizing page Select the desired instruction in the left instr...

Страница 89: ...ed to reset the system status 9 3 3 List of program instructions Instruction Group Instruction Description I O Instructions DOUT Digital output MOUT Virtual digital output DIN Digital input PULSE Pulse output AOUT Analog output AIN Analog input Control Instructions CCOOD Specify the coordinate JUMP Jump to the specified label CALL Call a subprogram AXISDISA BLE Axis prohibition of movement LABEL I...

Страница 90: ...peration XOR Logic XOR operation GETPOS Get the current position of manipulator MFRAME Establish a coordinate DIST Calculate the distance between the two points Move Instructions MOVJ Joint interpolation MOVC Circular interpolation MOVCA Circular interpolation MOVL Linear interpolation MOVML Micro interpolation Arc welding instruction ARCON Arc begins ARCOFF Arc stops ARCSET Welding condition sett...

Страница 91: ...rom the NOP line 9 4 1 2 Selecting Operation Cycles Switch to PLAY mode press the icon in the status control area to select one of three types of manipulator operation cycles SINGLE STEP Executes one step instruction at a time SINGLE CYCLE Executes a program once The program will be executed again if PROGRAM START button is pressed CONTINUOUS CYCLE Repeats a program continuously Please select the ...

Страница 92: ...xecuted the program will pause at the current line and the moving manipulator will slow down and stop There are two ways to pause the program 1 Press PROGRAM PAUSE button on the programming pendant 2 Use the external input signal The program pause operation will be executed when the input EXT HD of the dedicated IO board is valid Emergency Stop Operation If the emergency stop operation is executed...

Страница 93: ...tch is switched from PLAY mode to TEACH mode 2 The PAUSE instruction is executed in the program 9 5 User Processes The ERC G200 control system includes user processes such as arc welding reservation external axes laser tracking scripting vision tracking palletizing stamping etc which can be enabled in System System Configuration Manipulator Configuration The configuration and operation instruction...

Страница 94: ... for the variables are described as follows B Byte Type B000 B255 256 I Integer Type I000 I255 256 D Double Type D000 D255 256 P Position Type P000 P255 256 In the variable monitor page the user can switch between different variable types by pressing the buttons in the submenu area Select the target variable by the cursor and press MODIFY button in the submenu area to input the required value in t...

Страница 95: ...sition type variable Select the desired P variable using the cursor in the variable monitor page Press VIEW to view its value in the information prompt area Press CLEAR to reset it to the default value Press MODIFY to record the current joint coordinates into the variable ...

Страница 96: ...bot cn 9 6 3 IO The IO monitor page includes four options input output virtual input and virtual output Select the desired option to open the corresponding monitor page The user can switch between the four options in the submenu area quickly ...

Страница 97: ...elect Y000 using the cursor and press MODIFY in the submenu area to reverse its state Its value will become 1 from 0 or become 0 from 1 9 6 4 Motor The motor monitor page includes three options pulse motor speed and absolute position The pulse monitor page displays three items the sending pulse counting the feedback pulse counting and the difference For pulse motors if there is a movement position...

Страница 98: ...eed monitor page the real time rotational speed of each axis can be viewed according to the actual requirements In the absolute position monitor page the pulse counting at the current position for the motor of each axis can be viewed according to the requirements ...

Страница 99: ...ded in the move instruction can be viewed The joint coordinates are displayed by default which can be switched to the Cartesian coordinates by pressing JOINT CARTESIAN button in the submenu area In the program editing window use the cursor to select the desired move instruction and the coordinate values of the target point corresponding to the instruction will be displayed in the operational monit...

Страница 100: ...n functions include screen validation screenshot normal mode advanced mode etc There are different key combination functions for different user processes which can be used according to the actual requirements 9 7 2 Multi Window Function Some windows in the system can be displayed in both full size mode and half size mode The selected window can be expanded towards the desired direction by pressing...

Страница 101: ... TCP must be defined The tool coordinates are established by registering the coordinates of the TCP and the tool angle in the flange coordinates of the manipulator After that the TCP is automatically calculated and registered in the tool file There are 8 tool coordinates numbered from 0 to 7 can be set in the system Go to the page of Readiness for operation Tool coordinates and select the tool coo...

Страница 102: ...ordinate Data When the number input operation is used for registering the tool coordinate input the TCP of the tool in the flange coordinates Three cases corresponding to the tool A B and C are given as examples for registering the coordinate data as shown in the figures below ...

Страница 103: ... 0 Y is 145 and Z is 260 Enter the value into the coordinate input box and press SET button in the submenu area Then the information prompt area will display the following message The tool coordinate is successfully set 9 8 1 2 Seven point Tool Calibration In order to perform the seven point tool calibration seven points with different postures must ...

Страница 104: ...e and each angle must be arbitrary Accuracy may decrease when pose setting is rotated in a constant direction The points P6 and P7 are used to define the X axis direction and the Z axis direction of the tool coordinate First select the target point in the window then press RECORD to record the current position of the manipulator After that the color corresponding to the point will change from red ...

Страница 105: ...he diagram below These three points of positional data are registered in a user coordinate file User coordinate definition RORG is the home position and RXX is a point on the X axis RXY is a point on the Y axis side of the user coordinates that has been taught and the directions of Y and Z axes are determined by point RXY Note that it is important that the two points RORG and RXX be taught accurat...

Страница 106: ...terference Area The interference area is a function that prevents interference between multiple manipulators or the manipulator and peripheral device The area can be set up to 16 areas There are two types of interference areas Cubic Interference Area Axis Interference Area 9 8 3 1 Cubic Interference Area This area is a rectangular parallelepiped which is parallel to the base coordinate Cartesian c...

Страница 107: ...s of the cube corner using the axis keys and record them respectively Then press SAVE button in the submenu area and the target cubic interference area will be set successfully 2 Number Input of the Side of Cube and Teaching Center Move the manipulator to the center point of the cube using the axis keys and record it Then enter the length width and height of the cube and press SAVE button in the s...

Страница 108: ...have been set at the plus and minus sides of the axis to define the working range a signal indicating whether the current position of the axis is inside or outside this range is output ON inside OFF outside In the interference area setup page select Axis for the usage mode Then select the axis number and move the axis to the minimum and maximum points using the axis keys Record the points and pres...

Страница 109: ...ifying the PLC program 9 8 4 Home Position The Readiness for Operation Home position menu includes three options mechanical home position program home position and home position calibration 9 8 4 1 Mechanical Home Position Although the mechanical home position is calibrated prior to shipment at the factory the following cases require the calibration to be performed again Change in the combination ...

Страница 110: ...apter of setting mechanical home position in Initial Configuration Manual 9 8 4 2 Program Home Position The program home position is the reference point for manipulator operations It prevents interference with peripheral device by ensuring that the manipulator is always within a set range as a precondition for operations such as starting the line In the page of setting program home position press ...

Страница 111: ...of the calibration cone 2 Go to Readiness for Operation Home Position Home Position Calibration 3 Select the above program and the tool number that needs to be calibrated 4 Press Set button and if the calibration data is valid the information prompt area will display the following message The mechanical home position is calibrated successfully 5 Press CALIBRATE button 6 Go back to Readiness for Op...

Страница 112: ...Settings Authority menu switching users and changing password 9 8 5 1 Switching users The system provides four types of user authorities general user expert user root and administrator The user authorities required by the options in the operating system are provided in section 1 4 1 In the page of switching users enter the password of the current user authority then press OK to switch user authori...

Страница 113: ...w elibot cn 9 8 5 2 Changing Password The password of the current user authority can be modified in the page of changing password Enter the previous password and the new password at the given locations and press OK to change the password ...

Страница 114: ...ues can be used for the parameters in this page which most users do not need to set 9 8 7 Limit Parameters In the page of Settings Limit Parameters the maximum and minimum angular position of each axis can be set as the joint soft limits If one of the joint positions is out of the soft limits during the operation the manipulator will stop immediately and give an alarm The limit parameters are set ...

Страница 115: ...urations press SET button and the users will be prompted to decide whether to restart the system Then press OK button all the settings will take effect after the restart Generally all above settings are configured successfully when shipping from the factory and the users do not need to set them 9 8 8 2 Network Configuration The network configuration is mainly used to change the IP address subnet m...

Страница 116: ...l take effect after the restart 9 9 Backup and Upgrade The backup and upgrade operations of the system software are simple fast and convenient which only need an ordinary USB flash disk After preparing the USB flash disk according to the upgrade or backup requirements insert it into the USB port of the controller for the collaborative robot the USB port is on the surface of the cabinet and simply ...

Страница 117: ...he controller the software version number and the system version number The software information page displays the basic information by default 9 9 1 2 Detailed Information Press DETAILED INFORMATION in the submenu area to display the detailed information page where the version number and the compilation time of the system components can be viewed 9 9 2 Local to USB The System Save to USB option i...

Страница 118: ...If the folder exists in the root directory the backup file will be saved in it directly 9 9 3 Local from USB The System Load from USB option includes parameter upgrade IO annotation upgrade PLC upgrade user data recovery script upgrade and identification file import When performing Load from USB operation a folder named rbctrl must be created in the root directory of the USB flash disk After placi...

Страница 119: ...to USB and select User Data Backup to back up the user data 4 Go to System System Upgrade then press OK button and wait several minutes The system will check the firmware and be upgraded automatically It will restart the system after successful upgrade 9 9 4 2 Firmware Upgrade The firmware upgrade is peculiar to the collaborative robot and the detailed upgrade procedures are as follows 1 In the ro...

Страница 120: ...be displayed in the coordinate area of the programming pendant screen 3 Go to System System Upgrade and a dialog box with the message Confirm System Upgrade will pop up After pressing OK button the system will give the message Please select the content that needs to be upgraded Then select Upgrade Firmware 4 Press OK button and the following page displays ...

Страница 121: ...x xx xx bin for Axis 3 The file Boot_Small xxxx xx xx bin for Axis 4 Axis 5 and Axis 6 For the robot EC63 select The file Boot_Middle xxxx xx xx bin for Axis 1 Axis 2 and Axis 3 The file Boot_Small xxxx xx xx bin for Axis 4 Axis 5 and Axis 6 Press SET button every time the upgrade file is selected for an axis until the upgrade for all axes are finished ...

Страница 122: ... ISO13850 2008 or IEC60204 1 2006 Stop Category 2 It is defined as a controlled stop with power available to the robot The robot stops all motions within one second Through the operation of the safety related assessment control system the robot may stay at the stop position For more information please refer to IEC60204 1 2006 Diagnostic coverage DC It is used to measure effectiveness of the diagno...

Страница 123: ... for details Performance level PL The PL is a discrete level which is used to specify the ability of each safety related part in the control system to implement the safety function under foreseeable conditions PLd is a second highest reliability classification meaning that the safety function is extremely reliable For more information please refer to EN ISO13849 1 2008 ...

Страница 124: ...d the robot performance test of National Robot Testing and Assessment Center Headquarters of China and the performance indexes have exceeded most of the domestic brands and achieved the standard of the traditional industrial robot and have been gradually narrowing a gap with the top international brands The EC66 robot has passed the EU CE certification and the product is in line with all relevant ...

Страница 125: ... collaborative robot The test standards are as follows GB 5226 1 2008 GB 11291 1 2011 GB T 15706 2012 GB T 17799 2 2003 GB 17799 4 2012 The EC66 robot is subjected to the robot performance test implemented by National Robot Testing and Assessment Center Headquarters of China and the test basis and standards are as follows GB T 12642 2013 Industrial robots Performance criteria and related test meth...

Страница 126: ...100 the general speed of the robot is set as 100 and the robot moves at a joint speed of 180 s Payload a maximum payload 6kg that can be handled by the robot connected to TCP The Joint 0 test was carried out by performing a horizontal movement where the rotational axis was perpendicular to the ground During the Joint 1 and Joint 2 tests the robot followed a vertical trajectory where the rotational...

Страница 127: ...States relating to electromagnetic compatibility and repealing Directive 89 336 EEC EN ISO 13850 2008 Safety of machinery Emergency stop Principles for design EN ISO 13849 1 2008 Safety of machinery Safety related parts of control systems Part 1 General principles of design EN ISO 13849 2 2012 Safety of machinery Safety related parts of control systems Part 2 Validation EN ISO 12100 2010 Safety of...

Страница 128: ...analog in and 4 analog out Tool IO 2 digital in 2 digital out 1 analog in and 1 analog out IO power supply The control box is 24V 2A and the tool end is 24V 0 8A Communication with control box TCP IP 100Mbit IEEE 802 3u 100BASE TX compatible with Modbus TCP RS485 compatible with Modbus RTU Tool Communication RS485 Protection class IP54 Typical power consumption 250W Temperature 0 50 C Power supply...

Страница 129: ...Page 128 of 130 Doc No T202001005 www elibot cn F Alarm Information and Description of Routine Problems See the detailed instructions of the control system for the alarm information ...

Страница 130: ...ial Park Beijing R D Center Room D102A 3 1st Floor Building B 2 Dongsheng Science and Technology Park West Xiaokou Haidian District Beijing Shanghai office B306 Building L1 Hongqiao World Center Lane 1588 Zhuguang Road Shanghai Shenzhen Technical Service Center Room 601 Building 2B Taihua Wutong Island Science and Technology Innovation Park Hangkong Road Hangcheng Street Baoan District Shenzhen ...

Отзывы: