


001
www.elitescreens.com
Looking at the Matte White screen material itself, it seems durable - and indeed you can wash the surface with a damp
cloth, though for most dirt and dust a soft duster will work wonders. The gain is 1.1 and it has a viewing angle of 100
degrees (50 degrees to either side of center, which is wide enough for just about any practical use. The black 1.25-inch
fixed masking around the screen looked to be made well and I noticed no tears or inconsistencies on the front of the
screen. The rear looked like some glue had dried in a more randomized manner, but it didn't appear to be anything other
than cosmetic - in an area where it would never be seen except by nosey reviewers.
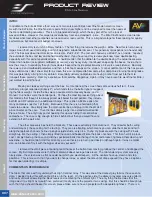
The case is durable but lightweight. I didn't feel 100% secure in the twin buckle clasps that adorned the front of the case,
locking it closed. A double latch would have been more confidence-inspiring, though the case never once popped open of
its own accord. It is possible that larger screens utilize this type of locking mechanism as the online video shows a differ-
ent style of buckling clasp. When the case is opened the extending height adjustment pole was found locked securely in
place behind the screen. The system really does look solid, with parts that aren't likely to wear out or break over a typical
lifespan. I especially liked the ability, however slight to tilt the screen one notch position to manually keystone it to fit the
projector angle in the event that you have a slightly off-axis alignment.
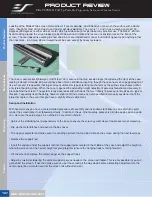
Setup and Installation
With fixed screens you have a more detailed procedure of assembly and instructions to follow, any one of which could
render the screen lame if not followed perfectly. In contrast, the ez-Cinema setup process is akin to popping open a soda
can. Here are the setup steps in a nutshell (a very small nutshell):
• Spin out the stabilizing feet perpendicular to the base to ensure the screen system doesn't topple over when raised up
• Flip up the metal latches and open up the box cover
• Fire up your projector and make sure it is sending a picture that can be visible on the screen during the next few steps
• Remove the support rod
• Insert the square end of the support rod into the support plate located in the middle of the case and adjust the height to
where the screen is at the correct height for your projector (ensure the hanging hook is facing forward)
• Lift the screen and place the metal hanger on the support hook.
• Adjust by raising or lowering the vertical support pole as needed - the screen will follow. This is only possible if you can
get behind the screen. If not, then make sure you put the screen all the way down before attempting adjustments to the
vertical pole (be certain to never let the screen fall without tension.)
107
www.elitescreens.com
Product Reviews
News Release
Marketing
Contact
001
www.elitescreens.com
Product Reviews
News Release
Marketing
Contact
Product Review
Elite F80NWH Pull Up Portable Projection Screen-ezCinema Series
Содержание VMAX200XWV PLUS3
Страница 1: ......
Страница 37: ...034 www elitescreens com Manual Screens CineTension2 Series Fixed Frame Screens Portable Screens...
Страница 69: ...066 www elitescreens com Manual Screens CineTension3 Series Fixed Frame Screens Portable Screens...
Страница 82: ...079 www elitescreens com Custom Size Request Form...
Страница 88: ......
Страница 121: ...118...
Страница 122: ...119...
Страница 123: ...120...
Страница 124: ...121...
Страница 133: ...Notes 130...
Страница 134: ...www elitescreens com...


