Elikon EVD2-30KIT Скачать руководство пользователя страница 5

1.

Playback

: Select it to play the videos/pictures recorded(or when the monitor is in standby 

mode, press CALL Button to enter the playback function).
Note: the playback function will be activated only when the system connect SC6V module, 
otherwise, this function is unvalid in normal. For more information, please refer to SC6V 
user instruction in detail.

2.

light

:Select it to open the staircase light(or press staircase light button), the staircase light 

will be turned off automatically.

Note: the staircase light function will be activated only when the system connect light via 
RT-SC6V/DT-RLC module, otherwise, this function is unvalid in normal. For more 
information, please refer to DT-SC6V/DT-RLC user instruction in detail.
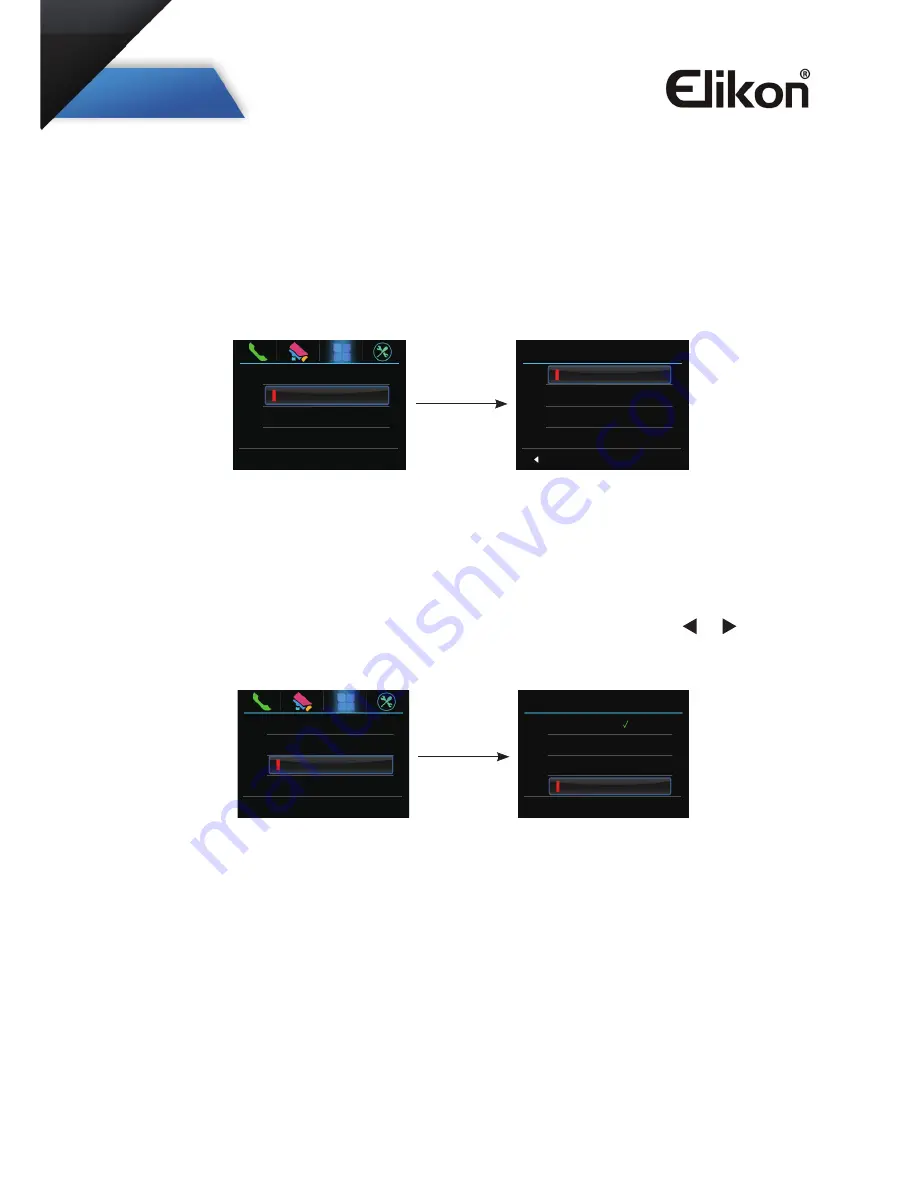
3.

Call Transfer

:Select it and press MENU Button to enter the transfer mode.Use   ▲  / ▼ 

Button to move upward / downward to select the Edit Numbers item to input the telephone 
number , and then use ▲ / ▼ Button to increase / decrease the value; use 


 /    Button to 

select last/next digital. After inputing,press MENU Button to confirm.

Playback                            >

Light                                  >

Call Transfer                     >

Light Option

Turn on

Turn on 5 Min

Turn off

Exit

1:Don't Transfer----calls from outdoor station will not be diverted.
2:If No Answer----outdoor station calls indoor monitor firstly,if nobody answer 
the call within 30 seconds,the call will be diverted to the telephone number you set. 
At this mode,the monitor will shut off immediately when TPC/GSM/TPS divert 
sucessfully,while it won't affect the communication between TPC/GSM/TPS and 
outdoor station.Otherwise, the monitor can do the operation of monitoring,talking,and 
unlocking.
3:Simutaneously----calls from outdoor station will be diverted to your telephone 
immediately.At this mode,the monitor won't shut off when TPC/GSM/TPS divert 
sucessfully,but if the monitor answers the call at this time,TPC/GSM/TPS will quit 
absolutely.

Playback                            >

Light                                  >

Call Transfer                     >

Call Transfer

Don’t Transfer

No Answer

Simultaneously

Edit Numbers

4

Содержание EVD2-30KIT

Страница 1: ...ENGLISH 2 WIRE INTERCOM SYSTEM USER MANUAL TALK MENU MONITOR EVD2 30KIT...

Страница 2: ...unting Bracket Special 2 wire cables to connect with Monitor 2 Wire the system correctly see the later connection chapter then hang the Monitor on the Mounting Bracket firmly 145 160 cm Microphone LCD...

Страница 3: ...s are installed press button to choose the first camera the screen will display the image from the first door camera Similarly Press button to choose the second one Press button to choose the third on...

Страница 4: ...to move upward downward to select the item you want press MENU Button to enter 1 Monitor Select it to monitor the view of outside 2 Monitor Doors if multi door stations are installed you can press Mon...

Страница 5: ...o input the telephone number and then use Button to increase decrease the value use Button to select last next digital After inputing press MENU Button to confirm Playback Light Call Transfer Light Op...

Страница 6: ...he User Setup item then press MENU Button to enter the User Setup mode You can adjust the ring tune ring volume and restore in this page 7 Basic Setup Instructions 7 1 How to Enter Main Menu Page Inte...

Страница 7: ...r as a Guard Monitor 8 3 How to set the slave monitor address Maximum 4 monitors can be connected in one apartment one master monitor together with 3 slave monitors so you should set the address corre...

Страница 8: ...to 1 Unlock mode Unlock menu The code of 8014 is used to open the unlock menu The code of 8015 is used to close the unlock menu Note When you input code 8014 to open the unlosk menu you can release tw...

Страница 9: ...3 1 2 3 4 5 6 ON Code 14 1 2 3 4 5 6 ON Code 25 1 2 3 4 5 6 ON Code 4 1 2 3 4 5 6 ON Code 15 1 2 3 4 5 6 ON Code 26 1 2 3 4 5 6 ON Code 5 1 2 3 4 5 6 ON Code 16 1 2 3 4 5 6 ON Code 27 1 2 3 4 5 6 ON...

Страница 10: ...are ring tone and talking volume adjustment 4 Note that all the modifications will be done immediately after the operation Press button to move leftmost or rightmost of menu to quit the adjust page 10...

Страница 11: ...nsumption Standby 7 51mA Working status 155mA Monitor screen 3 5 Inch color LCD Display Resolutions 320 R G B x 240 pixels Video signal 1Vp p 75 CCIR standard Wiring 2 wires non polarity Monitor time...

Страница 12: ...The design and specifications can be changed without notice to the user Right to interpret and copyright of this manual are preserved TALK MENU MONITOR...

Отзывы: