http://www.elfinx.com
32
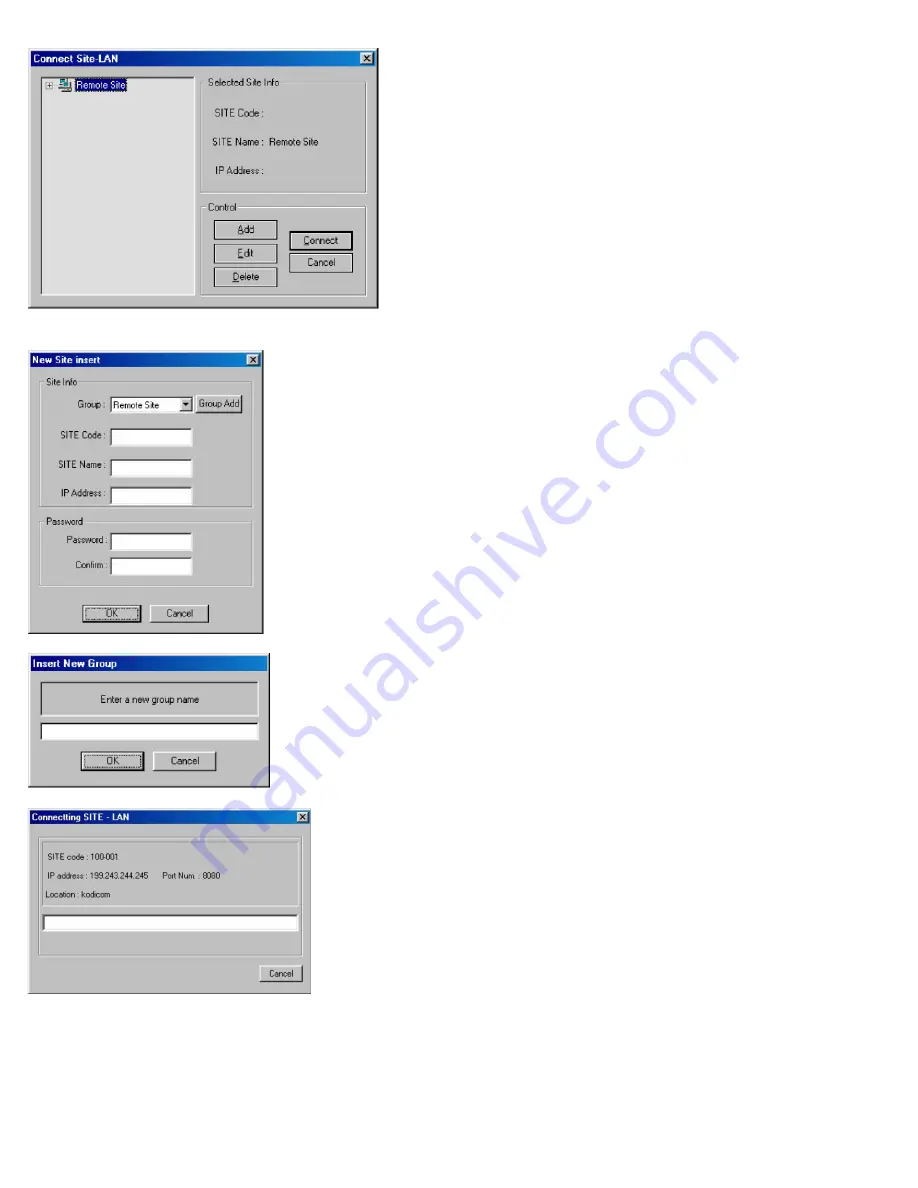
The following window will appear:
1.
2.
3.
4.
5.
Add: Selecting this option adds remote LAN locations to
the remote site list.
Edit: Selecting this option will edit the Remote Site, which
is highlighted.
Delete: Will delete the selected Remote Site.
Connect: Will connect to the selected Remote Site.
Cancel: Allows the user to cancel the connection.
To add a new Remote Site select the Add button. And the following window will appear:
1.
2.
3.
4.
5.
6.
7.
8.
9.
Site code: This can fit up to 7 characters.
Note
: This must match with your “Site code” on the site
remote.
*Click ‘Group Add’ button.
Group: is the group to which user would like to place the
connection under.
Add Group: Enables the user to add a Group.
Note
: enter the name of the new Group and select OK to
continue.
Site name: Choose any name to describe the remote site
Password: This can fit up to 5 characters. This password
must match with your “Password” on the remote site.
IP address: The user can enters the IP address in this
area. (Does not work with a domain name)
Cancel: Allows user to cancel the connection.
Password: Enter the password required to connect to the
remote location.
Confirm: Enter the password again to confirm.
Note
: once the user clicks “connect”, the ‘Connecting
SITE – LAN’ window will appear, showing the status of
the connection.
Содержание TX-DSR16
Страница 22: ...http www elfinx com 22...
Страница 23: ...http www elfinx com 23...


