background image

26

Consistent and proper cleaning is essential to 

maintaining your ceramic glass cooktop.

Before cleaning the cooktop, be sure the controls are 

turned to OFF and the cooktop is COOL. 

Cooktop maintenance

Cooktop cleaning

IMPORTANT

CAUTION

CARE & CLEANING

Prior to using your cooktop for the first time, apply 

a ceramic cooktop cleaning cream (available in most 

hardware, grocery and department stores) to the ceramic 

surface. Clean and buff with a clean paper towel. This will 

make cleaning easier when soiled from cooking. Cooktop 

cleaning creams leave a protective finish on the glass to 

help prevent scratches and abrasions.
Sliding aluminum or copper clad bottom pans on the 

cooktop can cause metal markings on the cooktop surface. 

These marks should be removed 

immediately

 after the 

cooktop has cooled using the cooktop cleaning cream. 

Metal marks can become permanent if not removed prior 

to future use.
Cookware (cast iron, metal, ceramic or glass) with rough 

or dirty bottoms can 

mark or scratch

 the cooktop 

surface.

Do not:

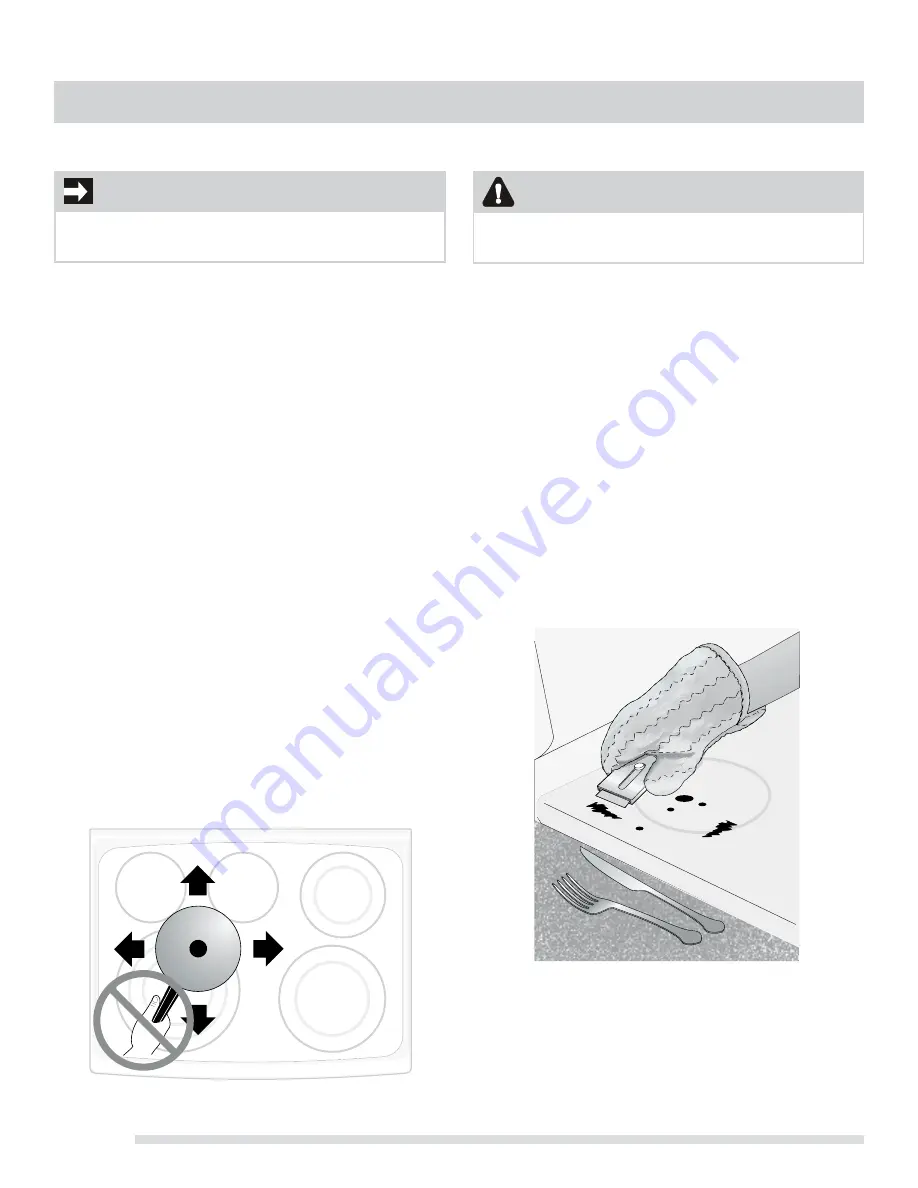
•  Slide anything metal or glass across the cooktop. 

•  Use cookware with dirt or dirt build up on bottom; 

replace with clean cookware before using.


•  Use your cooktop as a cutting board or work surface in 

the kitchen.

•  Cook foods directly on the cooktop surface without a 

pan.

•  Drop heavy or hard objects on the ceramic glass 

cooktop, they may cause it to crack.

For light to moderate soil

Apply a few drops of cooktop cleaning cream directly 

to the cooktop. Use a clean paper towel to clean the 

entire cooktop surface. Make sure the cooktop is cleaned 

thoroughly, leaving no residue. Do not use the towel you 

use to clean the cooktop for any other purpose.

For heavy, burned on soil

Apply a few drops of glass-ceramic cooktop cleaner 

directly to the soiled area. Rub the soiled area using a 

non-abrasive plastic type no-scratch cleaning pad, applying 

pressure as needed. Do not use the pad you use to clean 

the cooktop for any other purpose.
If soils remain, carefully scrape soils with a metal razor 

blade scraper, holding scraper at a 30 degree angle to 

the surface. Remove loosened soils with cooktop cleaning 

cream and buff surface clean.

Содержание Frigidaire CGEF3030PF

Страница 1: ...01 Rev D May 2015 Important Safety Instructions 3 5 Features at a Glance 6 Before Setting Oven Controls 7 8 Before Setting Surface Controls 9 10 Setting Surface Controls Ceramic cook top 11 14 Oven Control Functions 330 330i 15 Setting Oven Controls 16 22 Self Cleaning 24 Care Cleaning 25 28 Before You Call 29 30 Notes 31 Major Appliance Warranty 32 ...

Страница 2: ...ucts Inc All rights reserved Printed in the USA PRODUCT RECORD AND REGISTRATION Product Registration 2 Important Safety Instructions 3 5 Features at a Glance 6 Before Setting Oven Controls 7 8 Removing replacing arranging the oven racks 7 Effortless Oven Rack system and assembly 8 Before Setting Surface Controls 9 10 About the ceramic cooktop radiant elements 9 Cookware material types 10 Setting S...

Страница 3: ...ce any part of the appliance unless specifically recommended in the manuals All other servicing should be done only by a qualified technician This may reduce the risk of personal injury and damage to the range Ask your dealer to recommend a qualified technician and an authorized repair service Know how to disconnect the power to the range at the circuit breaker or fuse box in case of an emergency ...

Страница 4: ... oven vent is located under the left rear surface element if your model is equipped with coil elements The oven vent is located below the backguard for models equipped with ceramic glass cook tops Touching the surfaces in this area when the oven is operating may cause severe burns Also do not place plastic or heat sensitive items on or near the oven vent These items could melt or ignite Placement ...

Страница 5: ...ORTANT INSTRUCTIONS FOR USING YOUR COOKTOP Know which knob controls each surface heating unit Place a pan of food on the unit before turning it on and turn the unit off before removing the pan Use proper pan size This appliance is equipped with one or more surface units of different sizes Select utensils having flat bottoms large enough to cover the surface unit heating element The use of undersiz...

Страница 6: ...n door latch 15 Quick Bake cooking system fan some models 16 Adjustable interior oven rack s Effortless Oven Rack system not shown some models 17 Large 1 piece oven door handle 18 Full width oven door with window 19 Storage drawer with large 1 piece door handle some models or lower cover panel some models 20 Easy to clean upswept cooktop 21 Ceramic smoothtop elements styles and color will vary by ...

Страница 7: ...pace place the bottom oven rack some models in the lowest rack position for baking and when roasting large cuts of meat Removing replacing arranging racks To remove pull the rack forward until it stops Lift up front of rack and slide out To replace fit the rack onto the guides on the oven walls Tilt the front of the rack upward and slide the rack back into place Arranging always arrange the oven r...

Страница 8: ...s 4 and 5 for the other connector arm 7 Once both connector arms are properly in place be sure to test the oven rack operation by gently closing the oven door The oven rack should move in and out of the oven freely when the door is opened or closed CAUTION REMOVE ALL OVEN RACKS and accessories before starting a self clean cycle If the oven racks are left in the oven during the self clean cycle the...

Страница 9: ...s not flat Be sure to read the detailed instructions for ceramic glass cooktop cleaning in the General Care Cleaning and Before You Call checklist sections of this Use Care Manual BEFORE SETTING SURFACE CONTROLS Air circulation in the oven For best baking results allow 2 4 5 10 cm around the cookware for proper air circulation and be sure pans and cookware do not touch each other the oven door sid...

Страница 10: ...in enamel coating must be smooth to avoid scratching ceramic cooktops Glass Slow heat conductor Not recommended for ceramic cooktop surfaces because it may scratch the glass Using proper cookware The size and type of cookware used will influence the setting needed for best cooking results Be sure to follow the recommendations for using proper cookware as illustrated in Figs 2 3 Cookware should hav...

Страница 11: ...icator lights will glow when one or more elements are turned ON A quick glance at these indicator lights when cooking is finished is an easy check to be sure all control knobs are turned OFF The Hot Surface indicator light will continue to glow AFTER the control knob is turned to the OFF position and will glow until the heating surface area has cooled sufficiently NOTES Fig 2 Radiant surface eleme...

Страница 12: ... turn the dual radiant surface element OFF before removing the cookware Start most cooking operations on a higher setting and then turn to a lower setting to finish cooking The surface control knobs do not have to be set exactly on a particular mark Use the marks as a guide and adjust the control knob as needed A glowing red surface heating area extending beyond the bottom edge of the cookware ind...

Страница 13: ... Always use potholders or oven mitts when removing food from the keep warm zone as cookware and plates will be hot Radiant surface elements may appear to have cooled after they have been turned off The glass surface may still be hot and burns may occur if the glass surface is touched before it has cooled sufficiently Do not place flammable items such as plastic salt and pepper shakers spoon holder...

Страница 14: ...tart with hot tap water to bring water to boil more quickly Use the highest heat seating when first bringing the water to a boil Once boiling is achieved reduce heat to lowest possible setting to maintain that boil Radiant surface elements may appear to have cooled after they have been turned off The glass surface may still be hot and burns may occur if the glass surface is touched before it has c...

Страница 15: ...te timer The minute timer does not start or stop cooking Also Timer On Off pad is used to set the continuous bake function Oven light pad Use to turn the interior oven light ON or OFF Quick Bake pad activates the Quick Bake feature Up and down arrow pads Use with the feature or function pads to set oven temperature bake time start time clean time when programming an automatic start time setting or...

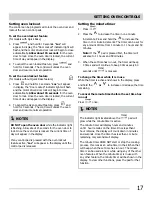
Страница 16: ...eature 1 Press appears in the display 2 Press and hold the until HI appears in the display 3 Press and hold until F or C appears in the display 4 Press the or to change F to C or C to F 5 Press any control pad to return to normal operating mode Setting a silent control panel When choosing a function a beep will be heard each time a pad is pressed If desired the control can be programmed for silent...

Страница 17: ...hown in the display To view other functions press the pad for that function To set the oven lockout feature for models without Quick Bake feature 1 Press and hold for 3 seconds Loc will appear in display the Door Locked indicator light will flash and the motor driven door lock will begin to close automatically Allow about 15 seconds for the oven door to lock Once the oven door is locked the curren...

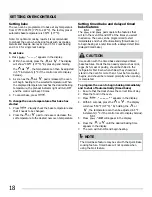
Страница 18: ...ng timed bake and delayed timed bake features The and pads operate the features that will turn the oven ON and OFF at the times you select in advance The oven can be programmed to start immediately and shut off automatically timed bake or to begin baking at a later time with a delayed start time delayed timed bake Use caution with the timed bake and delayed timed bake features Foods that can easil...

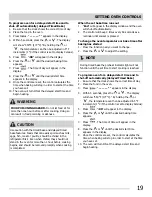
Страница 19: ...imed bake the preheat indicator light will not function until the set time to start cooking is reached To program oven for a delayed start time and to shut off automatically delayed Timed Bake 1 Be sure that the clock shows the correct time of day 2 Place the food in the oven 3 Press appears in the display 4 Within 5 seconds press the or The display will show 350 F 177 C By holding the or the temp...

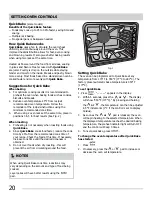
Страница 20: ... 2 When roasting 1 Preheating is not necessary when roasting foods using Quick Bake 2 Since Quick Bake cooks food faster reduce the cook time by 25 from the recommended cook time of your recipe Check the food at this time If necessary increase cook time until the desired doneness is obtained 3 Do not cover foods when dry roasting this will prevent the air from circulating around the food Fig 1 6 1...

Страница 21: ...drain and be kept away from the high heat of the broiler DO NOT use the pan without the insert DO NOT cover the insert with foil the exposed grease could ignite DO NOT use the broil pan without the insert or cover the insert with aluminum foil The exposed fat could ignite CAUTION WARNING Should an oven fire occur close the oven door and turn the oven OFF If the fire continues use a fire extinguish...

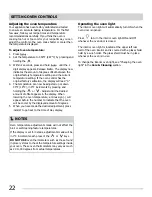
Страница 22: ... 287 C by pressing and holding the 3 Within 2 seconds press and hold until the 2 digit display appears Release The display now indicates the amount of degrees offset between the original factory temperature setting and the current temperature setting If the oven control has the original factory calibration the display will read 0 4 The temperature can now be adjusted up or down 35 F 19 C in 5 F in...

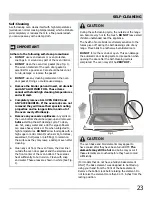
Страница 23: ...g temperatures and will melt Completely remove ALL OVEN RACKS and ANY ACCESSORIES If the oven racks are not removed they will loose their special coating properties and no longer slide in and out of the oven cavity effortlessly Remove any excessive spillovers Any spills on the oven bottom should be wiped up and removed before starting the self cleaning cycle To clean use hot soapy water and a clot...

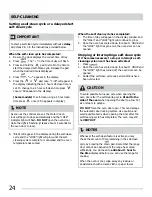
Страница 24: ...as cooled Whenever the self clean feature is active you may check the amount of time remaining in the self clean cycle by pressing the pad Remember the range door cannot be opened until the range has cooled sufficiently You will need to add about 1 hour to the time displayed before you can use the range for cooking When the oven is cool wipe away any residue or powdered ash with a damp cloth or pa...

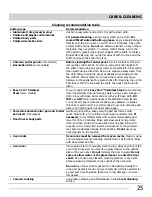
Страница 25: ...r cloth Rinse with clean water and dry with a soft clean cloth DO NOT use ANY store bought cleaners like Stainless Steel cleaners or any other types of cleaners containing any abrasive chlorides chlorines or ammonia It is recommended to use mild dish soap and water or a 50 50 solution of water and vinegar Porcelain enamel broiler pan and broiler pan insert if equipped Door liner body parts Gentle ...

Страница 26: ...s can mark or scratch the cooktop surface Do not Slide anything metal or glass across the cooktop Use cookware with dirt or dirt build up on bottom replace with clean cookware before using Use your cooktop as a cutting board or work surface in the kitchen Cook foods directly on the cooktop surface without a pan Drop heavy or hard objects on the ceramic glass cooktop they may cause it to crack For ...

Страница 27: ...oktop surface Do not use the following on the cooktop Do not use abrasive cleaners and scouring pads such as metal and some nylon pads They may scratch the cooktop making it more difficult to clean Do not use harsh cleaners such as chlorine bleach ammonia or oven cleaners as they may etch or discolor the cooktop Do not use dirty sponges cloths or paper towels as they can leave soil or lint on the ...

Страница 28: ...ven frame see fig 4 To replace oven door 1 Firmly grasp both sides of oven door along the door sides Do not use the oven door handle see fig 3 2 Holding the oven door at the same angle as the removal position sit the hook of the hinge arm over the roller pins located on each side of the oven door frame See Fig 4 The hook of the hinge arms must be fully seated onto the roller pins 3 Fully open the ...

Страница 29: ...nough Incorrect control setting Be sure the correct control is ON for the element that you are attempting to use Surface element does not heat Lightweight or warped pans used Use only flat evenly balanced medium or heavyweight cookware Flat pans heat better than warped pans Cookware materials and weight of the material affect heating Heavy medium weight pans heat evenly Because lightweight pans he...

Страница 30: ... smoke are present see About broiling in the Setting Oven Controls section Oven control panel beeps displays any F code error for example F10 F11 F13 F14 F15 F30 F31 or F90 Oven control has detected a fault or error condition Press CANCEL to clear the display stop beeping Try the bake or broil feature again If the F code error repeats remove power from appliance wait 5 minutes and then repower app...

Страница 31: ...31 NOTES ...
Страница 32: ...ding but not limited to floors cabinets walls etc 13 Damages caused by services performed by unauthorized service companies use of parts other than genuine Electrolux parts or parts obtained from persons other than authorized service companies or external causes such as abuse misuse inadequate power supply accidents fires or acts of God DISCLAIMER OF IMPLIED WARRANTIES LIMITATION OF REMEDIES CUSTO...

Отзывы: