background image

37


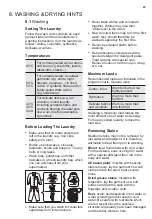
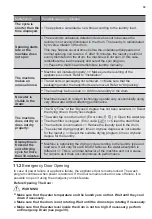
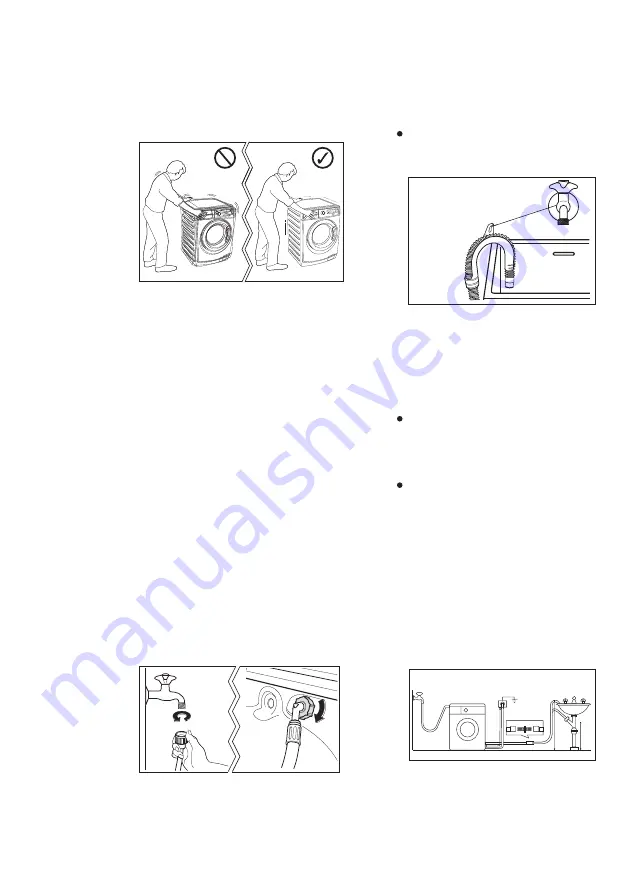
Never place cardboard, wood or 

similar materials under the machine 

to compensate for any unevenness 

in the floor. Install the machine on a 

flat hard floor. Make sure that air 

circulation around the machine is 

not impeded by carpets, rugs etc.

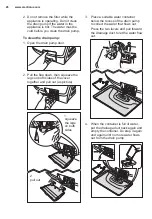
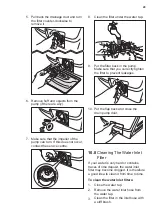
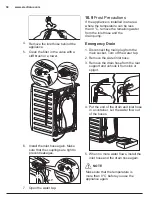
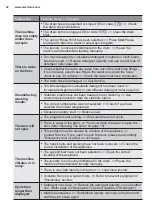
When the washer-dryer is levelled, 

try to rock it from corner to corner. 

If it does rock, adjust the legs 

again until it is levelled and does 

not rock.

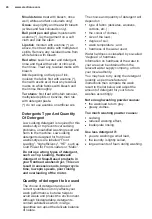
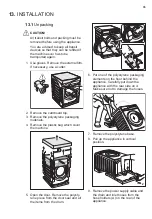
Connect the water inlet hose to a 

tap with 3/4” BSP thread.
Use the hose supplied with the 

washer-dryer. DO NOT USE OLD 

HOSES.
The other end of the inlet hose 

which connects to the machine can 

be turned in any direction. 
Simply loosen the fitting, rotate the 

hose and retighten the fitting, 

making sure there are no water 

leaks.

13.3 

Water Inlet

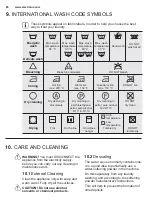
Check that the machine does not 

touch the wall or cupboard units. 

The inlet hose must not be 

lengthened. If it is too short and 

you do not wish to move the tap, 

you will have to purchase a new, 

longer hose specially designed for 

this type of use.

This could be done by tying it to 

the tap with a piece of string or 

attaching it to the wall.
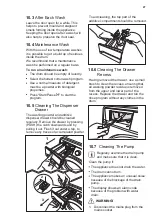
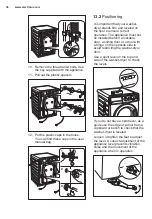
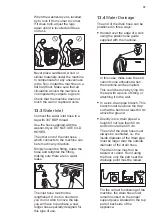
In a sink, drain pipe branch. This 

branch must be above the trap 

so that the bend is at least 60 cm 

above the ground.
Directly into a drain pipe at a 

height of not less than 60 cm 

and not more than 90 cm.
The end of the drain hose must 

always be ventilated, i.e. the 

inside diameter of the drain pipe 

must be larger than the outside 

diameter of the drain hose.
The drain hose must not be 

twisted or curled. Run it along 

the floor; only the part near the 

drainage point must be raised.

The end of the drain hose can be 

positioned in three ways:

Hooked over the edge of a sink 

using the plastic hose guide 

supplied with the machine.

In this case, make sure the end 

cannot come unhooked when 

the machine will be emptied.

13.4

 Water Drainage

For the correct functioning of the 

machine, the drain hose must 

remain hooked on the proper 

support piece situated on the top 

part of back side of the 

appliance.

90 cm

60 cm

Содержание EWW12753

Страница 1: ...EWW12753 User Manual Washer Dryer ...

Страница 2: ...ips Environmental information Subject to change without notice WE RE THINKING OF YOU CUSTOMER CARE AND SERVICE Thank you for purchasing an Electrolux appliance You ve chosen a product that brings with it decades of professional experience and innovation Ingenious and stylish it has been designed with you in mind So whenever you use it you can be safe in the knowledge that you ll get great results ...

Страница 3: ...2 22 6 DAILY USE DRYING Only 21 8 1 Washing 8 2 Drying 8 WASHING DRYING HINTS 23 25 10 1 External Cleaning 10 2 Descaling 10 3 After Each Wash 10 4 Maintenance Wash 10 5 Cleaning The Dispenser Drawer 10 6 Cleaning The Drawer Recess 10 7 Cleaning The Pump 10 8 Cleaning The Water Inlet Filter 10 9 Frost Precautions 10 CARE AND CLEANING 26 26 27 27 27 27 27 29 30 11 1 Possible Failures 11 2 Emergency...

Страница 4: ...t all people using the appliance are thoroughly familiar with its operation and safety features Save these instructions and make sure that they remain with the appliance if it is moved or sold so that everyone using it through its life will be properly informed on appliance use and safety 1 This washer dryer is not intended for use by young children or infirm persons without supervision Young chil...

Страница 5: ...t in any way During high temperature wash program the door glass may get hot Do not touch it Make sure that small pets do not climb into the drum To avoid this please check inside the drum before using the appliance Any objects such as coins safety pins nails screws stones or any other hard sharp material can cause extensive damage and must not be placed into the machine Only use manufacturer s re...

Страница 6: ...e appliance check that it is not standing on the inlet and drain hose and the worktop is not pressing the electrical supply cable If the appliance is installed on a carpeted floor please adjust the feet in order to allow air to circulate freely Always be sure that there is no water leakage from hoses and their connections after the installation Any plumbing work required to install this appliance ...

Страница 7: ...tems can become hot enough to catch fire Piling stacking or storing oil affected items can prevent heat from escaping and so create a fire hazard Items containing foam rubber also known as latex foam or similarly textured rubber like materials should not be dried in a washer dryer on a heat setting Fabric softeners or similar products should not be used in a washer dryer to eliminate the effects o...

Страница 8: ...Device 12 Transit Bolt 13 Mains Cable 14 Water Inlet Hose Transit Bolts Hose Support 15 16 Water Drain Hose 8 Drum Lifter All transit bolts 3 pcs must be removed before using the appliance 2 3 4 6 7 5 1 12 15 14 16 For more information see page 28 For more information see page 17 For more information see page 5 9 8 10 13 11 Level Adjustment Feet Front Level Adjustment Feet Back CAUTION ...

Страница 9: ...nnect the drain hose on the edge of a sink Plastic Caps To close the holes on the rear side of the cabinet after the removal of the transit bolts Plastic Hose Guide To remove the transit bolts To adjust levelling legs Spanner ...

Страница 10: ...ad 14 Vapour Touchpad Prewash Touchpad Child Lock Option see page 15 A Rinse Plus Icon Child Lock Icon Door Lock Icon Dryness Level Icon Vapour Icon Drying Status Icon Washing Status Icon B C D E F G H 3 2 Display 3 1 Control Panel Description 1 2 3 6 8 10 9 13 14 5 11 12 Digital The level of Time Manager Wash Dry Cycle Time The alarm codes Refer to the chapter Troubleshooting for their descriptio...

Страница 11: ...and decrease the energy consumption The time of the washing program is extended Delicate fabrics such as acrylics viscose polyester items Adjust wash time according to soil level See Time Manager table on page 14 Non Stop washing and drying program for 3 5 shirts with lightly soil Cottons Off Mixed Delicates WashDry 60 Quick 18 Wool 2 Energy Saver program with 40degC option selected is recommended...

Страница 12: ...Touchpad Press this touchpad repeatedly to increase or decrease the spin speed or select Rinse Hold if you want your laundry to be spun at a speed different from the one proposed by the washer dryer No spin option eliminates all the spin phases and increase the number of rinses No Spin By selecting this option the water of the last rinse is not emptied out and the drum turns regularly to prevent t...

Страница 13: ...ated on a default load size At the end of the program the appliance performs the anti crease phase for approx 10 minutes During this time the display will show time remaining and door is locked Type of fabric Load kg Spin Speed rpm Suggested Times Hrs Cotton and linen bathrobes bath towels etc Dry Time Option Guidelines 4 5 2 5 4 2 1200 1200 1200 3 4 2 3 1 2 Synthetic or mixed fabric items jumpers...

Страница 14: ...eft at a low temperature Additional drying Prewash Touchpad Select this option if you wish your laundry to be pre washed before the main wash Use this option for heavy soil The indicator of this option will be on When you set this function put the detergent into the compartment This function increases the program duration Rinse Plus Option This option is recommended for people who are allergic to ...

Страница 15: ...ance unsupervised with the door closed without having to worry that children might be injured by or cause damage to the appliance To activate the function press Dry Time and Dryness touchpads at the same time until the display shows the symbol To set Child Lock option This setting permits you to either enable or disable the buzzer at the end of the program As an example you might wish to disable t...

Страница 16: ...am You can only add clothes if Start Pause pilot light is lit Wait for the machine to come to a complete stop before opening the door Resume the program by pressing Start Pause touchpad again Add clothing and close the door BEFORE FIRST USE 4 Ensure that the electrical and water connections comply with the installation instructions Put 2 litres of water in the detergent compartment for washing pha...

Страница 17: ...a time shaking them out as much as possible Refer to page 23 WASHING DRYING HINTS 5 Close the door 6 Check and remove objects if there are any that could be trapped in the fold 4 Make sure that no laundry remains between the seal and the door The selector knob can be turned either clockwise or anticlockwise Position Off to reset program switching OFF the machine At the end of the program the selec...

Страница 18: ...r 2 If you wish to carry out the Prewash phase pour it into the compartment marked If required pour fabric softener into the compartment marked Close the drawer gently Residues of detergent softener and water may remain in the dispenser It is recommended to clean the dispenser regularly to remove any residue The amount used must not exceed the MAX mark in the drawer If you use thick softeners it i...

Страница 19: ...ar this means that the machine is already heating and the water level is above the bottom edge of the door or the drum is turning In this case the door CAN NOT be opened If you need to open it you must drain the water to open the door In case of emergency please refer to Emergency door opening on page 33 5 8 Opening The Door NOTE If an option is not compatible with the wash program selected symbol...

Страница 20: ...is on The door stays locked 1 To drain the water Press the Start Pause touchpad The appliance drains the water and spins with the maximum spin speed for selected program Alternatively before pressing the Start Pause touchpad you can press the Spin touchpad to change the spin speed You can select No Spin if you want the machine to only drain the water 2 turn the program selector knob to the positio...

Страница 21: ...rying performance 5 Select the drying program Drying Cottons for cotton items or Drying Mixed for synthetic or mixed fabric items 4 If you wish to select an automatic drying press the Dryness option until the icon corresponding to the required dryness level appears on the display see page 13 6 If you wish to select a timed drying press the Dry Time option repeatedly until desired drying time reach...

Страница 22: ...ted every minute on the display 6 At the end of the program turn the program selector knob to the position Off to deactivate the appliance 7 NON STOP program Washing Program Dryness Option NON STOP program Washing Program Dry Time Option NOTE Some drying level options are not available for some programs If you set only 15 minutes of drying the appliance performs only a cooling phase When Iron Dry ...

Страница 23: ...re left in the laundry e g hair clips safety pins pins Before Loading The Laundry Recommended loads are indicated in the program charts General rules Washing a maximum load makes the most efficient use of water and energy For heavily soiled laundry reduce the load size Cotton linen drum full but not too tightly packed Synthetics drum no more than half full Delicate fabrics and woollens drum no mor...

Страница 24: ...types of detergent such as Top Loading Handwash detergent or Soap Based products in your frontload washer dryer This can result in excessive suds longer cycle time low spin speeds poor rinsing and overloading of the motor The choice of detergent and use of correct quantities not only affects your wash performance but also helps to avoid waste and protect the environment Although biodegradable dete...

Страница 25: ... before starting the wash program If using liquid detergents a program without prewash must be selected Particularly delicate items such as synthetic curtains woollen and silk garments with metal inserts nylon stockings bulky garments such as anoraks bed covers quilts sleeping bags and duvets must not be machine dried Avoid drying dark clothes with light coloured fluffy items such as towels as the...

Страница 26: ... all Ironing Dry cleaning Drying Flat Tumble dry DO NOT tumble dry High temperature Low temperature On clothes hanger On the line Energetic wash Delicate wash CARE AND CLEANING 10 WARNING You must DISCONNECT the appliance from the electricity supply before you can carry out any cleaning or maintenance work The water we use normally contains lime It is a good idea to periodically use a water soften...

Страница 27: ...t the hottest cotton wash program Use a normal measure of detergent must be a powder with biological properties To run a maintenance wash To aid cleaning the top part of the additive compartment should be removed Having removed the drawer use a small brush to clean the recess ensuring that all washing powder residue is removed from the upper and lower part of the recess Replace the drawer and run ...

Страница 28: ... squeeze the legs on both sides of the cover together and pull out as picture 3 Place a suitable water container below the recess of the drain pump to collect the water that flows out Press the two levers and pull forward the drainage duct to let the water flow out squeeze the legs on both sides pull out 1 2 4 When the container is full of water put the drainage duct back again and empty the conta...

Страница 29: ...ages 10 Put the flap back and close the drain pump door Remove the water inlet hose from the water tap Clean the filter in the inlet hose with a stiff brush 5 Pull back the drainage duct and turn the filter counter clockwise to remove it 1 2 If your water is very hard or contains traces of lime deposit the water inlet filter may become clogged It is therefore a good idea to clean it from time to t...

Страница 30: ... the remaining water from the inlet hose and the drain pump Emergency Drain 10 9 Frost Precautions Disconnect the main plug from the main socket Turn off the water tap 1 2 Remove the water inlet hose 3 Remove the drain hose from the rear support and unhook it from sink or spigot Put the end of the drain and inlet hose in a container Let the water flow out of the hoses 4 5 When no more water flows ...

Страница 31: ...been closed Error code Close the door firmly The plug is not properly inserted in the power socket Insert the plug into the power socket There is no power at the socket Please check your domestic electrical installation The Start Pause touchpad has not been pressed Press the Start Pause touchpad The Delay Start has been selected If the laundry are to be washed immediately cancel the Delay Start Th...

Страница 32: ...ine and redistribute laundry manually There is very little laundry in the drum Load more laundry Unstable floors eg wooden floors Refer to relevant paragraph in Positioning section There is water in the drum You must drain the water to open the door refer Opening The Door on page 19 This problem may be caused by a failure of the appliance Contact Service If you need to open the door please read ca...

Страница 33: ...ssary Make sure that the water level inside the drum is not too high If necessary perform an Emergency Drain see page 30 Display time is frozen at the end of drying cycle for more than 30 minutes The machine does not dry or does not dry properly Malfunction Possible cause Solution The electronic unbalance detection device has cut in because the laundry is not evenly distributed in the drum The lau...

Страница 34: ...tion Drying Cottons Drying Mixed 4 5 kg 3 kg Drying 0 8 MPa 0 05 MPa 220 240 V 50 Hz Wash 2100 W Dry 1100 W Minimum fuse protection 10 A To open the door proceed as follows If you are unable to identify or solve the problem contact our service centre Before calling service centre make a note of the model serial number and purchase date of your machine the Service Centre will require this informati...

Страница 35: ...n be refitted if the machine ever has to be transported again Use gloves Remove the external film If necessary use a cutter Remove the polystyrene packaging materials Remove the plastic bag which cover the machine Open the door Remove the polysty rene piece from the door seal and all the items from the drum All transit bolts and packing must be removed before using the appliance CAUTION 1 2 Remove...

Страница 36: ...dge of a door frame cupboard or bench to check that the washer dryer is leveled It is important that your washer dryer stands firm and leveled on the floor to ensure correct operation The appliance must not be installed behind a lockable door a sliding door or a door with a hinge on the opposite side to avoid restricting the washer dryer door 10 11 Pull out the plastic spacers 12 Put the plastic c...

Страница 37: ...he tap you will have to purchase a new longer hose specially designed for this type of use This could be done by tying it to the tap with a piece of string or attaching it to the wall In a sink drain pipe branch This branch must be above the trap so that the bend is at least 60 cm above the ground Directly into a drain pipe at a height of not less than 60 cm and not more than 90 cm The end of the ...

Страница 38: ... water energy and to help protect the environment we recommend that you follow these tips Use authorized disposal sites for your old appliance Help to keep your country tidy The symbol on the product or on its packaging indicates that this product may not be treated as household waste Instead it shall be handed over to the applicable collection point for the recycling of electrical and electronic ...

Страница 39: ...n or service iii normal wear and tear iv power surges electrical storm damage or incorrect power supply v incomplete or improper installation vi incorrect improper or inappropriate operation vii insect or vermin infestation viii failure to comply with any additional instructions supplied with the Appliance In addition Electrolux is not liable under this warranty if a the Appliance has been or Elec...

Страница 40: ...www electrolux com G0012006 001 A00973018 ...

Отзывы: