background image

- 7 -

OPERATING INSTRUCTIONS

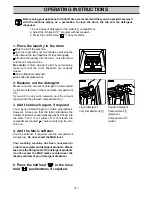
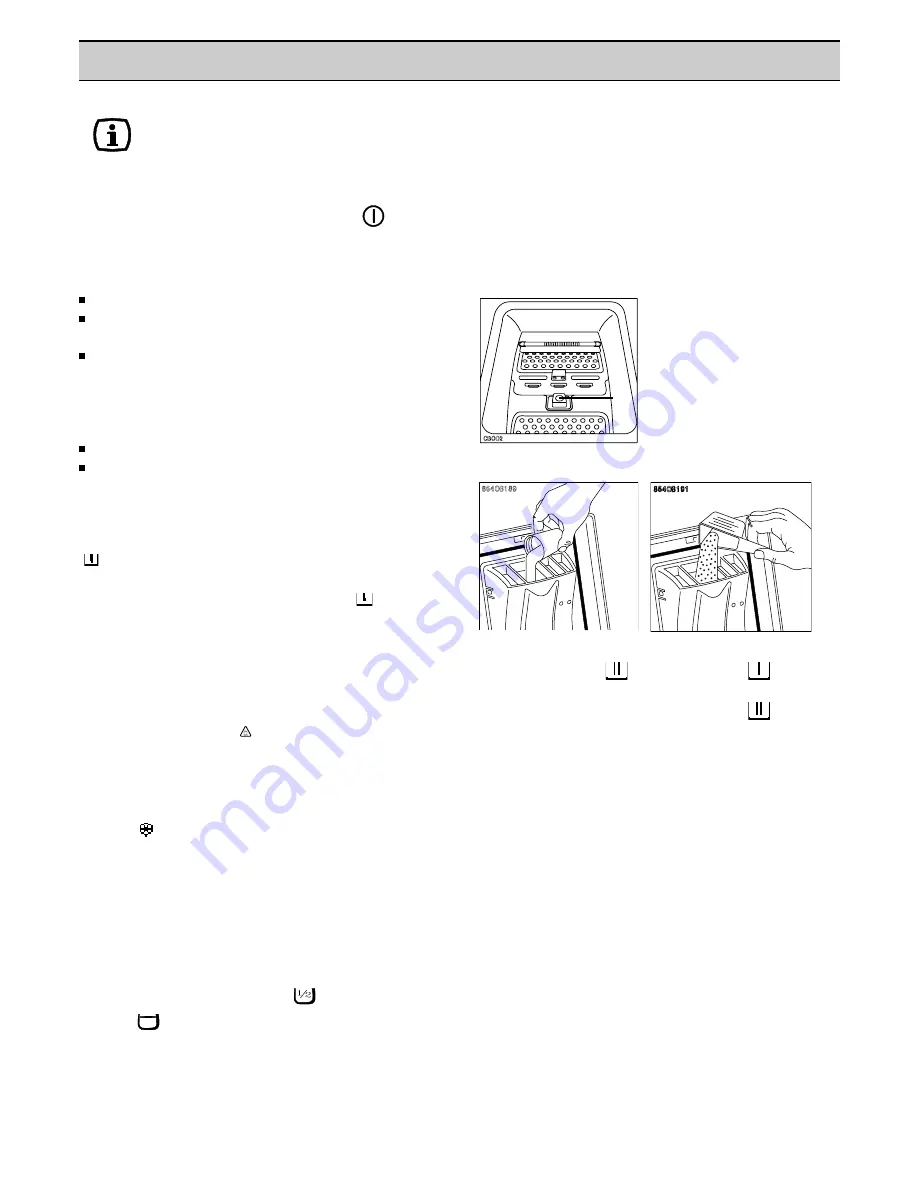
1. Place the laundry in the drum

 lift up the lid of the machine.
 open the drum with your two hands by pressing the

button A and the two flapdoors till they disengage.

 introduce the laundry into the drum ; close the drum

and the lid of the machine.
Be careful : before closing the lid of your machine,
make sure that the drum flapdoors are correctly
closed :

 the two flapdoors fastened,
 the button A pressed out.

2. Measure out the detergent

Measure out the amount of detergent recommended
by the manufacturer in the main wash compartment
( ).
If you wish to carry out a prewash, pour the amount
required into the prewash compartment (

).

3. Add the bleach agent, if required

You may use a bleach agent on cotton programmes.
However, make sure that the fabric withstands the
treatment. Bleach is automatically washed down into
the drum. Pour 1/4 to 1 glass of 12° chl bleach into
compartment marked ( ) before switching the ma-
chine on.

4. Add the fabric softener

Pour the softener, if required, into the compartment
marked ( ). Do not exceed the MAX level.

Your washing machine has been conceived in
order to save water and detergent products. Please
take care the filling level of the detergent products
do not exceed the MAX marks located near the
display window of your detergent dispenser.

5. Press the half load "

" or the rinse

hold "

" pushbuttons if required.

A

Liquid detergent
only compartment 

Powder detergent
Compartment 
(prewash)
Compartment 
(wash)

Before using your appliance for the first time, we recommend that you do a preliminary wash
with the machine empty, as a precaution to clean the drum, the tub and the detergent
dispenser.

1. Pour a dose of detergent in the “washing” compartment.
2. Select the "whites 90°C" program without prewash.

3. Press the on/off button "

". The cycle starts.

Содержание EW1024T

Страница 1: ...INSTRUCTIONS MANUAL EW 1024 T 146 1903 03 GB WASHINGMACHINE ...

Страница 2: ...e 15 If something doesn t work 16 17 Service 18 For the installer Technical information 19 Installation Unpacking 19 Installation 20 Levelling 20 Moving of the appliance 20 Water connection 21 Electrical connection 21 Guide to use the instruction The following symbols will be found in the text to guid you throughout the instructions Safety instructions Hints and tips Environmentalinformation ...

Страница 3: ...eum products If volatile cleaning fluids have been used make sure that they are thoroughly removed from the fabrics before they are placed in the appliance Small and delicate objects e g baby socks stockings can be easily washed inside a small pillowcase with a zip fastener or in larger socks Use only the recommended quantities of fabric conditioner Before cleaning care and maintenance ensure that...

Страница 4: ...Anti balanced system This safety allows to the appliance to keep a perfect stability during the intermediaryspinningsandduringthefinalspinning Ifyounoticethatyourlaundryisnotspinnedenough the anti balanced system has then detected a bad distribution of the laundry during the final spinning so it is adviced to realize a new spinning taking care to unpack handly the laundry before Environmental info...

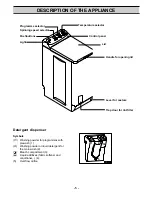
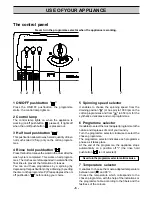
Страница 5: ... powder or liquid detergent for the main wash 2 Bleach compartment 3 Liquid additives fabric softener and conditioner 4 5 Overflow orifice Control panel Lid Handle for opening lid Trap door for lint filter Lever for castors Pushbuttons Programme selector Temperature selector Light 1 2 34 5 Spinning speed selector ...

Страница 6: ...before doing your choice Never turn the programme selector when the appliance is working 5 Spinning speed selector It enables to choose the spinning speed from the draining position or no spin to 1000 rpm on the cotton programmes and from to 650 rpm for the synthetics delicates and wool programmes 6 Programme selector Itenablestoselectthemostadaptedprogrammetothe nature and degreees of soil of you...

Страница 7: ...eatment Bleach is automatically washed down into the drum Pour 1 4 to 1 glass of 12 chl bleach into compartment marked before switching the ma chine on 4 Add the fabric softener Pour the softener if required into the compartment marked Do not exceed the MAX level Your washing machine has been conceived in ordertosavewateranddetergentproducts Please take care the filling level of the detergent prod...

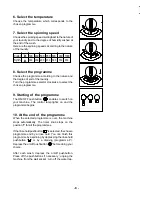
Страница 8: ...FF pushbutton enables to switch on your machine The control lamp lights on and the programme begins 10 At the end of the programme When the selected programme is over the machine stops automatically The timer knob stops on the position I for all the programmes Iftherinseholdpushbutton isselected thechosen programme end by a rinse hold You can finish this programme by a spinning by depressing the r...

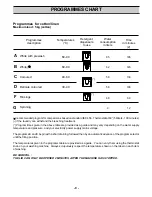
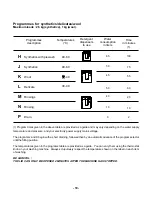
Страница 9: ... given in the above table are provided as a guide and may vary depending on the water supply temperature and pressure and your electricity power supply mains voltage The programs B and C begin with a short draining followed then by an automatic advance of the program selector until the filling position The temperatures given in the programs table are provided as a guide You can vary them using the...

Страница 10: ...epending on the water supply temperature and pressure and your electricity power supply mains voltage The programs J and K begin with a short draining followed then by an automatic advance of the program selector until the filling position The temperatures given in the programs table are provided as a guide You can vary them using the thermostat knob on your washing machine Always scrupulously res...

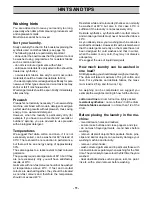
Страница 11: ...at 40 C Garments with non fast colours should not be washed at temperatures above 40 C If fast and non fast colours are washed together they should be treated as non fast colours and therefore the temperature should not exceed 40 C Resistant white and coloured synthetics can normally be washed at 60 C but also in this case 40 C is sufficient if the laundry is not excessively dirty Delicate synthet...

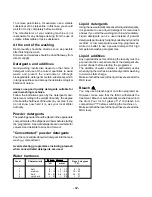
Страница 12: ...er detergents Pour the concentrated powder detergent into the main wash compartment Avoid selecting programmes including prewash when concentrated detergents are used Level Characteristic French degrees dH m mol T H 1 Soft 0 7 0 1 3 0 15 2 medium 8 14 1 4 2 5 16 25 3 hard 15 21 2 6 3 8 26 37 4 very hard 21 3 8 37 German degrees German degrees German degrees German degrees German degrees Liquid det...

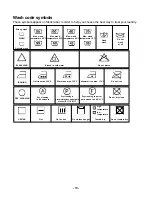
Страница 13: ...perature 30 C Hand wash Do not wash at all BLEACHING Bleach in cold water Do not bleach IRONING Hot iron max 200 C Warm iron max 150 C Lukewarm iron max 110 C Do not iron DRY CLEANING Dry cleaning in perchlorethylene petrol pure alcohol R 111 R 113 Dry cleaning in all solvents Dry cleaning in petrol pure alcohol and R 113 Do not dry clean DRYING On the line Flat On clothes hanger Tumble dry high t...

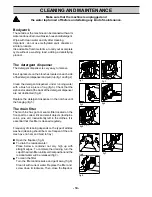
Страница 14: ...5 The drain filter The machine has got a mecanic filter located on the front part to collect lint and small objects toothpins coins pins etc inadvertently left in the clothes It is essential that this filter is cleaned regularly Frequency of cleaning depends on the type of articles washed cleaning should be more frequent if the arti cles have no hem and tend to fray Open the flapdoor fig 6 To drai...

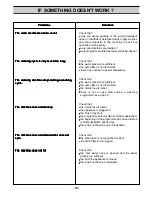
Страница 15: ... The machine does not fill The machine does not fill The machine does not fill The machine does not fill IF SOMETHING DOESN T WORK Check that was the wrong quantity or the wrong detergent added Insufficient detergent leads to grey washes and scale deposits in the machine Check the quantities more exactly were special stains pre treated wereprogrammeandtemperaturecorrectlychosen Check that the wate...

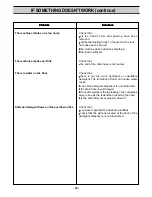
Страница 16: ...f the drain hose is not too low Check that there is not too much detergent or unsuitable detergent The formation of foam can cause water leaks one of the detergent dispenser is not obstructed the drain hose is well hanged if one of the joints or the tap leaking It is not always easy to see as the leak often runs along the hose is the drain filter cover properly closed Check that you have respected...

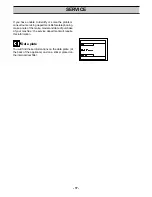
Страница 17: ... Before telephoning make a note of the make model and date of purchase of your machine the service department will require this information Data plate You will find these informations on the data plate at the back of the appliance and on a sticker placed on the internal door filter SERVICE ...

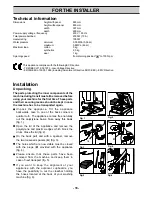
Страница 18: ...time These parts and their securing means should be kept in case the machine has to be transported again Unpack the appliance Tilt the appliance backwards Give to one of the back corners a quarter turn The appliance comes free naturally out the polystyrene basis Take away this basis fig 1 Open the lid of the appliance and remove the polystyrene and plastic wedges which block the drum Close the lid...

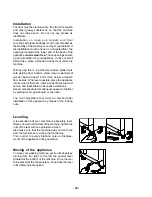
Страница 19: ...floor boards Wherever possible place the appliance inthecorneroftheroom therewoodenfloorsaremost secure and least liable to resonance vibrations Nevercompensateforsmallunevennessesinthefloor by placing wood pasteboard or such like The front adjustable feet must be blocked after installation of the appliance by means of the locking nuts Levelling It is essential that your machine is absolutely leve...

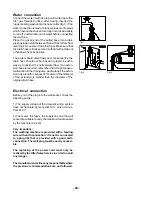
Страница 20: ...uired remember that it might cause a malfunction in the drain pump particularly if the exten sion has a length in excess of 1 meter or if the diameter of the extension is smaller than the diameter of the original drain hose Electrical connection Before you fit the plug into the wall socket check the following points 1 The supply voltage of the domestic wiring system does not fluctuate by more that...

Страница 21: ...05 02 ELECTROLUX HOME PRODUCTS OPERATIONS EUROPE 146 1903 03 ...

Отзывы: