Setting up your oven’s accessories
Continued
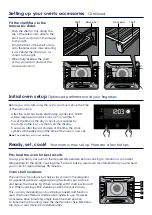
Fit the shelf/tray to the
telescopic slides
• Push the shelf or tray along the
top of the telescopic slide to the
back post, as shown in the image
to the right.
• Drop the front of the shelf or tray
onto the telescopic slide ensuring
it sits behind the front post, as
shown to the right.
• When fully inserted, the shelf
or tray should not obstruct the
closed oven door.
Pre-heat the oven for best results
Always pre-heat your oven to the desired temperature before cooking to maintain a consistent
temperature for the entire cooking time. For best baking results, we recommend that you pre-heat
your oven for approximately 30 minutes.
Ready, set, cook!
Your oven is now set up. Here are a few hot tips
Initial oven setup
Optimised performance at your fingertips
1
2
3
4
5
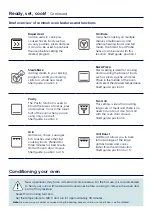
Oven shelf locations
The oven has 5 positions for shelves (as shown in the diagram).
As a general guide we suggest giving maximum space above
and below the shelves. Eg. When cooking with 1 shelf, position at 1
or 2. When cooking with 2 shelves, position them at 2 and 4.
This can vary depending on food being cooked and function
used. We have offered a shelf position guide to use. However,
to increase base browning simply lower the shelf position.
To increase top browning, raise the shelf position. See Electrolux
Life App or user manual for additional tips.
Front post
Back post
Shelf
Shelf
Before you can start using the oven, you must set up the time
of the oven clock.
• After the oven has been electrically connected, ’12:00’
will be displayed and the clock icon will flash.
• To set the time of the day in hours and minutes by
touching on the
+
or
–
symbols on the display.
• 5 seconds after the last change of the time, the clock
symbol will disappear and the time of the oven is now set.
Note:
The clock has a 24-hour display.


