


TECHNICAL DATA
Dimension
Height
1600 mm
Width
600 mm
Depth
650 mm
Rising Time
30 h
The technical information are situated in the
rating plate on the internal left side of the ap-
pliance and in the energy label.
INSTALLATION
Read the "Safety Information" carefully
for your safety and correct operation of
the appliance before installing the
appliance.
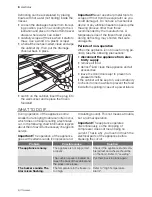
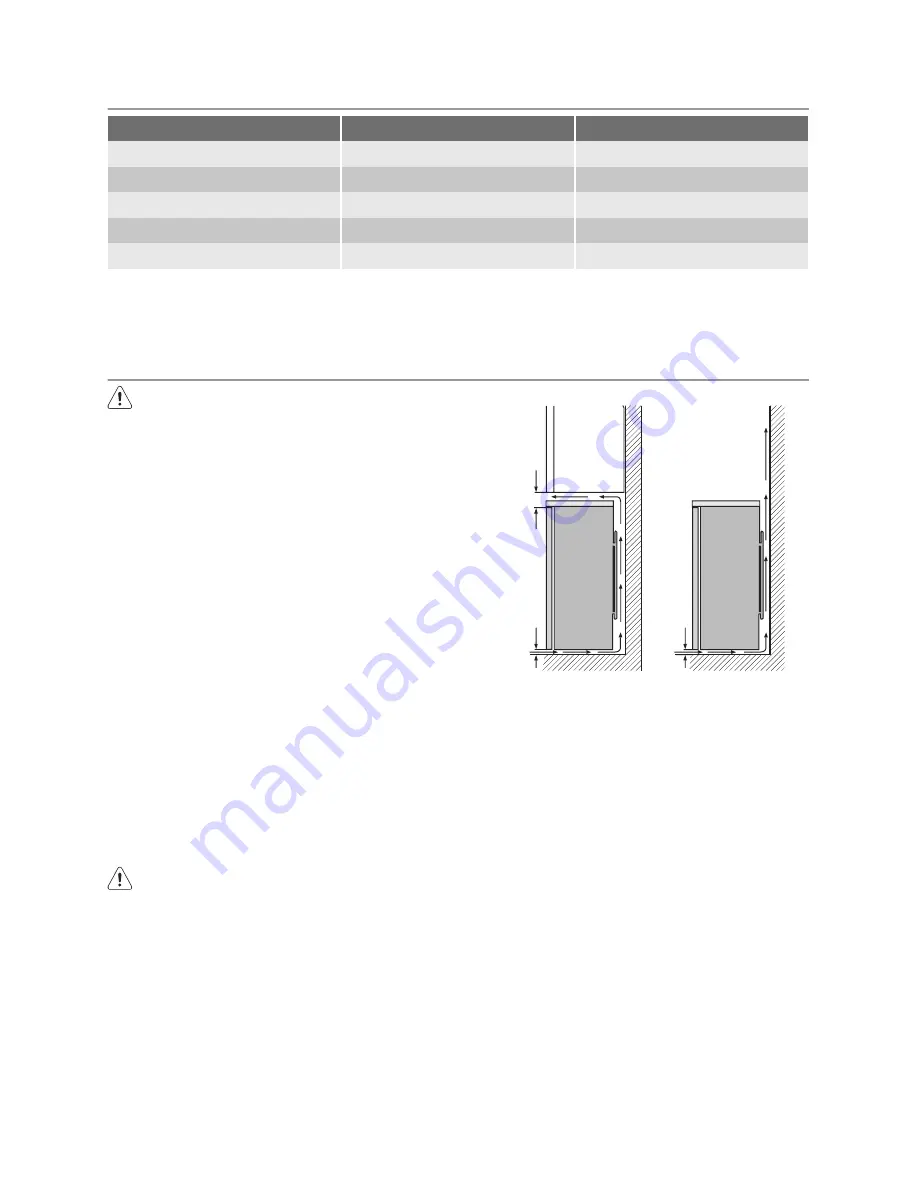
Location
The appliance should be installed well away
from sources of heat such as radiators, boil-
ers, direct sunlight etc. Ensure that air can
circulate freely around the back of the cabi-
net. To ensure best performance, if the ap-
pliance is positioned below an overhanging
wall unit, the minimum distance between the
top of the cabinet and the wall unit must be
at least 100 mm . Ideally, however, the ap-
pliance should not be positioned below over-
hanging wall units. Accurate levelling is en-
sured by one or more adjustable feet at the
base of the cabinet.
If the cabinet is placed in a corner and the
side with the hinges facing the wall, the dis-
tance between the wall and the cabinet must
be at least 10 mm to allow the door to open
enough so that the shelves can be removed.
Warning!
It must be possible to
disconnect the appliance from the mains
power supply; the plug must therefore
be easily accessible after installation.
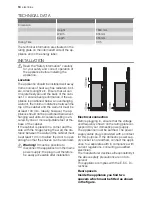
10mm
10mm
100mm
Electrical connection
Before plugging in, ensure that the voltage
and frequency shown on the rating plate cor-
respond to your domestic power supply.
The appliance must be earthed. The power
supply cable plug is provided with a contact
for this purpose. If the domestic power sup-
ply socket is not earthed, connect the appli-
ance to a separate earth in compliance with
current regulations, consulting a qualified
electrician.
The manufacturer declines all responsibility if
the above safety precautions are not ob-
served.
This appliance complies with the E.E.C. Di-
rectives.
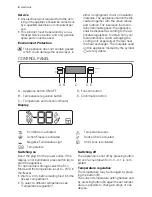
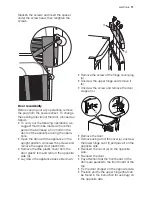
Rear spacers
Inside the appliance you find two
spacers which must be fitted as shown
in the figure.
10
electrolux
Содержание EUC25391W
Страница 1: ...user manual Freezer EUC25391W ...
Страница 13: ...electrolux 13 ...
Страница 14: ...14 electrolux ...
Страница 15: ...electrolux 15 ...
Страница 16: ...212720681 00 31032010 www electrolux com shop ...


