background image

22

TECHNICAL SPECIFICATIONS

The technical data is indicated in the rating plate on the left side inside the appliance.

CUSTOMER SERVICE AND
SPARE PARTS

If the appliance is not functioning properly, check that:

the plug is firmly in the wall socket and the mains
power switch is on;

there is an electricity supply (find out by plugging in
another appliance);

the thermostat knob is in the correct position.

If there are water drops on the bottom of the cabinet,
check that the defrost water drain opening is not
obstructed (see "Defrosting" section).

If your appliance is still not working properly after
making the above checks, contact the nearest service
centre.

To obtain fast service, it is essential that when
you apply for it you specify the model and serial
number of your appliance which can be found on
the guarantee certificate or on the rating plate
located inside the appliance, on the bottom left-
hand side.

INSTALLATION

lf this appliance featuring magnetic door seals is
to replace an older appliance having a spring lock
(latch) on the door or lid, be sure to make that
spring lock unusable before you discard the old
appliance. This will prevent it from becoming a
death-trap for a child.

Positioning

The appliance should be installed well away from
sources of heat such as radiators, boilers, direct
sunlight etc.
Best performance is obtained with ambient
temperature b18°C and +43°C (class T);
+18°C and +38°C (class ST); +16°C and +32°C
(class N); +10°C and +32°C (class SN).
The class of your appliance is shown on its rating
plate.

For building-in and door reversibility refer to the
relevant instructions.

Electrical connection

Before plugging in, ensure that the voltage and
frequency shown on the serial number plate
correspond to your domestic power supply.
Voltage can vary by ±6% of the rated voltage.
For operation with different voltages, a suitably sized
auto-transformer must be used.

Important

The appliance must be earthed.
The power supply cable plug is provided with a
contact for this purpose.
If the domestic power supply socket is not
earthed. connect the appliance to a separate
earth in compliance with current regulations,
consulting a specialist technician.

The Manufacturer declines all responsibility if the
above safety precautions are not observed.

Attention!
It must be possible to disconnect the appliance

from the mains power supply; the plug must
therefore be easily accessible after installation.

Содержание ERN1571

Страница 1: ...GEBRAUCHSANWEISUNGEN INSTRUCTION BOOKLET 2222 744 61 ERN 1571 K ü h l s c h r a n k r e f r i g e r a t o r GB D ...

Страница 2: ... Movable shelves 19 Positioning the door shelves 19 Hints 19 Hints for refrigeration 19 Hints for freezing 19 Hints for storage of frozen food 20 Maintenance 20 Defrosting 20 Periodic cleaning 21 Periodic of non operation 21 Interior light 21 Customer service and spare parts 22 Instructions for the installer Technical specifications 22 Installation 22 Positioning 22 Electrical connection 22 Door r...

Страница 3: ...e appliance See defrost instructions Do not place carbonated or fizzy drinks in the freezer as it creates pressure on the container which may cause it to explode resulting in damage to the appliance Do not use a mechanical device or any artificial means to speed up the thawing process other than those recommended by the manufacturer Never use metal objects for cleaning your appliance as it may get...

Страница 4: ...do this will result in component failure and possible food loss See installation instructions Parts which heat up should not be exposed Wherever possible the back of the product should be against a wall If the appliance has been transported horizontally it is possible that the oil contained in the compressor flows in the refrigerant circuit It is advisable to wait at least two hours before connect...

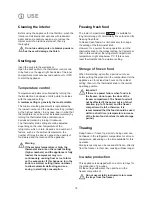
Страница 5: ...e knob to a warmer setting lower numbers to allow automatic defrosting and so a saving in electricity consumption Freezing fresh food The 4 star compartment is suitable for long term storage of commercially frozen food and for freezing fresh food To freeze fresh foods it is not necessary to change the setting of the thermostat knob However for a quicker freezing operation turn the thermostat knob ...

Страница 6: ...se should have a top and should be stored in the bottle rack on the door Raw meat beef pork lamb poultry wrap in polythene bags and place on top of the salad compartment this being the coldest spot in the refrigerator Meat can only be stored safely in this way for one or two days at the most Bananas potatoes onions and garlic if not packed must not be kept in the refrigerator Hints for freezing To...

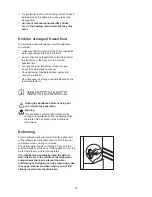
Страница 7: ...he storage period indicated by the food manufacturer D037 Unplug the appliance before carrying out any maintenance operation Warning This appliance contains hydrocarbons in its cooling unit maintenance and recharging must therefore only be carried out by authorised technicians Defrosting Frost is automatically eliminated from the evaporator of the refrigerator compartment every time the motor comp...

Страница 8: ...vaporator as you could damage it Do not use a mechanical device or any artificial means to speed up the thawing process other than those recommended by the manufacturer A temperature rise of the frozen food packs during defrosting may shorten their safe storage life PR151 Periodic cleaning Never use metal objects for clearing your appliance as it may get damaged Clean the inside with warm water an...

Страница 9: ... discard the old appliance This will prevent it from becoming a death trap for a child Positioning The appliance should be installed well away from sources of heat such as radiators boilers direct sunlight etc Best performance is obtained with ambient temperature between 18 C and 43 C class T 18 C and 38 C class ST 16 C and 32 C class N 10 C and 32 C class SN The class of your appliance is shown o...

Страница 10: ...ature is cold i e in Winter the gasket may not fit perfectly to the cabinet In that case wait for the natural fitting of the gasket or accelerate this process by heating up the part involved with a normal hairdrier D163 B A Inner door reversal 1 Using a screwdriver release bracket 1 by pressing on the internal spring Fig and withdraw it from its seat together with the door 2 remove plug 2 and fit ...

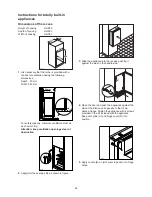
Страница 11: ...ion openings clear of obstruction 50 mm min cm2 200 200 cm 2 min D526 540 50 560 550 880 PR 32 2 Apply joint the sealing strip as shown in figure D132 A D022 3 Slide the appliance into the recess pushing it against the wall on the handle side 4 Open the door and push the appliance against the side of the kitchen unit opposite to that of ap pliance hinges Fasten the appliance with 4 screws provided...

Страница 12: ...learance of slots At the end of operations it is necessary to check if the door of the furniture closes properly 8mm PR167 A B 9 Open the appliance door and the furniture door at 90 Insert the small square B into guide A Put together the appliance door and the furniture door and mark the holes as indicated in the figure Remove the squares and drill holes with Ø 2 mm at 8 mm from the outer edge of ...

Страница 13: ......

Страница 14: ......

Страница 15: ...ELECTROLUX HOME PRODUCTS OPERATIONS EUROPE ...

Отзывы: