background image

Содержание EI23BC60KS1

Страница 1: ...Electrolux I H FREEZER REFRIGERATOR USE AND cARE GuiDE FR RE FRIGERATEUR CQNGELATEUR GU DE D UTILISATION ET DIENTRETIEN ES REFRiGERADOR CON CONGELAD R GU A DE USO YCOIDADO ...

Страница 2: ...ent to customer sat sfact on and f Sa ety 3 product qualitythroughoutthe service life of your new appliance FeatureOverview 5 Keep a record for quick Installation 6 reference Removing the Doors 11 nn in h W r I 14 _o ecl gl e ale _uppy __ controls _ Electrolux model number A tornatieleelVlaker 17 ___ StorageFeatures 18 St0 gF00_ _S_ _ gE 0 gv 23 24 Changing the Water andAir Filters 25 i _ _i i_ii_...

Страница 3: ...take the precautions listed below Proper Disposal of Refrigerators Freezers i_i _ _i i_ii_ i _ ...

Страница 4: ...damaged it should be replaced by the manufacturer service technician or a qualified person Never unplug the refrigerator by pulling on the power cord Always grip the plug firmly and pull straight out from the receptacle to prevent damaging the power cord To avoid electrical shock unplug the refrigerator before cleaning and before replacing a light bulb or LED light Performance may be affected if t...

Страница 5: ...Luxury Glide TM Lu ury Glide TM i_i _ _i i_ii_ i _ ...

Страница 6: ...your model We recommend using a service or kitchen contracting professional to installyour refrigerator Use the refrigerator only as instructed inthis Use Care Guide Before starting the refrigerator follow these important first steps Allow the following clearances for ease of installation proper air circulation and plumbing and electrical connections Sides Top inch 9 5 mm Back 1 inch 25 4 ram Choo...

Страница 7: ...4 Tighten four 4 drawer screws 5 Recheck gasket seal cabinet isstable 4 Afterunitisleveled lower anti tip leguntilit contacts thefloor i_i _ _i i_ii_ i _ ...

Страница 8: ...screw 2 Loosen screw 3 Adjust door to desired location 5 Retighten screw 6 Screw e Retighten Screw Ensure door stops in desired location before resuming normal use To level the doors using the adjustable lower hinge select models 1 Remove all food items from door bins on door being adjusted 2 Open doors to 90 degrees 3 Loosen or remove screw i _ _i i_ii_ i _ _i i_ii_ i _ _i i_ii_ i _ _i i_ii_ i _ ...

Страница 9: ...hinge i_i _ _i i_ii_ i _ ...

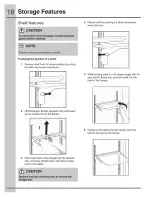
Страница 10: ...desired locations 1 Remove shelf from its locked position by pulling the slide mechanism toward you Relock shelf by pushing the slide mechanism away from you While holding shelf at a 45 degree angle with the gray handle facing you push the shelf into the back of the hanger i _ _i i_ii_ i _ _i i_ii_ i _ _i i_ii_ i _ _i i_ii_ i _ _i i_ii_ i _ _i i_ii_ i _ _i i_ii_ i _ _i i_ii_ i _ _i i_ii_ i _ _ii_i...

Страница 11: ...steps 7 iii iii iii iii iii iii iii iii iii iii iii Lower Hinge Removal Once both doors are in place ensure they are aligned with each other and level please see the Installation section for more details and replace the top hinge cover Removing Freezer Drawer 1 Open freezer drawer 2 Remove drawer screws on right and left sides two 2 screws on each side Multi wire Cables m r Head Drawer _ _ _ _q_ _...

Страница 12: ... iiiiiiiiiiiiiiiiiiiiiiiiiiiiiiiiiiiiiiiiiiiiiiiiiii __ Slot _ _ iiiiiiiiiiiiiiiiiiiiiiiiiiiiiiiiiiiiiiiiiiiiiiiiiii 2 Reinstall four 4 drawer screws two 2 per side tighten down and close drawer C iii_i _ _ ii ii i_II I_ iil ii_ _i_i iiii Push Against Freezer Drawer A iiiiiiiiiiiiiiiiiiiiiiiiiiiiiiiiiiiiiiiiiiiiiiiiiiiiiiiiiiiiiiiiiiiiiiiiiiiiiiiiiiiiiiiiiiiiiiiiiiiiiiiiiiiiiii 6 Tighten four 4 dr...

Страница 13: ...install opposite handle Ensure theholes forthe setscrews arefacing towards thefirstdoor i_i _ _i i_ii_ i _ ...

Страница 14: ...letandfingertightencompressionnutontovalve Tightenanotherhalfturnwithawrench UONOT overtighten SeeFigure 1 Ifyouusestainlesssteeltubing Thenutand ferrulearealreadyassembledonthetubing Slide compression nutontovalveinletandfingertighten compression nutontovalve Tightenanotherhalfturn withawrench UONOTovertighten SeeFigure2 5 Withsteelclampandscrew securewatersupplyline coppertubingonly torearpanelo...

Страница 15: ...rom Fahrenheitto Celsius Tonesemitted by eachkey press can beturned off based on user preference The sounds are mutedwhen the red indicator is lit Warning signalswill stay active Resetsall refrigerator settings suchas temp temp display andtones to their fac tory defaultsettings Pressand hold for three 3 secondsto turn off the cooling system to cleanthe refrigerator It also turns off the ice maker ...

Страница 16: ...e High Temp alarm is active for health reasons If a high temperature alarm is activated during this time for example due to a door left ajar the alarm will sound intermittently for about two 2 minutes The alarm will then silence on its own and a red high temperature icon will display The high temp icon will continue to display even if the door is closed until the Sabbath mode is exited and the ico...

Страница 17: ... if activated at your user interface allow an increase in ice production You do not need to deactivate it if not needed your refrigerator will operate on normal conditions Turning the ice maker on and off Ice production is controlled by lifting lowering the ice maker s wire signal arm To gain access to the ice maker pull the freezer drawer out Lift the wire signal arm to turn the ice maker OFF and...

Страница 18: ...i _ _i i_ii_ i _ _i i_ii_ i _ _i i_ii_ i _ _i i_ii_ i _ _i i_ii_ i _ _i i_ii_ i _ _i i_ii_ i _ _i i_ii_ i _ _i i_ii_ i _ _ii_i ...

Страница 19: ...Opening Crisper Drawer Crisper humidity control Some models are equipped with a drawer i_i _ _i i_ii_ i _ ...

Страница 20: ...thaw setting holds a temperature for thawing frozen foods for 12 hours At the end of that time it then switches to the snacks setting to store the thawed food To opo ato 1 To turn on and off press the drawer s On Off button The numericdisplay wJ lshow a temperature between 28 F and 42 F when on and OFF when off 2 Press F C if you prefer to display Fahrenheit F or Celsius C 3 Press either the up x ...

Страница 21: ...u to efficiently and securely store up to eight 12 ounce canned beverages iiii_ ii_il i i_i Tilt Can Bin To Remove Lower Basket 1 Remove all items from basket 2 Remove the basket by tilting itforward and lifting it from the retainer clips Removing Lower Basket ii_il To reinstall lower basket insert basket into retainer clips ...

Страница 22: ...d lift up in the center of the divider to move it side to side The divider cannot be removed i_ _i ii _ _i _ i_ _i i i Lower Basket PJastic Lower Basket Divider i _ _i i_ii_ i _ _i i_ii_ i _ _i i_ii_ i _ _i i_ii_ i _ _i i_ii_ i _ _i i_ii_ i _ _i i_ii_ i _ _i i_ii_ i _ _i i_ii_ i _ _ii_i Dividers Removal Lift up on the front of the middle divider and pull out i _ _i i_ii_ i _ _i i_ii_ i _ _i i_ii_ ...

Страница 23: ...daysshould befrozen temperature settings ...

Страница 24: ...ling or gurgling sound _ _ B Evaporator fan You may hear air being forced _ _CL_ _1_ _ through the refrigerator by the evaporator fan _ _1 L_ Y_ C Defrost heater During defrost cycles water _ l _ L _ _ dripping onto the defrost heater may cause a _ _ _ _ _ hissing or sizzling sound After defrosting a _ _ i_b popping sound may occur _ e _ _ D Automatic ice maker When ice has been _ produced you wil...

Страница 25: ......

Страница 26: ...isplay changes from Replace to Good the status has been reset Press and hold the Air Filter Reset button on the control panel for three 3 seconds When the display changes from Replace to Good the status has been reset The Air Filter Reset will turn itself off after a few seconds 6 After replacing the water filter and in order for the ice maker to work properly it is necessary _ to clear air from w...

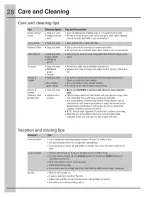
Страница 27: ...nless steel Do not wash any removable parts in a dishwasher Always unplug the electrical power cord from the wall outlet before cleaning Remove adhesive labels by hand Do not use razor blades or other sharp instruments which can scratch the appliance surface Do not remove the serial plate Removal of your serial plate voids your warranty Before moving your refrigerator raise the anti tip brackets s...

Страница 28: ...uid sprays Vacuum Remove toe grille see Installation Instructions _ Vacuum both sides and wipe with sudsy cloth or sponge Rinse and dry i _ _i i_ii_ i _ _i i_ii_ i _ _i i_ii_ i _ _i i_ii_ i _ _i i_ii_ i _ _i i_ii_ i _ _i i_ii_ i _ _i i_ii_ i _ _i i_ii_ i _ _ii_i Exterior Handles Stainless Steel Models Only Soap and water Stainless steel cleaners Never use CHLORIDEor cleaners with bleach to clean s...

Страница 29: ...i_i _ _i i_ii_ i ...

Страница 30: ...hed into placeagainst the wall Turn off householdwater line valve Remove valve restricted by foreign material Ensurethat valve is not a self piercing saddle valve Cleanvalve Replacevalve if necessary s c_ _hath _ c_ _at _v ze n _eth Ice cubes are freezing Ice cubes are not being used frequently Remove ice container and discard ice The ice maker together enough will produce fresh supply Ice should ...

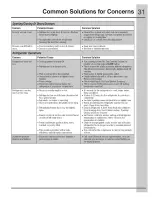
Страница 31: ...s too much ortoolong Room or outside weather is hot Refrigerator has recently been disconnected for a period of time these conditions It takes 8 12 hours for the refrigerator to cool down completely i_i _ _i i_ii_ i _ ...

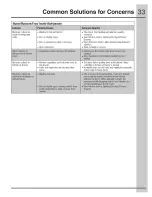
Страница 32: ...It is normal for the freezer compartment to over cool while automatic ice maker is on __ Deactivate Fast Ice function o i te _ Foodstored in drawers I _ control is set too cold Seesolution above freezes Temperatures Are TooWarm Freezer Refrigerator Doors are opened too frequently or too long Warm air enters the refrigerator wheneverthe door is temperature is too opened Openthe door less often warm...

Страница 33: ...i_i _ _i i_ii_ i ...

Страница 34: ... service calls to remote areas including the state of Alaska 13 Damages to the finish of appliance or home incurred during transportation or installation including but not limited to floors cabinets walls etc 14 Damages caused by services performed by unauthorized service companies use of parts other than genuine Electrolux parts or parts obtained from persons other than authorized service compani...

Отзывы: