background image

19

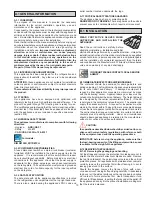
D.3.1 HACCP CONNECTIONS

Refer to the handbook enclosed with the kit for instructions
on installing the accessories.
Basic system connection

The printer can provide a print-out of data collected by the probe
connected to the electronic board.  To do this, connect the se-
rial cable (shielded) to the printer and the appliance itself.  The

serial cable connector is located behind the control panel.
Set the print interval (see 

TPRN

 parameter); and specify the

type of report by setting the 

“PRND”

 parameter.

REPORT PRINT-OUTS

Report print-outs are produced automatically when the appli-

ance is switched on.
The print-out contains data measured by electronic the board
and indicates:

- the date and time of start-up, repeated every 20 lines of tem-

perature;

- the chamber temperature at pre-set intervals (TPRN user

parameter);

- the description of the type of alarm generated complete

with the exact time of the start and end of the alarm;

- time of the start and end of defrosting.

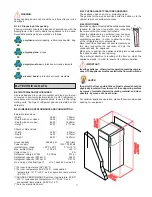
D.4.1 QUICK TROUBLESHOOTING GUIDE

In some cases faults can be remedied easily and quickly. Below
there is a list of possible faults and remedies:

A. 

The appliance doesn’t switch on:

- check that the main circuit breaker is powered.

B. 

The appliance does not reach the set internal temperature:

- check that the condenser is clean;
- check that the cycles have been set properly;
- check that the product has been loaded properly into

the chamber;

C. 

The appliance is excessively noisy:

- check that the appliance is properly levelled.

If it is unbalanced this could cause vibrations.

- check that the cabinet is not touching other units, as this may

cause resonant vibrations.

If the defect persists after having carried out the above checks,
contact the service center, remembering to give the following

details:
• the nature of the fault;
• the appliance’s PNC (production number code);

• the Ser. No. (appliance serial number).

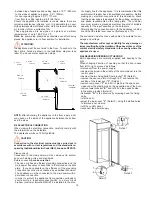
Note: 

the data plate with all the appliance specifications is

located on the refrigeration unit compartment at the top right

hand side.  There is also a plate bearing the appliance’s PNC
code and serial number located underneath the logo.  

These

are essential for identifying the type of appliance and date of

manufacture.

 D.3 HACCP  CONNECTIONS

(ACCESSORIES)

PNC 726377

Ser.No. 44600010

 D.4 TROUBLESHOOTING

Example: PNC 726377 00 - Ser.No. 44600010

726377 00: Prostore Smart
44600010: manufactured in 2004, week 46, 10th item.

D.5.1 WASTE STORAGE

At the end of the appliance’s working life, make sure it is dis-
posed of properly.  Make sure you remove the doors before

scrapping the appliance.
Special waste materials can be stored temporarily while await-
ing processing for disposal and/or permanent disposal.  In

any event, the binding environmental protection laws in the
country of use must be observed.

D.5.2 PROCEDURE FOR PRELIMINARY DISMANTLING

OF THE APPLIANCE

All countries have different legislation; provisions laid down by

the laws and the authorized bodies of the countries where
demolition takes place are therefore to be observed.
In general terms, the refrigerator must be taken to a special-

ized collection/demolition center.
Dismantle the refrigerator and group the components together
according to their chemical characteristics (plastic parts are

marked with letters identifying the material).  Bear in mind that
the compressor contains lubricant oil and coolant, which can
be recycled, and that the refrigerator components are classed

as special waste that cannot be disposed of as urban waste.
Make the appliance unusable by cutting off the power supply
cable and removing the door and or locking mechanisms in

order to avoid the risk of anyone becoming trapped inside.

DISMANTLING OPERATIONS MUST BE CARRIED OUT BY

QUALIFIED PERSONNEL.

• Set of test and inspection documents

• Wiring diagram
• Installation diagram

 D.6 ENCLOSED DOCUMENTS

 D.5 WASTE DISPOSAL AND DEMOLITION

Содержание 727027

Страница 1: ...RONIQUE ROLL IN SMART CONTROL ELECTRÓNICO DEL ROLL IN SMART INSTALLATION OPERATINGANDMAINTENANCEINSTRUCTIONS ISTRUZIONIDIINSTALLAZIONE FUNZIONAMENTOEMANUTENZIONE INSTRUCTIONSD INSTALLATION D UTILISATIONETDEMAINTENANCE INSTRUCCIONESDEINSTALACIÓN USOYMANTENIMIENTO USA Page 07 19 IT Pagina 20 32 FR Page 33 45 ES Página 45 58 ...

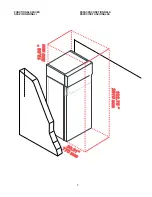
Страница 2: ...TERALE TOP VIEW VISTASUPERIORE I electrical connection Z bolt holes for floor fastening I connessione elettrica Z fori per bulloni fissaggio a pavimento I branchement électrique Z trous de boulon pour fixation au sol I Conexión eléctrica Z Orificios para pernos de anclaje en el suelo VUEDECÔTÉ VISTALATERAL VUEDEFACE VISTAFRONTAL INSTALLATIONDIAGRAM SCHEMA DI INSTALLAZIONE SCHÉMA D INSTALLATION DIA...

Страница 3: ...3 REVERSINGOPENINGOFTHEDOOR INVERSIONEAPERTURADELLEPORTE Dett 2 Dett 3 E F G H L Dett 1 INVERSIONDUSENSD OUVERTUREDELAPORTE CAMBIODEDIRECCIÓNDEAPERTURADELAPUERTA ...

Страница 4: ... Pulsante di sbrinamento manuale UP DEFROST 5 Pulsante inferiore Impostazione temperatura Selezione categoria 6 Pulsante Allarmi HACCP 7 Display 8 Spia stato compressore 9 Spia stato alimentazione 10 Pulsante ON OFF USA IT 1 Bouton ACCESS TO FOOD CATEGORIES 2 Bouton HIGH HUMIDITY ON OFF 2a Témoin lumineux HIGH HUMIDITY 3 Bouton SERVICE ALARMS 3a Témoin lumineux SERVICE ALARMS 4 Bouton MANUAL DEFRO...

Страница 5: ...5 FUNCTIONALSPACES SPAZIFUNZIONALI 19 68 19 68 500 mm 500 mm 30 31 30 31 770 mm 770 mm 102 75 102 75 2610 mm 2610 mm ESPACESFONCTIONNELS ESPACIOSFUNCIONALES ...

Страница 6: ...s page has been intentionally left blank Questa pagina e stata lasciata in bianco intenzionalmente Cette page est intentionnellement laissée blanche Esta página ha sido dejada en blanco de manera intencional ...

Страница 7: ... 2 1 Removing the packaging and handling Page 10 B 1 2 2 Disposing of the packing Page 11 B 2 TECHNICAL DATA Page 11 B 2 1 Materials and fluids used Page 11 B 2 2 Dimensions performance and consumption Page 11 B 2 3 Physical safety features hazards Page 11 B 2 4 Positioning Page 11 B 2 5 Electrical connection Page 12 B 2 6 Reversing opening of the door Page 12 B 2 7 Checking hinges Page 13 C 1 OPE...

Страница 8: ...sories Page 18 D 1 2 Precautions in the event of prolonged disuse Page 18 D 2 MAINTENANCE TO BE PERFORMED BY TRAINED PERSONNEL ONLY Page 18 D 2 1 Periodic cleaning of condenser Page 18 D 2 2 Replacing the power supply cable Page 18 D 3 HACCP CONNECTIONS ACCESSORIES Page 19 D 3 1 HACCP connections Page 19 D 4 TROUBLESHOOTING Page 19 D 4 1 Quick troubleshooting guide Page 19 D 5 WASTE DISPOSAL AND D...

Страница 9: ...safety and good trade practices BEFORESERVICING DISCONNETTHEELECTRICALSERVICE ANDPLACEAREDTAGATTHEDISCONNECT SWITCH TO INDICATE WORK IS BEING DONE ON THAT CIRCUIT NOTICE CONTACTYOUR AUTHORIZEDSERVICECOMPANYTOPERFORMMAINTENANCEANDREPAIRS NOTICE Usinganypartsotherthangenuinefactorymanufacturedpartsrelievesthemanufacturerofallwarrantyand liability NOTICE Manufacturer reserves the right to change spec...

Страница 10: ...ruck to lift appliances Inserting the forks under the pallet lift the appliance and carry it to the place of installation making sure that the load is balanced A 1 1 FOREWORD The purpose of this manual is to provide the necessary information for the correct installation operation use and maintenance of the appliance Consequently the manual and all the technical documentation enclosed with the appl...

Страница 11: ...131 F 55 C and evaporation temperature 14 F 10 C ASHRAE PERFORMANCE ambient temperature 89 6 F 32 C condensation temperature 131 F 55 C and evaporation temperature 44 96 F 7 2 C Auto by electronic board B 2 3 PHYSICALSAFETYFEATURES HAZARDS The appliance has no sharp or projecting parts The guards for the mobile and live parts are bolted on to the cabinet to prevent accidental access B 2 4POSITIONI...

Страница 12: ...rox 3 9 100mm for door opening approx 30 3 770 mm from floor to ceiling approx 8 5 ft 2610mm Should the appliance be installed in rooms where there are corrosive substances chlorine etc it is advisable to go over all the stainless steel surfaces with a cloth coated with vaseline oil in order to form a protective film These appliances are designed to operate at ambient temperatures of up to 109 4 F...

Страница 13: ...CE ALARMS PRINT TEMPERATURE CATEGORY SELECTION MANUAL DEFROST COMPRESSOR STATUS POWER SUPPLY STATUS HACCP ALARMS 7 DAYS REPORT POWER ON OFF 1 Access to Food Categories button 2 High humidity ON OFF button 2a High humidity indicator light 3 Service alarms button 3a Service alarms indicator light 4 Manual defrost UP button 5 Set temperature Category selection DOWN button 6 HACCP alarms button 7 Disp...

Страница 14: ...ture 109 4 F 43 C chamber temperature 35 6 F 2 C R H 75 With button released Low RU average humidity reading with ambient temperature 109 4 F 43 C chamber temperature 35 6 F 2 C R H 65 confirm the set temperature SET press SET DOWN button or MANUAL DEFROST UP button temperature SET or To store the new set value wait until it stops flashing to exit the program SET Here below the temperature range f...

Страница 15: ...EFROST UP button for 5 seconds During this function the dEFr indicator light stays on C 1 7 ALARMS C 1 7 1 General description We have available in the electronic board 2 type of alarm system the HACCP the SERVICE ALARMS The HACCP stores and manages the MAXIMUM CHAMBER HIGH TEMPERATUREALARMS The SERVICE ALARMS stores and manages all the alarms available in the electronic board except the chamber h...

Страница 16: ...within 10 seconds we go out from HACCP section HOW TO CHECK THE OLD ALARMS Keep pressed the button HACCP the display shows AL1 the last alarm to select all the other alarms AL2 AL3 press HOW LONG ARE THE ALARMS RECORDED Forever or better until the memory is out of space maximum number of recorded alarms 99 C 1 7 3 SERVICE ALARMS To have access to SERVICE ALARMS press button for 4 seconds now the d...

Страница 17: ...d the buzzer is active IT IS NECESSARY TOCONTACTTHETECHNICALASSISTANCE To reset the buzzer press the button for 1 second C 1 7 6 HACCP ALARM RESET The maximum number of high chamber temperature recording alarms is 99 Whenever the memory is full and a b2 alarm occurs or at the end of the year it is necessary to reset the memory in the following way press the HACCP button until the label HiSt will a...

Страница 18: ...a protective film make sure that the premises is aired regularly Non routine maintenance tasks must be performed by an AUTHORIZEDSERVICEAGENT USE APPROPRIATE SAFETY GEAR GLOVESANDMASK WHENCARRYING OUTANY MAINTENANCEOPERATION ATTENTION donottouchtheapplianceifhandsand orfeetarewet Before performing any cleaning or maintenance disconnect the appliancefromtheelectricalsourceandcarefullyunplugthe appl...

Страница 19: ...number code the Ser No appliance serial number Note the data plate with all the appliance specifications is located on the refrigeration unit compartment at the top right hand side There is also a plate bearing the appliance s PNC code and serial number located underneath the logo These are essential for identifying the type of appliance and date of manufacture D 3 HACCP CONNECTIONS ACCESSORIES PN...

Отзывы: