Electro Industries Shark ST40 Скачать руководство пользователя страница 4


Doc

#    

E183703   V.1.01     


             QS - 4

                    Shark

®


ST40 Meter Quickstart

Electro 

Industries/GaugeTech

Powered by Innovation™
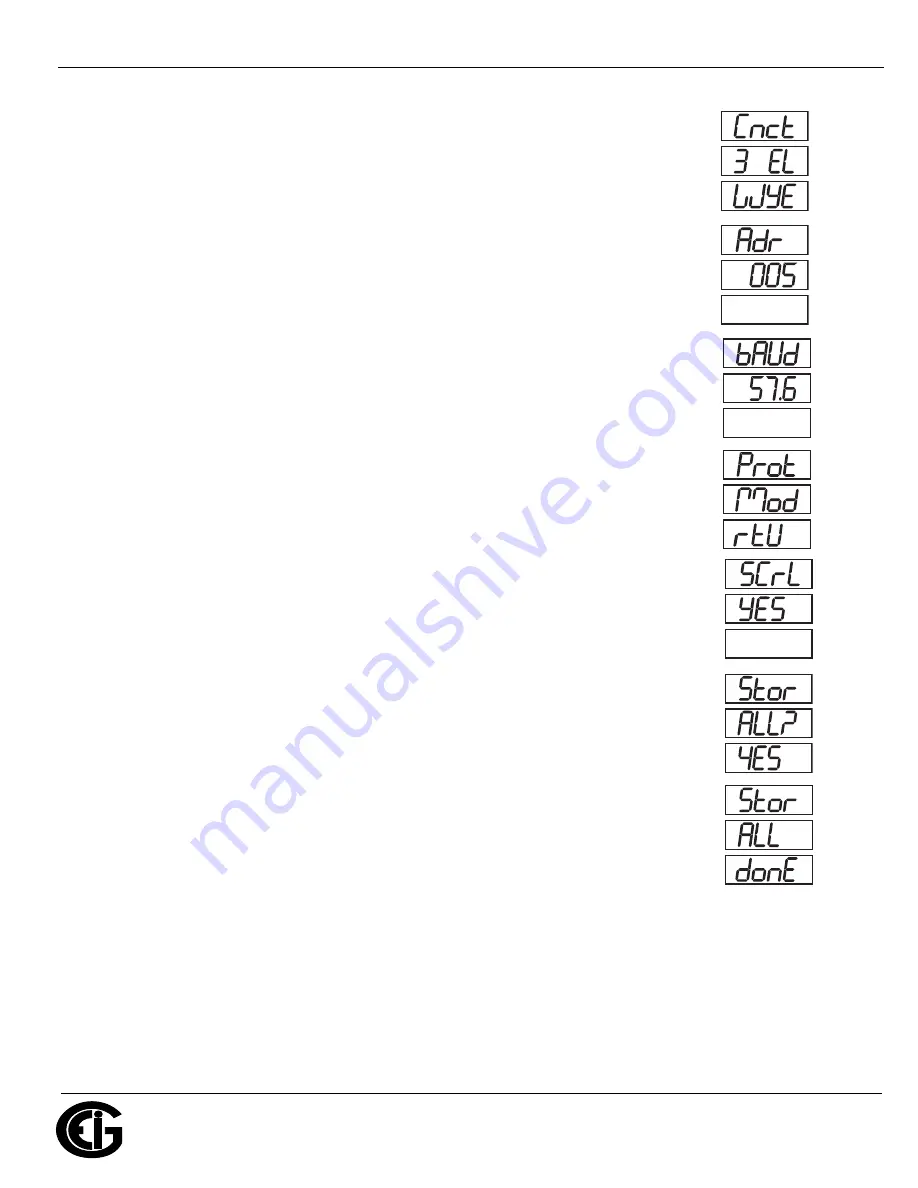
10.Press the 

ENTER 

button to go to the Connection setting screen (Cnct). The current 

     setting is shown in the second line. Press the 

DOWN ARROW

 to choose another 

     value. You can choose 3 EL (element) WYE, 2 Ct del (Delta), or 2.5 EL WYE.

11.Press the 

ENTER 

button to go to the meter Address setting screen (Adr). The 

     meter’s current address is shown in the second line. To change the setting, press 

     the 

DOWN


ARROW

 until the value you want is displayed. Then press the 

RIGHT 

     ARROW 

to move to the next digit. Repeat until the setting is done. Valid address-

     es are from 001 through 247. If you have the Ethernet option, keep this as 1.

12.Press the 

ENTER 

button to go to the meter Baud Rate setting screen (bAUd). The 

     meter’s current Baud Rate is shown in the second line. Press the 

DOWN ARROW


     to choose another Baud Rate. You can choose 9600 (choose this for RS485 

     connection), 19.2 (19200), 38.4 (38400) or 57.6 (57600). If you have the Ethernet

     option, keep this as 57.6.

13.Press the 

ENTER 

button to go to the meter Protocol setting screen (Prot). The 

     meter’s current Protocol is shown in the second and third lines. Press the 

DOWN 

     ARROW

 to choose another communication Protocol. You can choose Mod rtU 

     (Modbus RTU; choose this for RS485 or Ethernet connection), Mod ASCI (Modbus 

     ASCII), or dnp (DNP3). 

14.Press the 

ENTER 

button to go to the Scroll setting screen (SCrL). The current

     setting is shown in the second line. Press the 

DOWN ARROW

 to choose another

     setting. You can choose YES (the meter readings will scroll on the display) or no

     (the meter readings will not scroll on the display).

15.Press the 

MENU 

button twice. You will see the Store Settings screen (Stor ALL?)

     The default setting is YES. To save the settings you’ve made, press the 

ENTER


     button. You will see the confirmation screen (Stor ALL done) and then the meter 

     resets.


NOTE: 

If you do not want to save your settings, press the

 RIGHT ARROW. 

YES 

     changes to no. Press the

 ENTER 

button. 


A

B

C

A

B

C

A

B

C

A

B

C

A

B

C

A

B

C

A

B

C

Содержание Shark ST40

Страница 1: ...w NOTE This Quickstart Guide gives basic installation wiring and programming instructions For additional meter operation and programming information refer to your meter s Installation and Operation Manual and the Communicator PQATM MeterManagerPQATM and EnergyPQA comTM Software User Manual on EIG s website User Manual https www electroind com products st40 From the webpage click Technical Document...

Страница 2: ... 5 63 7 216 25 32 5 6833 5 7 1 9 WYE Delta 4 wire 3 PTs 3 CTs DUWK URXQG DUWK URXQG 2 2 2 1 1 9 5 9 9 9 6HUYLFH HOWD LUH ZLWK 1R 37V 7V 86 6 1 2 9 9 9 9 9 7 6KRUWLQJ ORFN 6 7 5 5 72 6 257 1 2 16758 7 216 72 33 6 2576 9 86 RU UDWLQJV VHH 9ROWDJH XVHV RQ SDJH 1 1 875 5 5 72 0 7 5 63 7 216 25 32 5 6833 5 7 1 1 1RW FRQQHFWLRQ WR PHWHU Delta 3 wire No PTs 2 CTs DUWK URXQG DUWK URXQG 2 2 2 1 1 9 5 9 9 9...

Страница 3: ...minator screen CT d This setting is display only it can t be changed 6 Press the ENTER button to go to the CT Scaling setting screen CT S The current Scaling is shown in the second line Press the DOWN ARROW to choose another value You can choose 1 10 or 100 7 Press the ENTER button to go to the PT numerator setting screen Pt n The current PT numerator is shown in the second line To change the sett...

Страница 4: ...600 choose this for RS485 connection 19 2 19200 38 4 38400 or 57 6 57600 If you have the Ethernet option keep this as 57 6 13 Press the ENTER button to go to the meter Protocol setting screen Prot The meter s current Protocol is shown in the second and third lines Press the DOWN ARROW to choose another communication Protocol You can choose Mod rtU Modbus RTU choose this for RS485 or Ethernet conne...

Страница 5: ...mmunicatorPQATM soft ware Use either the RS485 port or the USB port to make the physical connection to your PC Note that your meter will have either RS485 OR Ethernet it will always have a USB port For Ethernet communi cation connect first via the USB port and then see the ST40 User Manual for instructions on setting up Ethernet communication Connect through the RS485 Port The ST40 meter s RS485 p...

Страница 6: ...he Device Status screen and then click the Profile icon in the Icon Bar 5 The meter s Device Profile screen opens giving you access to the programmable settings for the meter NOTE A few basic settings are explained here Refer to the CommunicatorPQATM MeterManagerPQA and EnergyPQA com Software User Manual see page QS 1 for the download link or click Help Con tents from the top of the CommunicatorPQ...

Страница 7: ...ersal for any phase This feature is useful if a CT is wired the wrong way and you do not want to or cannot change the wiring This setting is only available for a three element WYE hookup For any other hookup this setting will be ignored Program Communications Setting 1 From the Device Profile screen double click General Settings Communications one of the listed ports The settings shown here are fo...

Страница 8: ...ch meter individually since the meter name is used to name the log databases when logs are downloaded IMPORTANT When you have made changes to the meter s Device Profile click Save Profile at the bottom left of the Device Profile screen to send the new settings to the meter The meter will reboot and then you can reconnect to it Shark is a registered trademark of Electro Industries GaugeTech EIG Com...

Отзывы: