background image


GREASE MESH FILTERS 

The mesh filters can be cleaned by hand.  

•  Remove the decorative board and wipe it clean with a damp cloth. Then,remove 

the aluminium filter by pressing and holding the 2 slots. 


•  Place the aluminium filter upside down. Then detach the charcoal filter. 


•  Soak the aluminium filter into the solution of warm water and mild detergent for 

about 10 minutes. 


Attaching filters 

• 

After cleaning, attach the charcoal filter to the aluminium filter. Then secure with the 

3/4 iron wires.(Model 60CM has 3 iron wires and Model 90CM has 4 iron wires.) 

Please note: The charcoal filter is not included in the product. 


• 

Insert the aluminium filter into the cooker hood. Then insert the decorative board and 

close it into place. 

Содержание eiQCHDD60

Страница 1: ...Q cooker hood This instruction manual is designed to provide you with all required instructions related to the installation use and maintenance of the appliance In order to operate the unit correctly...

Страница 2: ...1 CONTENTS SAFETY 2 INSTALLATION 4 CONTROL PANEL 6 FILTER INFORMATION 7 BULB REPLACEMENT 9 CLEANING AND MAINTENANCE 10 TROUBLESHOOTING 10 SUPPORT 11 PRODUCT FICHE 12...

Страница 3: ...cessively greasy They should be cleaned regularly see Maintenance or replaced as necessary The extraction fan must be level to avoid grease collection at one end as this could cause a potential fire r...

Страница 4: ...ugh a suitable sized opening which cannot be sealed during operation A number of alternative solutions are available to ensure this If in any doubt professional advice should be sought Regulations con...

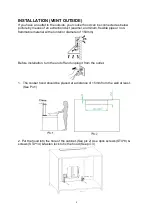
Страница 5: ...m flexible pipe or non flammable material with an interior diameter of 150mm Before installation turn the unit off and unplug it from the outlet 1 The cooker hood should be placed at a distance of 15m...

Страница 6: ...rding to the space of the cabinet See pic 4 Pic 4 4 Fix the pipe on the outlet and use 4pcs screws ST4 14 to fix the PCB box connect the power and finish the installation See pic 5 The distance betwee...

Страница 7: ...utomatically Press the speed or light button to cancel the timer LIGHT Press the light button to turn on the light then use the slide control to change the brightness Press again to turn off the light...

Страница 8: ...al filter Soak the aluminium filter into the solution of warm water and mild detergent for about 10 minutes Attaching filters After cleaning attach the charcoal filter to the aluminium filter Then sec...

Страница 9: ...r When activated carbon filter attached the suction power will be lowered Replacements are available from the retailer the hood was purchased from under references Model eiQCHDD60 Grease filter eiQGFD...

Страница 10: ...er 2 Unscrew the 4pcs screws on the LED light strip bracket by cross screwdriver dismantle the LED light strip and pull out the terminal of the light connecting wire 3 Apply the reverse procedure to r...

Страница 11: ...nect the unit from the power source when opening the unit Fault Possible Cause Solution Light on but motor does not work Fan switch turned off Select a fan switch position Fan switch failed Contact se...

Страница 12: ...AM 5PM Monday to Friday www electriQ co uk Unit J6 Lowfields Business Park Low elds Way Elland West Yorkshire HX5 9DA Recycling facilities are now available for all customers at which you can deposit...

Страница 13: ...low Qmax 563 8 m3 h Measured airflow rate at the best efficiency QBEP 280 5 m3 h Measured air pressure at best efficiency point PBEP 426 Pa Measured electric power input at best efficiency point WBEP...

Страница 14: ...15 4 m3 h Measured airflow rate at the best efficiency QBEP 342 9 m3 h Measured air pressure at best efficiency point PBEP 433 Pa Measured electric power input at best efficiency point WBEP 131 3 W No...

Отзывы: