8
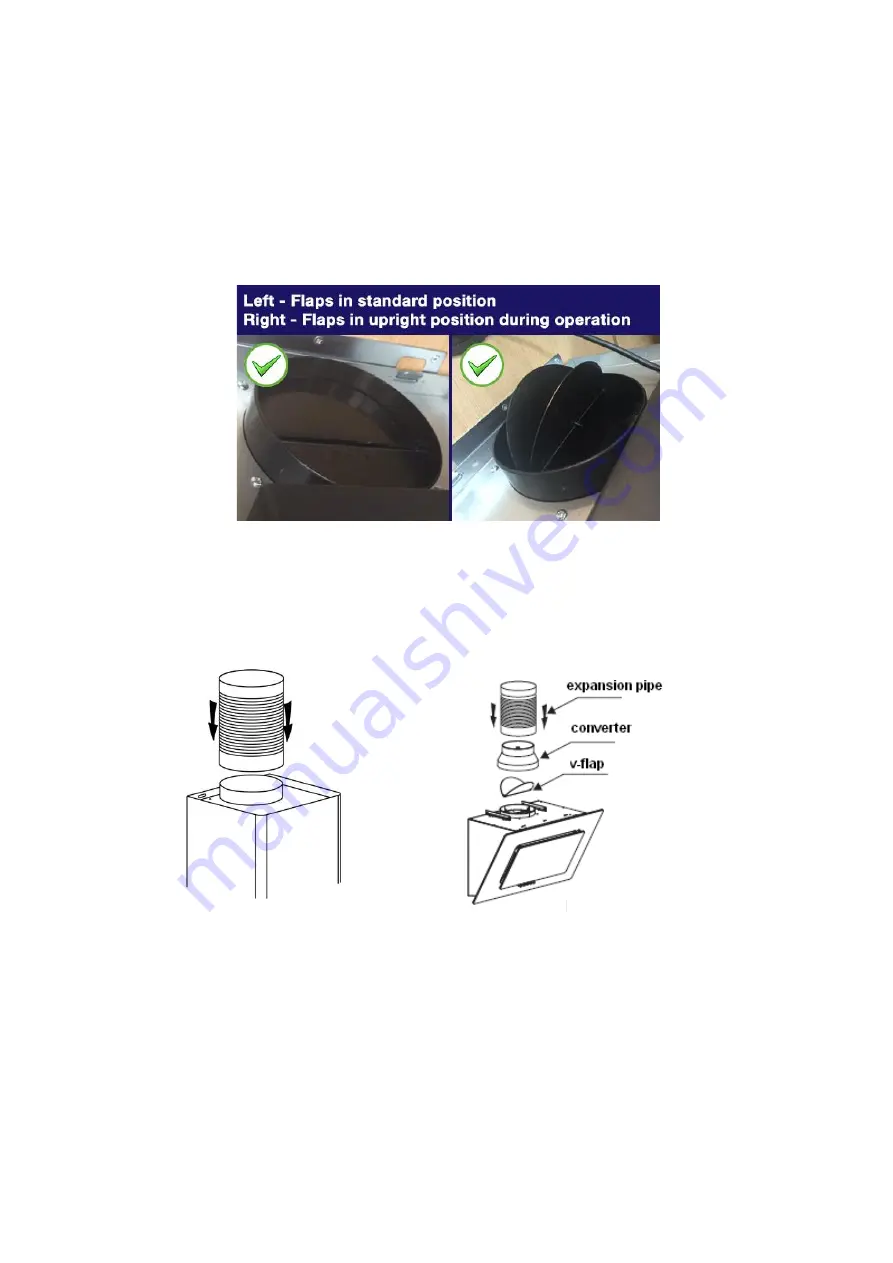
5. The 2 x airflaps should be installed at this stage, as access is easier before
the unit is wall mounted. On the top of the Hood Unit itself, where the air outlet
vent is located, the 2 x flaps should be carefully installed, bending very slightly
so the lugs at each end locate into the holes, enabling flaps to pivot upwards
when the unit is in operation, opening up the outlet fully for the air to pass
through. Please note: the small spindles/lugs at each end of each flap locate
into the holes on the housing, not the grooves above them.
6. Hang the cooker hood on wall.
7. Install the v-flap and converter onto the cooker hood. Fix the expansion
pipe on the converter using a cable tie. Hang the cooker hood onto the hook.
8. Adjust the height of the chimney to approximately
the required height.
Then install plate I on the chimney. Two screws (4mm x 8mm) are used.
9. Put the inner chimney into the outer chimney. Then pull the inner chimney
upwards. Adjust to reach the approximate height required. Fine height
adjustment is done later.


