7
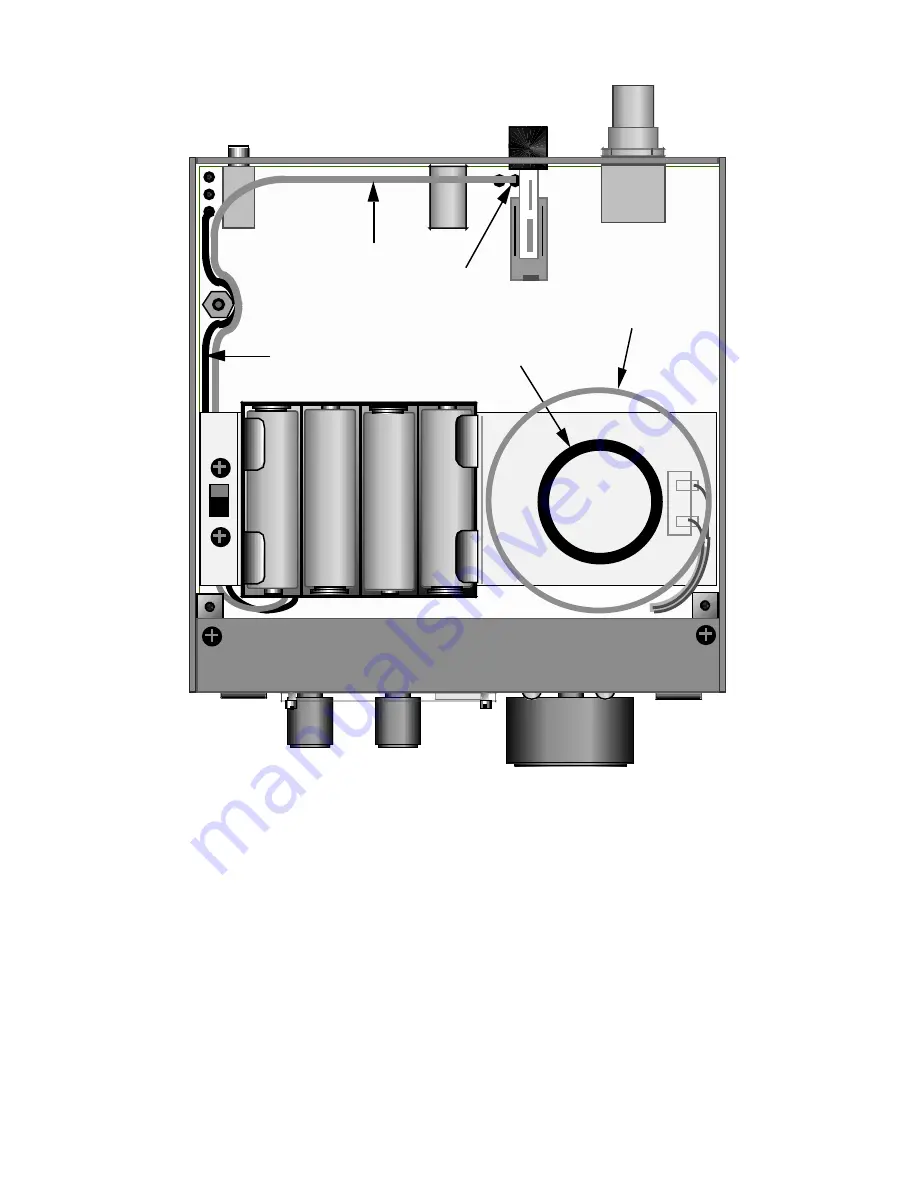
Figure 6.
KBT1 installation (see text).
RED
BLACK
Neoprene washer
Speaker
AUX 12V
Страница 1: ...regulation of the VFO Battery life is extended near end of charge by the KBT1 s special reverse polarity protection diode 95SQ015 which is optimized for low voltage drop less than 0 2V 500 mA The kit...
Страница 2: ...1 MISC Speaker 8 0 5 W Jameco A0201C E980036 1 MISC Dual conductor wire 22 E760012 6 MISC 2 pin female connector housing w locking ramp E620021 1 MISC Female crimp pin E620022 2 MISC Hookup wire stra...
Страница 3: ...older the diode in place 3 8 A B C Figure 1 Orient the 8 cell battery holder as shown in Figure 2 The holder s wire leads exit at the pair of small round holes identified by the arrows To provide bett...
Страница 4: ...er end of the bracket The mounting hardware shown in detail in Figure 3B will be installed in the next few steps Insert 5 16 8 mm flat head screws into the countersunk holes at the lower end of the br...
Страница 5: ...of black hookup wire Prepare the ends as you did with the red wire Form one end of the black hookup wire into a small hook Do the same to the black lead of the battery holder Attach the two hooks toge...
Страница 6: ...emove the KAT1 if applicable and Filter board Plug the new speaker into P2 on the RF board The 2 pin housing can only be plugged in one way Install the battery speaker bracket as shown in Figure 6 The...
Страница 7: ...7 Figure 6 KBT1 installation see text RED BLACK Neoprene washer Speaker AUX 12V...
Страница 8: ...8 3 mm below the top edge The label should be aligned with the battery s on off switch Using the Internal Battery Install batteries in the K1 only when portable operation is planned At all other times...