background image

X-Net Configuration Software Operating Instruction

(Software version:1.00)

Getting started X-Driver Configuration Software (Ver1.00)

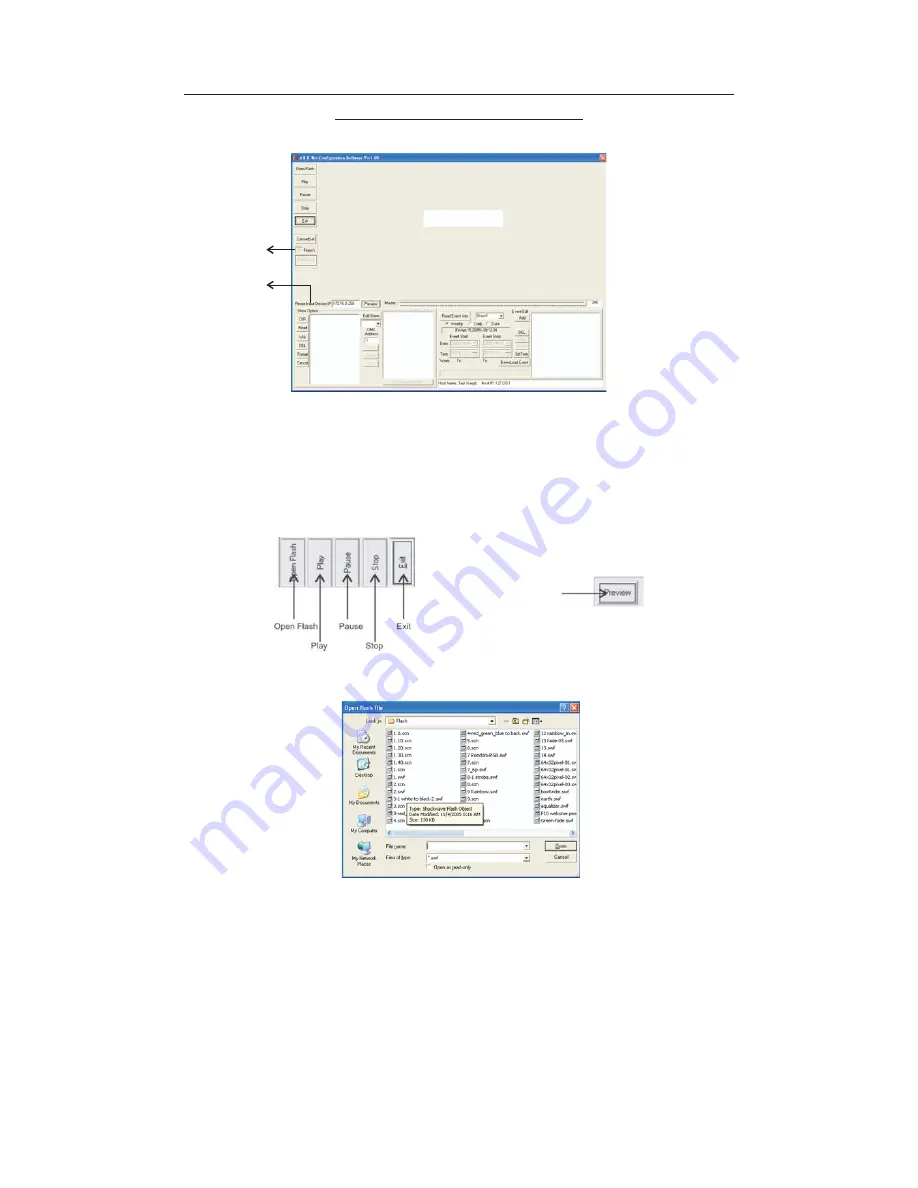
In Windows, click the Start button and go to the "Programs" then "X-Net Configuration Software". Move
the pointer to the X-Net Configuration Software icon, the X-Net Configuration Software screen appears
hereinafter:

1.Toolbar Operation:

1.1 Click "OPEN FLASH" icon, a dialogue box will appear on the screen.

Select your desired flash file with extension .swf and click "OPEN" icon to open, click the "Play" icon to play
the flash, "Pause" icon to temporarily terminate and "Stop" icon to end.

2.FileOption Operation:

2.1 "Fileconvert" icon used to convert the flash file with extension .swf into the file with extension .scn for
E-NODE 8 playing the one directly.

2.2 "Preview" icon used to temporarily play flash files effect by E-NODE 8 controlling RGB lightings.

: Before converting flash files, please enter a valid number to set the desired flash frame

in the Convert Set Option.

NOTE

FileOption is used to control RGB lightings by adjusting contents of presentation bar.

Enter IP address of
the existing E-NODE 8

Enter frame value

-26-

Содержание E-Node 8

Страница 1: ...Ethernet DMX Trigger DMX 1 DMX 2 DMX 3 DMX 4 DMX 5 DMX 6 DMX 7 DMX 8 1 Ground 2 Data 3 Data 8 Universes Artnet DMX Node Sub Net Power E NODE 8 Universe ArtNET 250k Baud rate 1000k ArtNET Instruction...

Страница 2: ...ts Part I About E NODE 8 2 How to Map 1 How to Setup Part II X Soft Net Holding System Operation 4 X Net Configure software Operation 3 How to playback preset Scenes by running X Software DMX Trigger...

Страница 3: ...Part I About E NODE 8...

Страница 4: ...a r o f how to improve to better serve you It is both a privilege and a pleasure serving you www elationlighting com info elationlighting com Thank you for your purchasing the Elation 8 Universe DMX S...

Страница 5: ...You MUST firstly set your PC s IP address of 172 16 0 3 and Sub mask addressing of 255 255 255 0 How to set your PC s IP addressing and Subnet mask addressing please refer to Configuring Ethernet card...

Страница 6: ...72 16 0 3 172 16 0 255 are not available 6 1 2 3 Special Notice When A 100 B 10 C exceeds 255 the IP address of the node will be set to 172 16 0 250 automatically After you change the protocol setting...

Страница 7: ...Part II X Soft Net Holding System Operation Guide...

Страница 8: ...card The process is very simple and is described as the below instructions It is necessary to set two parameters the IP address and the Subnet Mask 3 Select the TCP IP protocol line and then press th...

Страница 9: ...perating Event swf MPEG Files AVI Files Backup Load For further information please see Section_3 Events Backup Load for events loading Section_1 Node IP Address Setup For these connected Nodes control...

Страница 10: ...antity IP address of each node 1c Enter an actual IP address of each node in IP Address bar The actual IP address of each node is provided by us and labeled on the back of the node 1d After clicking t...

Страница 11: ...l automatically be listed and display in the Source Components Presentation List Calendar Start Time End Time Trigger mode PC time real time clock Active Window 2c Select trigger mode which you wish t...

Страница 12: ...on_3 Events Flash files Video Files MPEG Files Backup Load 3a Events Flash files Video Files MPAG Files Backup Load mode enables 3b In the option the main program folder is a drop down menu consists o...

Страница 13: ...oad these Flash files Video Files MPEG Files owning the same name with existing Flash files Video Files MPEG Files in the Scene_lib folder Otherwise it is easy to be in fault Additional Flash files Vi...

Страница 14: ...icon to delete events which you want to cancel 4d To repeat to Step4a Step4c to create more GVI for use In this option double click the GVI file in the GVI presentation list to select GVI till its na...

Страница 15: ...simply processes to add 1 1 Select one event Flash files Video Files MPEG Files in the Source Components Presentation List which you wish and click the Add icon to add The desired one will automatica...

Страница 16: ...lation process The X Mapping can be uninstalled via the Add or Remove Programs in the Control Panel All files LED Mapping Document which are created newly are ONLY located in the main folder for the X...

Страница 17: ...ere are several optional features and To add a new device simply follow these step 1 Click the Add Node icon 2 Enter Device Name Output Port Number and Channel Number 3 Click the Save Node icon to sav...

Страница 18: ...existing device Horizonta Vertical Skip l and define the offset between adjacent pixels in the device can be used to skip a pixel within the device when it s placed on the Work Grid Instead of having...

Страница 19: ...isfied these created devices s setting or something else wrong happens it allows the user to modify these settings Click the Modify icon bring up a setup dialog box The number of horizontal pixels and...

Страница 20: ...h to use to control your devices actually To create a Pixel Map simply follow these steps 6 1 Select an existing device which you wish to create a pixel map 6 2 Select an existing node which you to us...

Страница 21: ...control the fixtures In the event of some mistakes happen user can modify them by pointing the device number with the mouse action A new dialog box will display and enter a correct number then click...

Страница 22: ...vert Map Address icon to convert the pixel map addresses Program Rate 6 10 and click the Save icon in the Toolbar save in the main folder as a LEDMap file for X Software operation It is advisable to s...

Страница 23: ...llowing screen for you Manual Mode To manually open the Flash files Video Files MPEG Files which you wish to play firstly click the MANUAL icon and a new dialog box screen will appear indicating you t...

Страница 24: ...nu that displays the existing pixel map address of the selected Outport Dimming Area Operation Work Grid features to adjust the brightness 1 1 In the main folder click the Runproj icon to enable your...

Страница 25: ...ct an existing pixel address of the selected outport In the drop down menu Port_pixel_all means all the pixels existing in selected outport while Node_Pixel_all means all the pixels existing in select...

Страница 26: ...6 2 When you use X Trigger USB the version of the X Soft Net must be Rev1 06 Click the DMX CTRL icon to activate DMX Control function Enter the proper DMX starting addressing number as your desired be...

Страница 27: ...nsion swf and click OPEN icon to open click the Play icon to play the flash Pause icon to temporarily terminate and Stop icon to end 2 FileOption Operation 2 1 Fileconvert icon used to convert the fla...

Страница 28: ...nitial address for E NODE 8 controller receiving in DMX Address bar and amendment upon requirement 3 8 How to Edit Show 3 8 1 Clicking the DOWN Arrow of Edit Show icon to select your desired show 2 Se...

Страница 29: ...starting time of your desired show 4 5 Then secondarily click the Down Arrow under the Event Start icon to select the closing time of your desired show 4 6 And these edited events can be saved in memo...

Отзывы: