eka CyberLock FlashLock Скачать руководство пользователя страница 3

Key Fob Battery Replacement

FlashLock Battery Replacement

FlashLock and Key Fob Battery

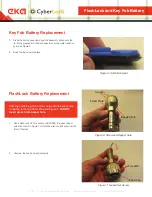
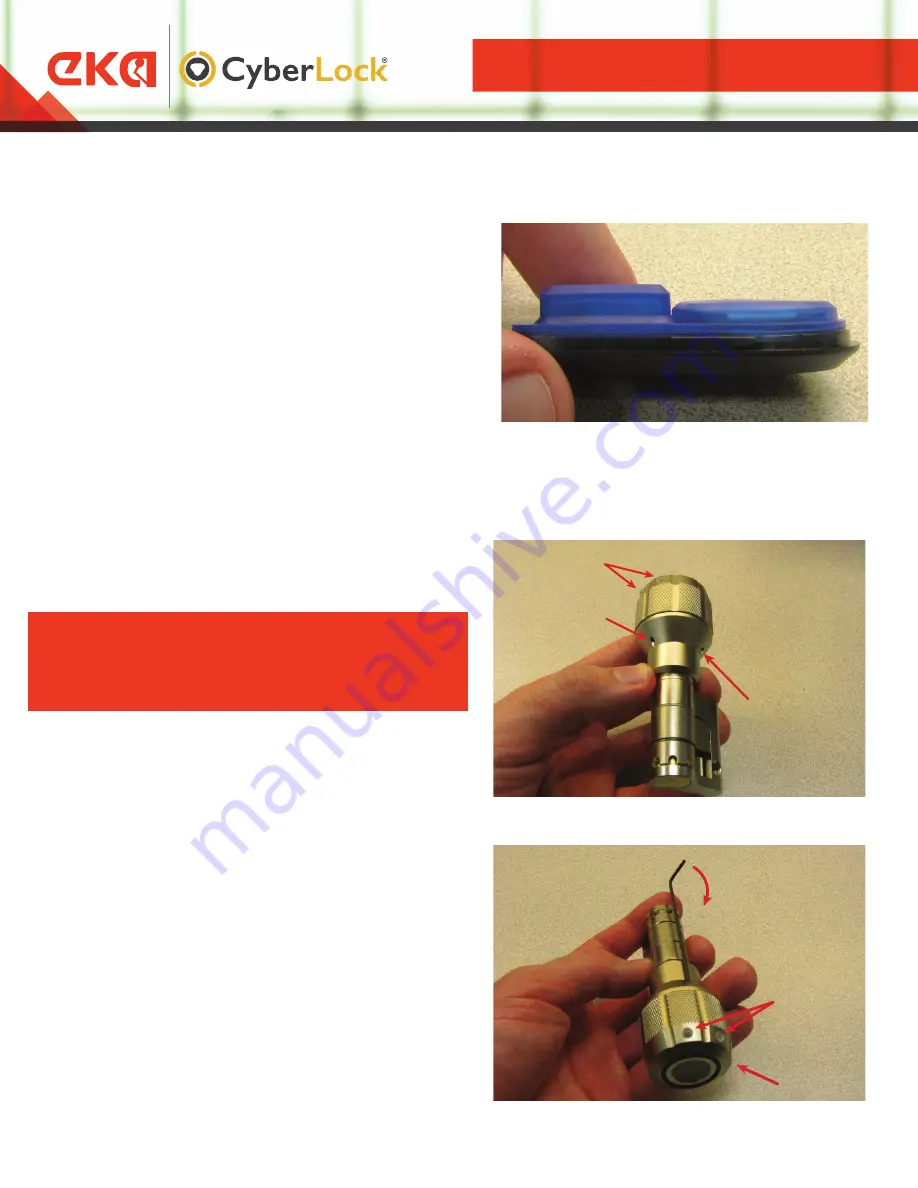
Note the positioning of the screw hole and the beeper hole 

in relation to the two LEDs shown in Figure 6. DO NOT 

insert wrench into beeper hole.

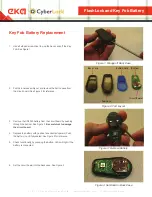
Figure 5: Set Button Seal

Figure 6: Screw and Beeper Hole

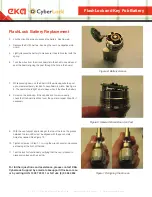
Figure 7: Loosen Set Screw

7.  Press the button case down over the assembly. Make sure the 

lip is fully pressed into the back case to ensure a water-resistive 
seal. See Figure 5.

8.  Snap the top case into place.

1.  Use a FlashLock T6 Torx wrench (HDM1893) to loosen the set 

screw as shown in Figure 7. Rotate the wrench clockwise from the 
front of the lock.

2.  Unscrew the knob cap and set aside.

Screw Hole

Beeper Hole

Two LEDs

Knob Cap

Two LEDs

V1.0_8101   |   Division of Davcor Group Pty Ltd     |     www.ekacyberlock.com.au     |     www.ekacyberlock.co.nz

Содержание CyberLock FlashLock

Страница 1: ...FlashLock and Key Fob Battery Replacement Field Instruction Manual www ekacyberlock com au www ekacyberlock co nz Copyright EKA CyberLock All Rights Reserved ...

Страница 2: ...l not to damage the circuit board 4 Replace the battery with positive face oriented upward Push the battery in until fully seated See Figure 3 for reference 5 Check functionality by pressing the button LEDs will light if the battery is connected 6 Set the circuit board into the back case See Figure 4 Figure 1 Wedge off Back Case Figure 2 Part Layout Figure 3 Remove Battery Figure 4 Set Board in Ba...

Страница 3: ...Set Screw 7 Press the button case down over the assembly Make sure the lip is fully pressed into the back case to ensure a water resistive seal See Figure 5 8 Snap the top case into place 1 Use a FlashLock T6 Torx wrench HDM1893 to loosen the set screw as shown in Figure 7 Rotate the wrench clockwise from the front of the lock 2 Unscrew the knob cap and set aside Screw Hole Beeper Hole Two LEDs Kn...

Страница 4: ...oard should light up and beep when it touches the battery 8 Screw on the knob cap If the cap does not screw on easily check that the board is still set over the post and repeat Step 3 2 if necessary 9 With the cap fully set and looking at the top of the lock the groove between the two LEDs must be aligned with the punch mark Adjust as needed See Figure 10 10 Tighten screw as in Step 1 1 turning th...

Отзывы: