


12
5.2 Setting speed
The speed can be preset via the thumb-wheel and is
infinitely variable.
Engine speed (rpm) 1.900 - 7.900
Belt speed
Power Stage 1
1.900
3 m/sec.
Power Stage 2
3.700
5 m/sec.
Power Stage 3
5.100
7,5 m/sec.
Power Stage 4
6.400
9 m/sec.
Power Stage 5
7.500
11 m/sec.
Power Stage 6
7.900
12 m/sec.
The best way to determine the ideal speed setting is
by performing a test.
6. Switching on and off
Always guide the machine with both hands.
Switch on first, then guide the accessory
towards the workpiece.
The machine must not be allowed to draw in
additional dust and shavings. When switching
the machine on and off, keep it away from dust
deposits. After switching off the machine, only
place it down when the motor has come to a
standstill.
In continuous operation, the machine
continues running if it is forced out of your
hands. Therefore, always hold the machine with
both hands using the handles provided, stand
securely and concentrate.
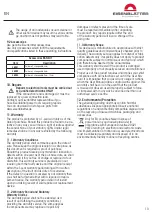
11
0
I
Switching on/Conti-
nous operation:
Switch the trigger
switch (11) forwards.
For continous operation let it tip down till it locks.
Switching off:
Press on the back end of the trigger switch
(11) and release.
7. Attaching the tools, working notes
7.1 Changing the abrasive belt
- Pull the tensioning arm backwards and remove the
abrasive belt.
- Place the new abrasive belt on the rollers, that it
matches the direction of rotation (arrows on the inside
of the sanding belt). Place the abrasive belt first on the
drive shaft, then on the roller on the grinding attachment.
Release the tensioning arm for tension.
- Check the belt run and adjust if necessary.
7.2 Grinding process
At first turn the machine on and after that you can put it
on the workpiece.
Place the machine with the abrasive belt parallel to the
workpiece surface on the material.
Keep the machine moving, because
otherwise indentations in the material can arise.
- Set the belt run.
TIP: For best handling, grind on the side where the abrasi-
ve belt is moving towards the machine
7.3 Change the grinding attachment
- Remove the abrasive belt (see chapter 7.1).
- Unlock the screw and remove the grinding attachment.
- Attach another grinding attachment.
- Fasten with screw.
- Attach abrasive belt (see chapter 7.1).
7.4Working Directions
Sanding, polishing:
Apply moderate pressure on the machine and move
it to and fro across the surface
8. Maintenance and Cleaning
8.1 Maintenance:
Ensure good ventilation of the workspace and use an
extraction unit and/or air purifier.
Clean the machine as 8.2 describes.
After long usage it is advisable to clean machine parts.
Clean these areas Clean the area with dry air and/or a
cloth.
8.2 Cleaning
While working on different materials it is possible that
particles deposit inside the power tool. Clogging may
compromise the cooling of your power tool. Conductive
build-up can impair the protective insulation of the power
tool and cause electrical hazards. The power tool should
be cleaned regularly, often and thoroughly through all
front and rear air vents using a vacuum cleaner or by blo-
wing in dry air. Prior to this operation, separate the power
tool from the power source and wear protective glasses
and dust mask.
9. Equipment and accessories
9.1 Five-fold rocking hand grip
The rocking handle of the power tool
can be secured in five different posi-
tions. Using different angles of the
forward hand grip eases work load in
different working positions. For right-
and left-handed users. To tilt the handle,
unscrew the handle for a few turns,
bring the handle in the desired position, lock the handle
by screwing it snug.
EN


