background image

56

t

GUARANTEE CERTIFICATE

Dear Customer,

All of our products undergo strict quality checks to ensure that they reach you in perfect condition. In the unlikely
event that your device develops a fault, please contact our service department at the address shown on this
guarantee card. Of course, if you would prefer to call us then we are also happy to offer our assistance under
the service number printed below. Please note the following terms under which guarantee claims can be made:

1.

These guarantee terms cover additional guarantee rights and do not affect your statutory warranty rights.
We do not charge you for this guarantee.

2.

Our guarantee only covers problems caused by material or manufacturing defects, and it is restricted to the
rectification of these defects or replacement of the device. Please note that our devices have not been
designed for use in commercial, trade or industrial applications. Consequently, the guarantee is invalidated
if the equipment is used in commercial, trade or industrial applications or for other equivalent activities. The
following are also excluded from our guarantee: compensation for transport damage, damage caused by
failure to comply with the installation/assembly instructions or damage caused by unprofessional
installation, failure to comply with the operating instructions (e.g. connection to the wrong mains voltage or
current type), misuse or inappropriate use (such as overloading of the device or use of non-approved tools
or accessories), failure to comply with the maintenance and safety regulations, ingress of foreign bodies
into the device (e.g. sand, stones or dust), effects of force or external influences (e.g. damage caused by
the device being dropped) and normal wear resulting from proper operation of the device.

The guarantee is rendered null and void if any attempt is made to tamper with the device.

3.

The guarantee is valid for a period of 2 years starting from the purchase date of the device. Guarantee
claims should be submitted before the end of the guarantee period within two weeks of the defect being
noticed. No guarantee claims will be accepted after the end of the guarantee period. The original guarantee
period remains applicable to the device even if repairs are carried out or parts are replaced. In such cases,
the work performed or parts fitted will not result in an extension of the guarantee period, and no new
guarantee will become active for the work performed or parts fitted. This also applies when an on-site
service is used.

4.

In order to assert your guarantee claim, please send your defective device postage-free to the address
shown below. Please enclose either the original or a copy of your sales receipt or another dated proof of
purchase. Please keep your sales receipt in a safe place, as it is your proof of purchase. It would help us if
you could describe the nature of the problem in as much detail as possible. If the defect is covered by our
guarantee then your device will either be repaired immediately and returned to you, or we will send you a
new device.

Of course, we are also happy offer a chargeable repair service for any defects which are not covered by the
scope of this guarantee or for units which are no longer covered. To take advantage of this service, please send
the device to our service address.

Anleitung_BT_MC_355_SPK1:Anl.-Hercules MS 355_1  03.04.2008  13:43 Uhr  Seite 56

Содержание 45.031.24

Страница 1: ...ner le métal Istruzioni per lʼuso Troncatrice per metallo Brugsvejledning Metalskæremaskine Használti utasítás Fém szétválasztó gép B Naputak za uporabu f Rezalica metala j Návod k použití Dělicí stroj na kovy Art Nr 45 031 24 I Nr 01017 BT MC 355 Anleitung_BT_MC_355_SPK1 Anl Hercules MS 355_1 03 04 2008 13 42 Uhr Seite 1 ...

Страница 2: ...uzioni per lʼuso e le avvertenze di sicurezza Betjeningsvejledningen og sikkerhedsanvisningerne skal læses inden maskinen tages i brug Alle anvisninger skal følges Üzembehelyezés előtt elolvasni és figyelembe venni a használati utasítást és a biztonsági utasításokat Bf Prije puštanja u rad pročitajte i pridržavajte se ovih uputa za uporabu i sigurnosnih napomena j Před uvedením do provozu si přečí...

Страница 3: ...3 6 1 2 4 5 2 1 3 4 5 6 7 13 12 17 16 11 15 14 10 2 9 8 3 7 4 5 14 15 4 5 14 6 15 7 17 16 4 15 7 1 18 19 7 Anleitung_BT_MC_355_SPK1 Anl Hercules MS 355_1 03 04 2008 13 42 Uhr Seite 3 ...

Страница 4: ...4 7 8 9 11 10 3 11 21 20 9 11 24 22 23 10 25 2 11 2 11 Anleitung_BT_MC_355_SPK1 Anl Hercules MS 355_1 03 04 2008 13 42 Uhr Seite 4 ...

Страница 5: ...können bestimmte Restrisikofaktoren nicht vollständig ausgeräumt werden Bedingt durch Konstruktion und Aufbau der Maschine können folgende Risiken auftreten Berührung der Trennscheibe im nicht abge deckten Schnittbereich Eingreifen in die laufende Trennscheibe Schnittverletzung Rückschlag von Werkstücken und Werkstück teilen Trennscheiben Brüche Herausschleudern von beschädigten oder fehlerhaften ...

Страница 6: ...erem Gebrauch des Werkzeuges müssen Schutzvorrichtungen oder leicht beschädigte Teile sorgfältig auf ihre einwandfreie und bestimmungsgemäße Funktion untersucht werden Überprüfen Sie ob die beweglichen Teile einwandfrei funktionieren und nicht klemmen oder ob Teile beschädigt sind Sämtliche Teile müssen richtig montiert sein und alle Bedingungen erfüllen um den einwandfreien Betrieb des Werkzeuges...

Страница 7: ...händig 11 Greifen Sie niemals hinter oder neben die Trennscheibe 12 Stellen Sie sicher dass die Trennscheibe komplett zu Stillstand gekommen ist bevor Sie das Werkstück entfernen ein neues einspannen oder den Winkel verstellen 13 Stellen Sie sicher dass Trennscheibe und Flansche frei von Fremdkörpern sind 14 Wenn Sie eine Scheibe montieren achten Sie darauf dass die Wellenschraube nur so festgezog...

Страница 8: ...A 5 Technische Daten Wechselstrommotor 230V 50Hz Leistung P 2000 Watt Leerlaufdrehzahl n0 3900 min 1 Hartmetallsägeblatt Ø 355 x Ø 25 4 x 3 2 mm Standfläche 445 x 245 mm Schwenkbereich 0 45 Spannbreite Schraubstock max 0 240 mm Sägebreite bei 90 Ø 100 70 x 170 mm Sägebreite bei 45 100 x 70 mm Gewicht 19 6 kg 6 Vor Inbetriebnahme Metall Trennmaschine auspacken und auf eventuelle Transportbeschädigu...

Страница 9: ...heibe aufgrund der Abnutzung im Durchmesser verkleinert und somit das Werkstück nicht mehr gänzlich durchtrennen würde Kontermutter 19 lösen Anschlagschraube 18 je nach Bedarf hinein oder herausdrehen Sägekopf 1 nach unten bewegen um zu kontrolieren ob die Trennscheibe 11 bis zur Spannfläche 7 des Schraubstocks 15 reicht Kontermutter 19 wieder festziehen 7 5 Trennscheibe austauschen Abb 7 8 Netzst...

Страница 10: ...am Ende des Schneidevorgangs nicht verringert werden da dadruch eine Übergitzung des Werkstücks und eine vermehrte Gratbildung vermieden wird Hinweis Die Anzahl der Schnitte je Trennschei be sowie deren Qualität kann aufgrund der Schnittzeiten erheblich variieren Schnelle Schnitte können zur schnelleren Abnutzung der Trennscheibe führen aber auch dazu dienen die Verfärbungen sowie die Gratbildung ...

Страница 11: ...act with the cutting off wheel in the un covered cutting zone Reaching into the cutting off wheel while it is running injuries through cutting Kick back of workpieces and parts of work pieces Broken cutting off wheels Catapulting of damaged or cutting off wheels Damage to hearing if ear muffs are not used as necessary 4 Important information Please read the directions for use carefully and observe...

Страница 12: ... service workshop Never use an electric tool with a switch that cannot be turned on and off 18 Direction of operation Make sure that the direction arrow points toward the workpiece 19 Never leave an electric tool unattended when it is running Always switch off your electric tool before leaving it Wait until the tool stops moving completely 20 Connect your electric tool to earth An electric tool wi...

Страница 13: ...tter This will only lead to premature wear and result in poor cuts or a broken cutting off wheel 21 Workpieces are best cut when their angle in relation to the cutting off wheel is kept as small a possible 22 The number of cuts per cutting off wheel and their quality may vary considerably with the time taken to make the cuts Fast cuts may accelerate wheel wear but they also prevent discoloring of ...

Страница 14: ... should use the chain 13 to anchor the saw head 1 again in its lower position The saw is equipped with a carry handle 8 to make it easier to transport 7 2 Vise Fig 3 4 Every workpiece has to be fastened in the vise 15 before it is cut Flip up the top half of the nut 14 Pull out the spindle 5 far enough for the work piece to be clamped between the clamping faces 4 7 of the vise 15 Note You do not h...

Страница 15: ... cutting off machine be activated with the switch 10 To deactivate the cutting off machine again let go of the switch 10 8 2 Making a cut Fig 10 11 Clamp the workpiece securely in the vise Switch on the machine and wait for the motor to reach its top speed Push down the saw head 1 by the handle 2 until the cutting off wheel makes slight contact with the workpiece Move the cutting off wheel 11 smoo...

Страница 16: ... à lʼégard de la médecine du travail et de la sécurité Des transformations effectuées sur la machine excluent entièrement la responsabilité du fabricant pour des dégâts en résultant En dépit dʼune utilisation selon les règles il nʼest pas possible dʼécarter complètement certains facteurs de risques restants En raison de la construction et de la conception de la machine les risques suivants peuvent...

Страница 17: ...tre dangereuse 16 Ne montez pas sur lʼoutil Etant donné que lʼoutil pourrait basculer il y a risque de blessure 17 Contrôlez lʼoutil quant à dʼéventuelles détériorations Avant dʼutiliser la machine contrôlez bien si les dispositifs de sécurité ou les pièces légèrement endommagées fonctionnent parfaitement et conformément à leurs fins Assurez vous que les pièces mobiles fonctionnent parfaitement sa...

Страница 18: ...et de la meule de tronçonnage avant de retirer la pièce à travailler avant de serrer une autre pièce ou de régler lʼangle 13 Assurez vous que la meule de tronçonnage et les brides soient exemptes de corps étrangers 14 Lorsque vous montez une meule faites attention à serrer la vis de lʼarbre seulement jusquʼà ce que la meule soit maintenue et ne puisse pas patiner Si vous serrez trop fortement la v...

Страница 19: ...uissance P 2000 Watts Vitesse de rotation à vide no 3900 min 1 Meule de tronçonnage Ø 355 x Ø 25 4 x 3 2 mm Encombrement 445 x 245 mm Zone de pivotement 0 45 Largeur de serrage maxi de lʼétau 0 240 mm Largeur de sciage à 90 Ø 100 70 x 170 mm Largeur de sciage à 45 100 x 70 mm Poids 19 6 kg 6 Avant la mise en service Déballez la machine à tronçonner le métal et vérifiez les éventuels endommagements...

Страница 20: ...a meule de tronçonnage diminue suite à lʼusure et que la meule ne couperait donc plus entièrement la pièce à travailler Desserrez le contre écrou 19 Selon le cas vissez ou dévissez la vis de butée 18 Guidez la tête de sciage 1 vers le bas pour contrôler si la meule de tronçonnage 11 atteint la surface de serrage 7 de lʼétau 15 Resserrez le contre écrou 19 7 5 Remplacer la meule de tronçonnage fig ...

Страница 21: ...e il faut presser la poignée 2 fermement et régulièrement vers le bas Ne réduisez pas non plus la vitesse de coupe à la fin du processus de coupe pour éviter une surchauffe de la pièce à travailler et des ébarbures Note Le nombre de coupes par meule ainsi que la qualité de coupe peut considérablement varier en fonction de la durée de coupe Les coupes rapides peuvent provoquer une usure plus rapide...

Страница 22: ...tamente determinati fattori di rischio rimanenti In base alla realizzazione e alla struttura della macchina ne possono derivare i seguenti rischi 앬 Contatto con la lama circolare nel settore di taglio non coperto 앬 Contatto delle dita con la lama circolare in movimento pericolo di lesioni 앬 Contraccolpo di pezzi da lavorare e parti di essi 앬 Rotture della lama circolare 앬 Parti difettose o dannegg...

Страница 23: ...i per garantire un funzionamento corretto dellʼelettroutensile Fate riparare o sostituire subito a regola dʼarte da unʼofficina specializzata le parti ed i dispositivi di protezione danneggiati salvo sia indicato diversamente nelle istruzioni per lʼuso Fate sostituire lʼinterruttore danneggiato da unʼofficina del servizio assistenza Non usate lʼapparecchio se non è possibile accendere e spegnere l...

Страница 24: ...sile 18 Prima di accendere lʼutensile accertatevi che la lama circolare non tocchi il pezzo da lavorare 19 Prima di iniziare a tagliare portate il motore al massimo dei giri 20 Dopo avere acceso lʼelettroutensile abbassate lentamente la lama circolare fino a quando venga a contatto del pezzo da tagliare Poi eseguire il taglio senza scossoni Evitate che la lama circolare sobbalzi oppure vibri perch...

Страница 25: ...di alimentazione prima di eseguire tutti i lavori di manutenzione di allestimento e di montaggio alla sega circolare 7 1 Sicura per il trasporto Maniglia Fig 1 2 앬 La testa della sega 1 è stata fissata con una catena 13 nella posizione inferiore Fig 2 앬 Spingete verso il basso la testa della sega 1 facendo forza sullʼimpugnatura 2 e sganciare la catena 13 앬 Muovete lentamente verso lʼalto la testa...

Страница 26: ...te la nuova lama circolare eseguendo le operazioni nellʼordine inverso e serratela Attenzione prima del montaggio pulite con cura le flange 앬 Osservate la freccia che indica il senso di rotazione 앬 Usate solamente le lame circolari rinforzate consigliate e serrate la vite dellʼalbero 22 solo fino a quando la lama circolare 11 venga tenuta in modo sicuro e non slitti Se la vite dellʼalbero 22 viene...

Страница 27: ... pulizia è con una spazzola fine o con uno straccio 앬 Non usate sostanze corrosive per pulire le parti in plastica 10 0 Commissione dei pezzi di ricambio Volendo commissionare dei pezzi di ricambio si dovrebbe dichiarare quanto segue 앬 modello dellʼapparecchio 앬 numero dellʼarticolo dellʼapparecchio 앬 numero dʼident dellʼapparecchio 앬 numero del pezzo di ricambio del ricambio necessitato Per i pre...

Страница 28: ...reområdet der ikke er afdækket Indgreb i den roterende skæreskive snitsår Tilbageslag af arbejdsemnet og dele af arbejdsemnet Brud på skæreskiven Udslyngning af beskadigede eller fejlagtige skæreskiver Høreskader der skyldes arbejde uden høreværn 4 Vigtige informationer Læs brugsvejledningen omhyggeligt igennem og følg dens anvisninger Brug den som en hjælp til at gøre dig fortrolig med maskinen o...

Страница 29: ...ede knapper ud hos et kundeserviceværksted Benyt ikke værktøj hvor knappen sidder fast 18 Arbejdsretning Sørg for at drejeretningspilen peger i retningen af værktøjet 19 Gå aldrig fra værktøjet mens det er i brug Hvis du forlader maskinen så sluk for den Vent indtil maskinen står helt stille 20 Sørg for jordforbindelse Hvis dit værktøj har en preltrådsforbindelse må det kun tilsluttes en dertil eg...

Страница 30: ...er hakker i det idet den derved slides hurtigere hvilket kan føre til et mislykket snit eller en knækket skæreskive 21 Arbejdsemnet beskæres på den bedste måde når vinklen til skæreskiven er så lav som mulig 22 Antallet af snit per skive samt snittenes kvalitet kan variere meget på grund af skæringstiden Hurtige snit kan føre til hurtigere nedslidning af skiven forhindrer dog samtidig at materiale...

Страница 31: ...ion Ved transport bør savhovedet 1 fastgøres igen med kæden 13 i den nederste position For at lette transporten er saven udstyret med en hank 8 7 2 Skruestik fig 3 4 Før arbejde påbegyndes skal alle arbejdsemner være fikseret ved hjælp af skruestik 15 Den øverste halvdel af møtrikken 14 klappes opad Koblingsskruen 5 trækkes så langt ud at arbejdsemnet kan spændes fast mellem spændefladerne 4 7 i s...

Страница 32: ...u kan knappen 10 trykkes ind for at tænde for saven For at slukke for saven igen skal knappen 10 slippes igen 8 2 Udførelse af snit fig 10 11 Arbejdsemnet spændes godt fast i skruestikken Maskinen tændes og der ventes indtil motoren har nået sit maksimale omdrejningstal Savhovedet 1 trykkes ned ved hanken 2 indtil skæreskiven berører arbejdsemnet let Skæreskiven 11 bevæges jævnt gennem det materia...

Страница 33: ...iója és felépítése által a következô pontok következhetnek be a szétválasztótárcsa megérintése a nem lefedett vágásikörben a forgó szétválasztótárcsához való nyúlás vágási sérülés a munkadarab és munkadarabrészek visszacsapódása a szétválasztótárcsa törései a szétválasztótárcsa sérült vagy hibás részeinek a kivetése a szükséges zajcsökkentô füllvédô használatának mellôzésekor a hallás károsodása 4...

Страница 34: ...biztosítva legyen Károsult biztonsági berendezéseket és részeket szakszerüen egy elismert szakměhely által kell megjavíttatni vagy kicseréltetni ha a használati utasításban nincs más megadva A károsult kapcsolókat egy vevôszolgálati měhely által muszáj kicseréltetni Ne használjon olyan szerszámokat ahol a kapcsolót nem lehet ki és bekapcsolni 18 Dolgozási irány Biztosítsa hogy a fordulási irányt j...

Страница 35: ...vannak megjelölve 16 Ellenôrizze mindig le a szétválasztótárcsát esetleges repedésekre vagy más sérülésekre Egy megrepedezett vagy megsérült szétválasztótárcsát azonnal kicserélni 17 Csak a gépéhez megadott szétválasztótárcsakarimát használni 18 Bizonyosodjon meg arról hogy a készülék bekapcsolása elôtt a szétválasztótárcsa nem érinti a szerszámot 19 Hagya a motort teljes fordulatszámra felperegni...

Страница 36: ...ép típustábláján levô adatok a hálózati adatokkal megegyeznek e 7 Összeszerelés Figyelem Húzza ki a körfěrészen történô minden karbantartási átépítési és összeszerelési munka elôtt a hálózati csatlakozót 7 1 Szállítási biztosítás Hordozó fogantyú 1 es 2 es ábra Szállításhoz a fěrészfej 1 az alsó állásban lett egy lánccal 13 lerögzítve 2 es ábra A fogantyúnál 2 fogva lenyomni a fěrészfejet 1 és kia...

Страница 37: ...ási irány nyilát figyelembe venni Csak az ajánlott megerôsített szétválasztótárcsákat használni és a tengelycsavart 22 csak annyira meghúzni hogy a szétválasztótárcsa 11 biztosan legyen tartva és ne tudjon kipörögni Ha túl erôsen meghúzná a tengelycsavart 11 akkor megsérülhet a tárcsa Az oldali szétválasztótárcsafedeleket 21 ismét elôre fordítani és a szárnyas csavarral 20 rögzíteni A fěrészfejet ...

Страница 38: ...anyag tisztítására ne használjon maró hatású szereket 10 0 Pótalkatrészek megrendelése A pótalkatrészek megrendelésénél a következô adatokat kell megadni A készülék típusát A kászülékk cikkszámát A készülék ident számát A szükséges pótalkatrész pótalkatrész számá Aktuális árak és inforációk a www isc gmbh info alatt találhatóak Anleitung_BT_MC_355_SPK1 Anl Hercules MS 355_1 03 04 2008 13 43 Uhr Se...

Страница 39: ...ijelova obratka lomovi rezne ploče izbacivanje oštećenih ili neispravnih reznih ploča oštećenje sluha kada se ne koristi potrebna zaštita za uši 4 Važne upute Molimo da pažljivo pročitate naputak za upotrebu i da se držite uputa iz njega Na osnovu ovoga naputka za upotrebu upoznajte se s uredjajem ispravnom upotrebom te sigurnosnim uputama Sigurnosne upute Upozorenje Kada se koristi električni ala...

Страница 40: ...vlažnoj ili mokroj sredini Osigurajte dobro osvjetljenje Ne koristite alat u blizini zapaljivih tekućina ili plinova 22 Čuvajte se od električnog udara Izbjegnite kontakt tijela s uzemljenim dijelovima 23 Čuvajte svoj alat na sigurnom mjestu Dok ne upotrebljavate alat čuvajte ga u suhoj zaključenoj prostoriji nedostupno za djecu 24 Priključite napravu za usisavanje prašine Kada ima priključak za n...

Страница 41: ...nu pažnju treba tome posvijetiti pri obradi cijevi tankih stijenki Kada ste rez gotovo završili nemojte smanjiti tempo nego snažno provucite Time se materijal štiti od pregrijavanja i stvaranja oštrih ivica 23 Uvijek koristite poklopac rezne ploče 24 Nikada ne radite sa strojem u području gdje ima lakozapaljivih plinova ili tekućina 25 Radi sprečavanja električnog udara aparat nikada ne izlažite m...

Страница 42: ...jeva izvaditi ili ugurati Gurnite vreteno 5 unaprijed dok čeljust 4 ne dodirne obradak Preklopite gornju polovicu matice 14 opet nadolje tako da se vreteno 5 i oba dijela matice zahvataju Okretanjem ručice 6 se obradak sigurno steže u škripcu 15 7 3 Kosi rezovi slika 5 Kako bi se omogućilo izvodjenje kosih rezova moguće je da se škripac namjesti od 0 45 Popustite oba vijka 16 17 Okrenite čeljust 7...

Страница 43: ...ili da skače pošto se na taj način pogoršava kvaliteta reza a moglo bi to za posljedicu imati čak i lomljenje rezne ploče Za vrijeme rezanja rukohvat 2 se snažno i ravnomjerno mora pritiskati nadolje Brzinu rezanja ne treba smanjiti ni na kraju postupka rezanja pošto se time sprečava pregrijavanje obratka i preveliko stvaranje oštrih ivica Napomena Broj rezova po ploči i kvaliteta istih može znatn...

Страница 44: ...cího kotouče řezné úrazy Zpětné vrhání obrobků a částí obrobků Zlomení dělicích kotoučů Vymrštění poškozených nebo chybných dělicích kotoučů Poškození sluchu při nepoužívání ochrany sluchu 4 Důležité pokyny Prosím přečtěte si pečlivě návod k použití a dbejte jeho pokynů Na základě tohoto návodu k použití se seznamte s přístrojem jeho správným použitím a také s bezpečnostními pokyny Bezpečnostní po...

Страница 45: ...kud se od stroje vzdálíte přístroj vypněte Vyčkejte tak dlouho až se stroj úplně zastaví 20 Nástroj uzemněte Pokud je nástroj vybaven přípojkou s ochranným vodičem smí být připojen pouze na proto určenou zásuvku 21 Zohledněte vlivy okolí Nevystavujte nástroj dešti Nepoužívejte stroj ve vlhkém nebo mokrém prostředí Postarejte se o dobré osvětlení Nepoužívejte nástroje v blízkosti hořlavých kapalin ...

Страница 46: ...patný řez nebo zlomený dělicí kotouč 21 Obrobky jsou nejlépe řezány když je jejich úhel k dělicímu kotouči držen co možná nejmenší 22 Počet řezů pro kotouč jako též jejich kvalita může být na základě řezných časů velmi proměnlivá Rychlé řezy mohou vést k rychlejšímu opotřebení kotouče ale zabrání také zbarvení materiálu jako též tvorbě otřepů Je na to nutné dbát obzvlášt u slabostěnných trubek Kdy...

Страница 47: ...zem 13 K jednoduššímu transportu je stroj vybaven nosným madlem 8 7 2 Svěrák obr 3 4 Každý obrobek musí být před opracováním fixován ve svěráku 15 Horní polovinu matice 14 odklopit nahoru Vřeteno 5 vytáhnout tak dalece až může být obrobek upnut mezi upínacími plochami 4 7 svěráku 15 Pokyn není nutné otáčet vřeteno 5 když je polovina matice 14 vyklopena nahoru Vřeteno 5 může být plynule vytaženo ne...

Страница 48: ...pět pustit 8 2 Provádění řezů obr 10 11 Obrobek pevně upnout do svěráku Stroj zapnout a počkat až motor dosáhne maximálního počtu otáček Hlavu stroje 1 na rukojeti 2 tlačit dolů až se dělicí kotouč lehce dotkne obrobku Dělicí kotouč 11 rovnoměrně posouvat řezaným materiálem Pozor Dělicí kotouč nesmí nerovnoměrně běžet nebo skákat protože se tím zhorší kvalita řezu nebo to dokonce může mít za násle...

Страница 49: ...or produkt j prohlašuje následující shodu podle směrnice EU a norem pro výrobek A a következő konformitást jelenti ki a termékek re vonatkozó EU irányvonalak és normák szerint X pojasnjuje sledečo skladnost po smernici EU in normah za artikel deklaruje zgodność wymienionego poniżej artykułu z następującymi normami na podstawie dyrektywy WE W vydáva nasledujúce prehlásenie o zhode podľa smernice EÚ...

Страница 50: ...returning the electrical device the owner is obliged to cooperate in ensuring that the device is properly recycled if ownership is relinquished This can also be done by handing over the used device to a returns center which will dispose of it in accordance with national commercial and industrial waste management legislation This does not apply to the accessories and auxiliary equipment without any...

Страница 51: ...mfattet heraf er tilbehørsdele og hjælpemidler som ikke indeholder elektroniske komponenter B Samo za zemlje Europske zajednice f Elektroalate ne bacajte u kućno smeće U skladu s europskom odredbom 2002 96 EG o starim električnim i elektroničkim uredjajima i njezinom primjenom u okviru državnog prava istrošeni elektroalati moraju se odvojeno sakupiti i zbrinuti na ekološki način u svrhu recikliran...

Страница 52: ...í zpět Vlastník elektrického přístroje je alternativně namísto zaslání zpět povinen ke spolupráci při odborné recyklaci v případě že se rozhodne přístroj zlikvidovat Starý přístroj může být v tomto případě také odevzdán do sběrny která provede likvidaci ve smyslu národního zákona o hospodářském koloběhu a zákona o odpadech Toto neplatí pro ke starým přístrojům přiložené části příslušenství a pomoc...

Страница 53: ... dʼaccompagnamento dei prodotti è consentita solo con lʼesplicita autorizzazione da parte della ISC GmbH Eftertryk eller anden form for mangfoldiggørelse af skriftligt materiale ledsagepapirer indbefattet som omhandler produkter er kun tilladt efter udtrykkelig tilladelse fra ISC GmbH Az termékek dokumentációjának és kisérô okmányainak az utánnyomása és sokszorosítása kivonatosan is csak az ISC Gm...

Страница 54: ... de modifications Con riserva di apportare modifiche tecniche Der tages forbehold för tekniske ændringer Technikai változások jogát fenntartva Bf Zadržavamo pravo na tehnične izmjene j Technické změny vyhrazeny Anleitung_BT_MC_355_SPK1 Anl Hercules MS 355_1 03 04 2008 13 43 Uhr Seite 54 ...

Страница 55: ...55 Anleitung_BT_MC_355_SPK1 Anl Hercules MS 355_1 03 04 2008 13 43 Uhr Seite 55 ...

Страница 56: ...evice e g sand stones or dust effects of force or external influences e g damage caused by the device being dropped and normal wear resulting from proper operation of the device The guarantee is rendered null and void if any attempt is made to tamper with the device 3 The guarantee is valid for a period of 2 years starting from the purchase date of the device Guarantee claims should be submitted b...

Страница 57: ... emploi d accessoires non homologués le non respect des prescriptions de maintenance et de sécurité l infiltration de corps étrangers dans l appareil comme par exemple du sable des pierres ou de la poussière l emploi de la force ou l influence extérieure comme par exemple les dommages dus à une chute ainsi que l usure normale conforme à l utilisation Le droit à la garantie disparaît dès lors que d...

Страница 58: ...o di utensili o accessori non consentiti dalla mancata osservanza delle norme di sicurezza e di manutenzione dalla penetrazione di corpi estranei nell apparecchio come per es sabbia pietre o polvere dall impiego della forza o dall influsso esterno come per es danni dovuti a caduta e dall usura normale e dovuta all impiego Il diritti di garanzia decadono quando sono già effettuati interventi sull a...

Страница 59: ...lse f eks overbelastning eller brug af værktøj eller tilbehør som ikke er godkendt tilsidesættelse af vedligeholdelses og sikkerhedsforskrifter indtrængen af fremmedlegemer i apparatet f eks sand sten eller støv brug af vold eller eksterne påvirkninger udefra f eks fordi produktet tabes samt skader der hidrører fra almindelig slitage Garantien mister sin gyldighed hvis der allerede er blevet foret...

Страница 60: ...például a készülék túlterhelése vagy nem engedélyezett betétszerszámok vagy tartozékok a karbantartási és biztonsági határozatok figyelmen kívül hatása idegen testek behatolása a készülékbe mint például homok kövek vagy por erőszakbehatolás vagy idegen behatások mint például leejtés általi károk úgymint a használat általi szokásos kopások által keletkező károk ki vannak zárva A készüléken történő ...

Страница 61: ...npr preopterećenje uređaja ili korištenje nedopuštenih alata ili pribora u slučaju nepridržavanja uputa za održavanje i sigurnosnih odredbi zbog prodiranja stranih tijela u uređaj npr pijeska kamenja ili prašine nasilne primjene ili vanjskih utjecaja kao npr oštećenja zbog pada kao i zbog uobičajenog trošenja tijekom korištenja Zahtjev za jamstvo prestaje biti valjan ako su na uređaju već izvršeni...

Страница 62: ...o např přetížení přístroje nebo použití neschválených vložných nástrojů nebo příslušenství nedodržování pokynů pro údržbu a bezpečnostních pokynů vniknutí cizích těles do přístroje jako např písek kameny nebo prach použití násilí nebo poškození v důsledku cizích vlivů jako např škody způsobené pádem jakož také běžného opotřebení způsobeného používáním Nárok na záruku zaniká pokud bylo do přístroje...

Страница 63: ...cherheitsbestimmungen Ein dringen von Fremdkörpern in das Gerät wie z B Sand Steine oder Staub Gewaltanwendung oder Fremdeinwirkungen wie z B Schäden durch Herunterfallen sowie durch verwendungsgemäßen üblichen Verschleiß ausgeschlossen Der Garantieanspruch erlischt wenn an dem Gerät bereits Eingriffe vorgenommen wurden 3 Die Garantiezeit beträgt 2 Jahre und beginnt mit dem Kaufdatum des Gerätes G...

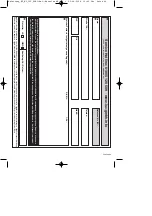
Страница 64: ...chst genau Dadurch können wir für Sie Ihre Reklamation schneller bearbeiten und Ihnen schneller helfen Eine zu ungenaue Beschreibung mit Begriffen wie Gerät funktioniert nicht oder Gerät defekt verzögert hingegen die Bearbeitung erheblich Service Hotline kontaktieren oder bei iSC Webadresse anmelden es wird Ihnen eine Retourennummer zugeteilt l Ihre Anschrift eintragen l Fehlerbeschreibung und Art...

Отзывы: