❑
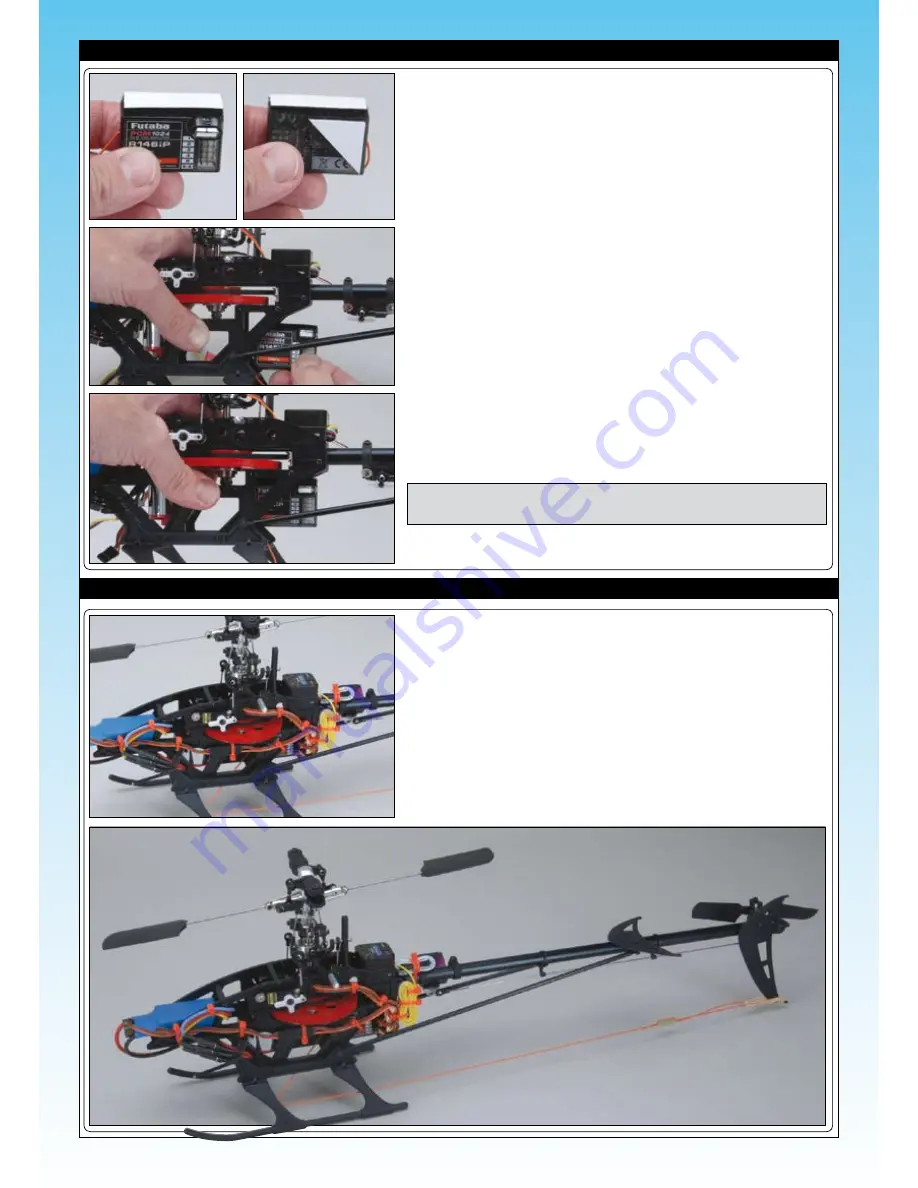
Cut two pieces of Velcro (hook and loop material) from the strip supplied.
One piece attaches to the top of the receiver and the other is cut to match
the angled shape of the sideframes on the rear.
❑
Peel off the backing paper from one side of each piece of Velcro and
attach them to the receiver as shown.
INSTALLING THE RECEIVER
❑
Remove the remaining backing paper from both pieces of Velcro and slide
the receiver into its position to the rear of the main frames under the main
gear.
NOTE
Do not mount the receiver too far forward to ensure that you still
have access to the crystal without removing the receiver.
❑
Press the receiver into position between the frames as shown, ensuring
the Velcro on the top and rear of the receiver attach to the sideframes.
CONNECTING UP AND TIDYING THE WIRING
❑
You can now connect your servos, ESC and gyro to the receiver using
the instructions supplied with your radio system for guidance as to which
channels operate which functions.
❑
Use cable ties (not suplied) to secure the wiring to the main frames to
ensure that nothing can be drawn into any of the mechanical parts. This
is particularly important on a smaller helicopter where there are a lot of
wires in a restricted space.
❑
Use a small band to retain the aerial to the vertical stabiliser ensuring it
cannot be drawn into the main or tail rotors. Do not shorten the aerial.


