


© Edwards Limited 2009. All rights reserved.
Page 9
Edwards and the Edwards logo are trademarks of Edwards Limited.
OPERATION
D141-32-880 Issue A
z
Switch on the GasCheck G3 using the
key.
z
While on the running screen, ensure that the sensitivity is set to the '×100' range as this is the most sensitive.
Adjust the sensitivity using the
or
keys if required.
z
Hold the GasCheck G3 at 45° to the object under test and draw the probe across the test area at a rate of
approximately 25mm per second. When a leak is detected, the bar graph will fill, the reading will increase
and the frequency of the LED flasher will increase. The frequency of the audio indicator will also increase if
this function has been switched on in the main menu.
z
When a leak is detected, return the probe to the area where the leak was identified and move the probe
around slowly until the exact source is identified. Hold the probe steady until the leak rate stabilizes.
Note:
If the GasCheck G3 bar graph fills completely or the instrument display indicates a flashing '99999,' the leak
rate has exceeded the detection limit. In the event of the leak rate being too great, the sensitivity should
be adjusted to a lower level using the
or
keys.
Note:
Variation in temperature, humidity or background gas may result in a constant offset being detected on the
GasCheck G3. To reset the zero, hold the GasCheck G3 away from the source of contamination and press
the key. Human breath contains moisture and carbon dioxide which may also affect the instruments
readings.
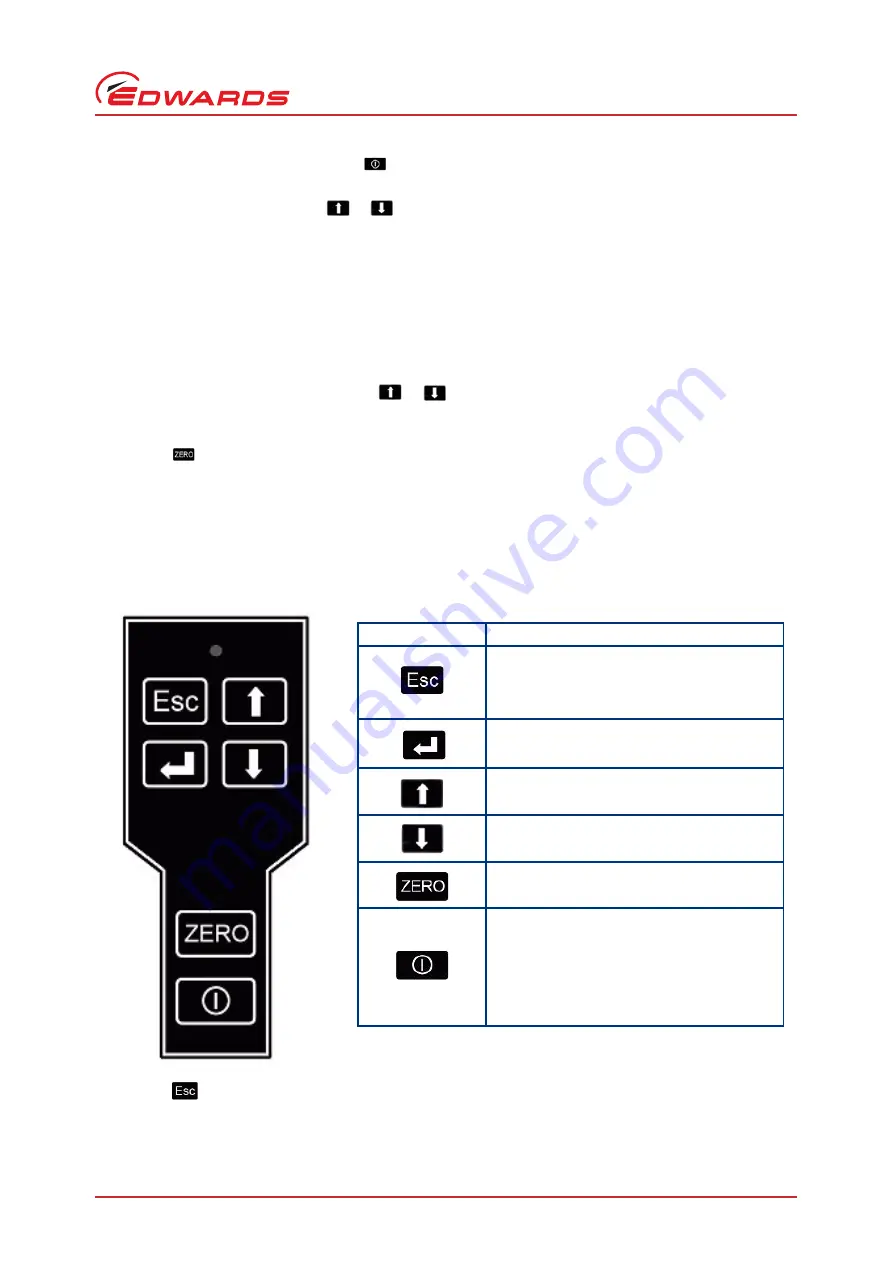
4.4
GasCheck G3 keypad
The GasCheck G3 is operated using a 6 button tactile keypad as shown in
.
Figure 6 - GasCheck G3 keypad layout
Pressing the key switches the GasCheck G3 between the ‘Running screen’ and the main menu. Once in the main
menu screen, pressing the up and down buttons scroll between the different instrument functions. Refer to
.
Button
Function
Escape
returns the display to the previous
screen. Also used to abort an adjustment.
Repeated pressing of Escape will return the
display to the ‘Running Screen’.
Enter
is used to select functions and to accept
settings after parameter has been changed.
Up
is used to scroll up through the function
menu. Also used to adjust settings.
Down
is used to scroll down through the
function menu. Also used to adjust settings.
Zero
is used to zero the background reading.
Power
is used to switch the unit on. Press and
hold the key until the bar reaches the right
hand side of the screen to switch the unit off.
Note:
The unit automatically switches off if
no key presses are detected for
approximately 10 minutes.


