background image

A652–07–880

Issue C Original

Instruction Manual

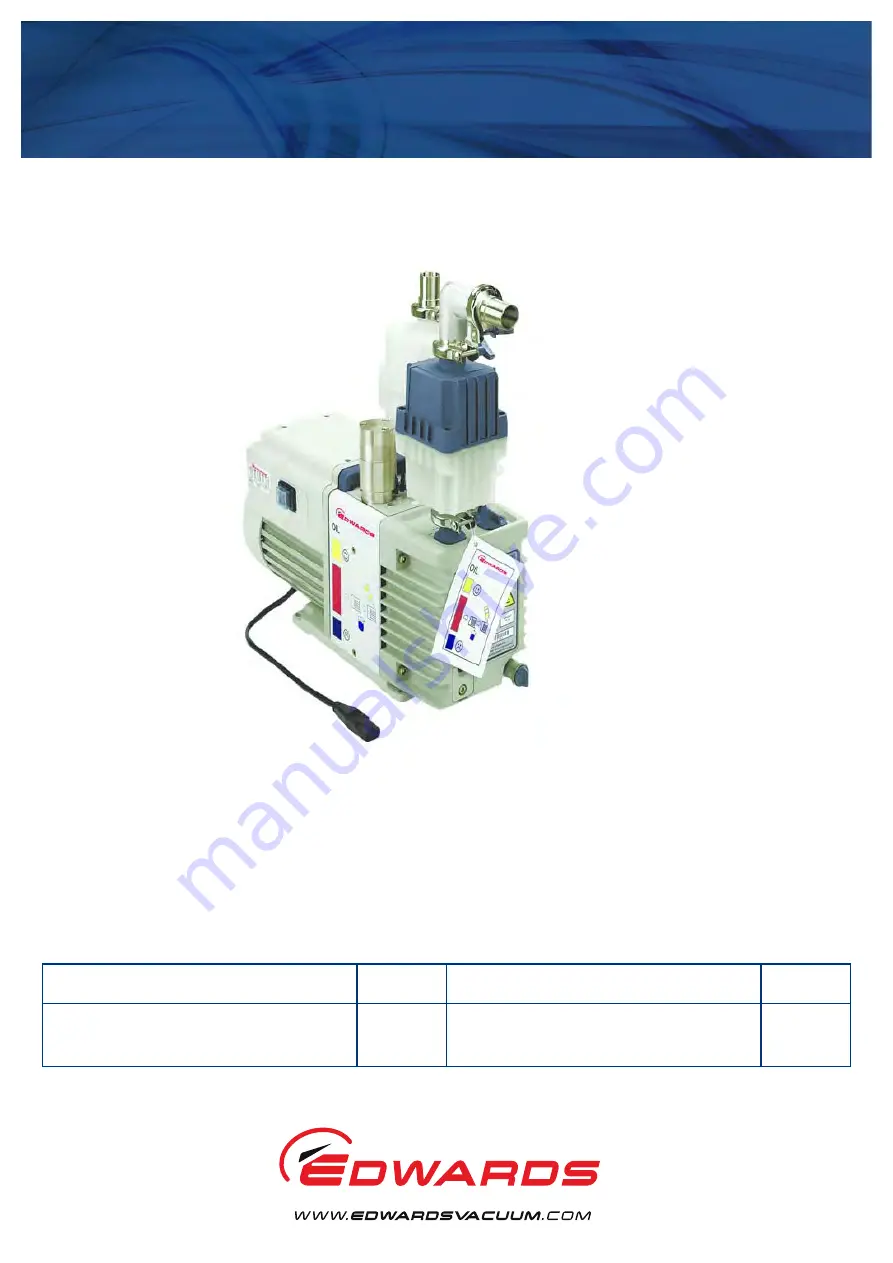
E-LAB 2 Pumps

Description

Item 

Number

Description

Item 

Number

E-LAB 2 Pump, 110-120/220-240 V, 50/60 Hz, 
single-phase

A652-07-903 E-LAB 2 Pump, 100/200 V, 50/60 Hz, single-phase

A652-07-904

E-LAB 2 Pump, 110-120 V, 50/60 Hz, single-phase

A652-07-906

Содержание A652-07-903

Страница 1: ...l service in house repair center WE BUY USED EQUIPMENT Sell your excess underutilized and idle used equipment We also offer credit for buy backs and trade ins www artisantg com WeBuyEquipment REMOTE INSPECTION Remotely inspect equipment before purchasing with our interactive website at www instraview com LOOKING FOR MORE INFORMATION Visit us on the web at www artisantg com for more information on ...

Страница 2: ...nual E LAB 2 Pumps Description Item Number Description Item Number E LAB 2 Pump 110 120 220 240 V 50 60 Hz single phase A652 07 903 E LAB 2 Pump 100 200 V 50 60 Hz single phase A652 07 904 E LAB 2 Pump 110 120 V 50 60 Hz single phase A652 07 906 ...

Страница 3: ......

Страница 4: ...tem design considerations 11 3 3 Unpack and inspect 12 3 4 Locate the pump 12 3 5 Fill the pump with oil 13 3 6 Fit the outlet oil mist filter 13 3 7 Fit the gas ballast oil return assembly 13 3 8 Select the gas ballast flow rate optional 16 3 9 Fit the inlet catchpot 18 3 10 Electrical installation 18 3 10 1 Check and configure the motor 18 3 10 2 Connect the pump to your electrical supply 20 3 1...

Страница 5: ...ean the pump oil level sight glass 32 5 10 Clean the motor fan cover 34 5 11 Clean and overhaul the pump 34 5 12 Test the motor condition 34 5 13 Fit new blades to the pump 34 5 14 Fault finding 35 5 14 1 The pump has failed to start 35 5 14 2 The pump has failed to achieve the specified performance has failed to reach ultimate vacuum 35 5 14 3 The pump is noisy 35 5 14 4 The pump surface temperat...

Страница 6: ...n assembly 15 6 Select the gas ballast flow rate 17 7 Motor voltage configuration 19 8 The outlet oil mist filter 29 9 Pump inlet filter assembly 30 10 Sight glass assembly 32 11 Part sectional view of the oil return assembly 33 Tables Table Page 1 Electrical data pumps with Item Numbers 903 or 906 7 2 Electrical data pumps with Item Numbers 904 7 3 Checklist of components 12 4 Recommended time sw...

Страница 7: ...This page has been intentionally left blank A652 07 880 Issue C Page iv Edwards Limited 2007 All rights reserved Edwards and the Edwards logo are trade marks of Edwards Limited ...

Страница 8: ...ormation is highlighted as WARNING and CAUTION instructions you must obey these instructions The use of WARNINGS and CAUTIONS is defined below CAUTION Cautions are given where failure to observe the instruction could result in damage to the equipment associated equipment and process The units used throughout this manual conform to the SI international system of units of measurement In accordance w...

Страница 9: ...lectric motor through a flexible motor coupling The motor is totally enclosed and is cooled by the motor cooling fan which directs air along the motor fins The pumps are cooled by an additional fan attached to the motor coupling The motor has an on off switch 12 and a thermal overload device When the motor is too hot the thermal overload device switches off the pump The thermal overload device has...

Страница 10: ...re 1 The E LAB 2 Pump 1 Electrical supply connector 2 Voltage indicator 3 Inlet 4 Inlet catchpot 5 Outlet 6 Outlet oil mist filter 7 Oil filler plugs 8 Oil level sight glass 9 Oil drain plug 10 Oil change tag 11 Rubber feet 4 off 12 On off switch 13 Motor fan cover 14 Correct direction of rotation 15 Lifting handle 16 Gas ballast oil return assembly ...

Страница 11: ...A652 07 880 Issue C Page 4 Edwards Limited 2007 All rights reserved Edwards and the Edwards logo are trade marks of Edwards Limited This page has been intentionally left blank ...

Страница 12: ...supply 3 7 m3h 1 60 Hz electrical supply 4 5 m3 h 1 Maximum pumping speed Pneurop 6602 1979 50 Hz electrical supply 3 3 m3h 1 60 Hz electrical supply 3 9 m3 h 1 Maximum permitted inlet pressure and gas ballast inlet pressure 1 bar gauge 2 x 10⁵ Pa Maximum permitted outlet pressure 1 bar gauge 2 x 10⁵ Pa Ultimate total pressure 1 x 10 1 mbar 10 Pa Maximum gas ballast flow 14 l min 1 Maximum water v...

Страница 13: ...C Page 6 Edwards Limited 2007 All rights reserved Edwards and the Edwards logo are trade marks of Edwards Limited Technical data Figure 2 Dimensions mm 1 Outlet 2 Inlet 3 Baseplate mounting holes 4 x M8 4 Oil change tag ...

Страница 14: ... slow blow fuse to prevent unnecessary fuse failure during pump start up Within five minutes as the oil in the pump warms up the current drawn will slowly reduce to the full load current specified in Tables 1 and 2 Sound pressure measured at ultimate vacuum 1 metre from the end of the pump to ISO 11201 50 Hz electrical supply 50 dB A Vibration severity measured at the inlet port to ISO 2372 1974 C...

Страница 15: ...sue C Page 8 Edwards Limited 2007 All rights reserved Edwards and the Edwards logo are trade marks of Edwards Limited Technical data Figure 3 Pumping speed curves speed plotted against inlet pressure 1 60 Hz 2 50 Hz ...

Страница 16: ...ion The surfaces of the pump that are exposed to the process vapours pumped are free from copper zinc and cadmium Other materials of construction include cast iron aluminium fluoroelastomer nitrile chemically resistant polymers nickel and stainless steel Recommended oil Edwards Ultragrade 19 hydrocarbon oil Oil capacity Maximum 0 70 l Minimum 0 42 l To operate the E LAB 2 when the ambient temperat...

Страница 17: ...A652 07 880 Issue C Page 10 Edwards Limited 2007 All rights reserved Edwards and the Edwards logo are trade marks of Edwards Limited This page has been intentionally left blank ...

Страница 18: ...ecautions to avoid the inhalation of oil mist and excessive skin contact with pump oil as prolonged exposure can be harmful z Disconnect the other components in the pumping system from the electrical supply so that they cannot be operated accidentally z Ensure that you correctly fit the inlet catchpot outlet oil mist filter and the gas ballast oil return kit as described in the following sections ...

Страница 19: ...p by hand If you wish to use mechanical lifting equipment do not attach the equipment to the handle for stability use slings around the motor and the pump body Provide a firm level platform for the E LAB 2 Refer to Figure 1 Locate the E LAB 2 so that the oil level sight glass 8 and the oil change tag 10 are visible and so that the oil filler plug 7 and oil drain plug are 9 accessible If your E LAB...

Страница 20: ... the elbow already fitted ensure that the free end of the elbow point vertically downwards as shown on Figure 4 6 Use another Co Seal 9 and clamping ring 10 to secure one of the hose adaptors 11 to the elbow 3 7 Fit the gas ballast oil return assembly 1 Remove the drain plug Figure 8 item 4 from the drain port on the oil mist filter 2 Refer to Figure 5 Fit the drain adaptor 8 to the drain port on ...

Страница 21: ...bow 5 Co Seal 6 Clamping ring 7 Co Seal 8 Elbow 9 Co Seal 10 Clamping ring 11 Hose adaptor 12 Oil mist filter outlet 13 Outlet oil mist filter 14 Oil mist filter inlet 15 Co Seal 16 Clamping ring 17 Pump outlet 18 Gas ballast control 19 Pump inlet 20 Clamping ring 21 O ring centring ring and filter 22 Inlet catchpot outlet 23 Inlet catchpot drain plug 24 Inlet catchpot 25 Inlet catchpot inlet 26 C...

Страница 22: ...dwards Limited Installation A652 07 880 Issue C Figure 5 Fit the gas ballast oil return assembly A Side view pump inlet and inlet catchpot omitted for clarity B Top view 1 Oil mist filter 2 Hose clip 3 Flexible oil return tube 4 Nozzle 5 Oil return assembly 6 E LAB 2 pump 7 Restrictor 8 Drain adaptor ...

Страница 23: ...ree screws 1 which secure the restrictor plate 5 do not dismantle the assembly 2 The restrictor plate 5 has circular indentations 2 and 3 the position of these indentations with respect to the indentation 4 on the oil return assembly identifies the gas ballast flow setting Turn the restrictor plate to the required position z To select no gas ballast flow turn the restrictor plate so that none of t...

Страница 24: ...the Edwards logo are trade marks of Edwards Limited Installation A652 07 880 Issue C Figure 6 Select the gas ballast flow rate 1 Screws 3 off 2 Indentation low gas ballast flow position 3 Indentations high gas ballast flow position 4 Indentation 5 Restrictor plate ...

Страница 25: ...al installation 3 10 1 Check and configure the motor CAUTION Ensure that the motor is correctly configured for your electrical supply If the motor is configured for 110 V operation and you operate the pump with a 240 V electrical supply you will damage the motor Refer to Figure 7 for the item numbers in brackets Ensure that the voltage shown on the voltage indicator 4 in the motor cover correspond...

Страница 26: ...ade marks of Edwards Limited Installation A652 07 880 Issue C Figure 7 Motor voltage configuration A Top view of motor B Internal view of top of motor 1 Cover plate 2 Electrical inlet connector 3 Voltage selector switch 4 Voltage indicator 5 On off switch 6 Position O off 7 Position on ...

Страница 27: ...he other end of the cable fitted with a plug suitable for your local electrical supply E LAB 2 pumps with Item Number A652 07 903 are not supplied with an electrical supply cable you must separately order a suitable electrical supply cable Use the following procedure to connect the electrical supply to the pump 1 Ensure that the on off switch on the motor Figure 7 item 5 is in the off position 2 I...

Страница 28: ...ion of rotation is incorrect switch off the electrical supply immediately and contact your supplier or Edwards for advice 3 11 Inlet and outlet connections CAUTION Ensure that the outlet hose is routed below the level of the pump outlet If you do not condensates may drain back into the pump and damage it Refer to Figure 1 Use suitable 1 2 inch inside diameter hose to connect your vacuum system to ...

Страница 29: ...A652 07 880 Issue C Page 22 Edwards Limited 2007 All rights reserved Edwards and the Edwards logo are trade marks of Edwards Limited This page has been intentionally left blank ...

Страница 30: ...electrical supply to the pump 4 2 To achieve ultimate vacuum pump condensable vapours If the E LAB 2 does not achieve the performance specified in Section 2 make sure that this is not due to your system design before you contact your supplier or Edwards for advice In particular the vapour pressure of all materials used in your vacuum system including pump oil see below must be much lower than the ...

Страница 31: ...load device which isolates the E LAB 2 from the electrical supply when critical temperature or current levels are exceeded The overload device resets automatically when the motor has cooled When you check the E LAB 2 make sure that the pump is not going through a repetitive cycle of thermal overload failures and automatic resets If necessary reduce the thermal load from the pumped gases to prevent...

Страница 32: ...ce is completed recheck the direction of pump rotation if the electrical supply has been disconnected z The pump pump oil inlet catchpot outlet oil mist filter and gas ballast oil return kit will be contaminated with the process chemicals that have been pumped during operation Ensure that the pump is decontaminated before maintenance and that you take adequate precautions to protect people from th...

Страница 33: ...y The Item Numbers of the spares and kits are given in Section 7 5 3 Check the liquid level in the inlet catchpot Refer to Figure 1 Look at the level of fluid in the inlet catchpot 4 If the level is close to or above the MAX level mark 1 Place a suitable container under the drain plug Figure 4 item 23 2 Remove the drain plug and allow the fluid to drain out of the inlet catchpot 3 Refit the drain ...

Страница 34: ...st replace the oil as described below If you continue to use the pump and the oil condition deteriorates until the colour of the oil is approximately the same as the lower bar on the side panel or tag you must clean and overhaul the pump as described in Section 5 11 Use the following procedure to replace the pump oil 1 Refer to Figure 1 Operate the pump for approximately ten minutes to warm the oi...

Страница 35: ...remove the elbow 4 and Co Seal 3 from the outlet 12 of the oil mist filter 2 Refer to Figure 8 Undo and remove the four screws 12 which secure the upper body 10 to the lower body 7 then remove the upper body 3 Lift out the elements 8 10 and inspect the outer surface of the elements for contaminates z If the elements need to be replaced dispose of them safely refer to Section 6 and obtain new eleme...

Страница 36: ... 07 880 Issue C Figure 8 The outlet oil mist filter 1 Outlet 2 Odour element seal 3 Pressure relief valve 4 Drain plug 5 Mist filter element O ring 6 Inlet 7 Lower body white 8 Mist filter element 9 D seal 10 Upper body grey 11 Odour element 12 Securing screws 13 Maximum oil level mark 14 Sight panel Pump exhaust gas Oil droplets ...

Страница 37: ...Step 7 If they are not clean continue at Step 3 3 Remove the O ring 2 from the centring ring and filter assembly 1 Do not allow the O ring to come into contact with the cleaning solution 4 Wash the centring ring and filter assembly in a suitable cleaning solution and allow it to dry 5 If necessary wipe the O ring with a clean dry lint free cloth 6 Refit the O ring 2 to the centring ring and filter...

Страница 38: ...operated accidentally 2 Refer to Figure 5 Undo and remove the hose clip 2 on the oil mist filter end of the oil return tube 3 then remove the end of the oil return tube from the drain adaptor 8 on the oil mist filter 1 3 Remove the restrictor 7 from the oil return tube and remove the blockage from the restrictor 4 Refit the restrictor 7 in the end of the oil return tube 3 fit the end of the oil re...

Страница 39: ...he bezel 2 the sight glass 3 and the O ring 4 from the oil box 5 4 Clean the screws bezel and sight glass with a suitable cleaning solution 5 Wipe the O ring with a clean dry lint free cloth 6 Wipe the sight glass recess in the oil box with the cloth 7 Refit the O ring sight glass and bezel and secure with the two screws 8 Refill the pump with oil as described in Section 5 5 9 Check that the sight...

Страница 40: ...ved Page 33 Edwards and the Edwards logo are trade marks of Edwards Limited Maintenance A652 07 880 Issue C Figure 11 Part sectional view of the oil return assembly 1 Screw 2 Air intake 3 Restrictor plate 4 Expansion chamber 5 Silencer tube ...

Страница 41: ...1 Clean and overhaul the pump Clean and overhaul the pump as described in the instructions supplied with the clean and overhaul kit see Section 7 5 12 Test the motor condition Test the earth continuity and the insulation resistance of the pump motor in accordance with local regulations for periodic testing of electrical equipment The motor of the E LAB 2 complies with IEC 1010 1 We recommend that ...

Страница 42: ...pump has seized after long storage z The pump has been left to stand after contaminants have been pumped and has seized z The motor is faulty 5 14 2 The pump has failed to achieve the specified performance has failed to reach ultimate vacuum z Your pressure measurement technique or gauge head is unsuitable or gives an incorrect indication of pressure For example a contaminated Pirani gauge can ind...

Страница 43: ...nated z The process gas is too hot or the throughput is too high 5 14 5 The vacuum is not fully maintained after the pump is switched off z The gas ballast oil return assembly is incorrectly fitted z The inlet valve pad is damaged z The inlet valve has not closed 5 14 6 The pumping speed is poor z The connecting pipelines are too small in diameter z The connecting pipelines are too long z The inle...

Страница 44: ...nect the pump from your vacuum system 4 Drain any fluid from the inlet catchpot and drain any oil from the oil mist filter 5 Replace the oil as described in Section 5 5 6 Place and secure protective covers over the inlet and outlet ports 7 Store the pump in cool dry conditions until required for use When required prepare and install the pump as described in Section 3 If the pump has been stored fo...

Страница 45: ...A652 07 880 Issue C Page 38 Edwards Limited 2007 All rights reserved Edwards and the Edwards logo are trade marks of Edwards Limited This page has been intentionally left blank ...

Страница 46: ...contamination service exchange repair rebuild and testing to factory specifications Equipment which has been serviced repaired or rebuilt is returned with a full warranty Your local Service Centre can also provide Edwards engineers to support on site maintenance service or repair of your equipment For more information about service options contact your nearest Service Centre or other Edwards compa...

Страница 47: ...A652 07 880 Issue C Page 40 Edwards Limited 2007 All rights reserved Edwards and the Edwards logo are trade marks of Edwards Limited This page has been intentionally left blank ...

Страница 48: ...l service in house repair center WE BUY USED EQUIPMENT Sell your excess underutilized and idle used equipment We also offer credit for buy backs and trade ins www artisantg com WeBuyEquipment REMOTE INSPECTION Remotely inspect equipment before purchasing with our interactive website at www instraview com LOOKING FOR MORE INFORMATION Visit us on the web at www artisantg com for more information on ...

Отзывы: