background image


63


Playing back


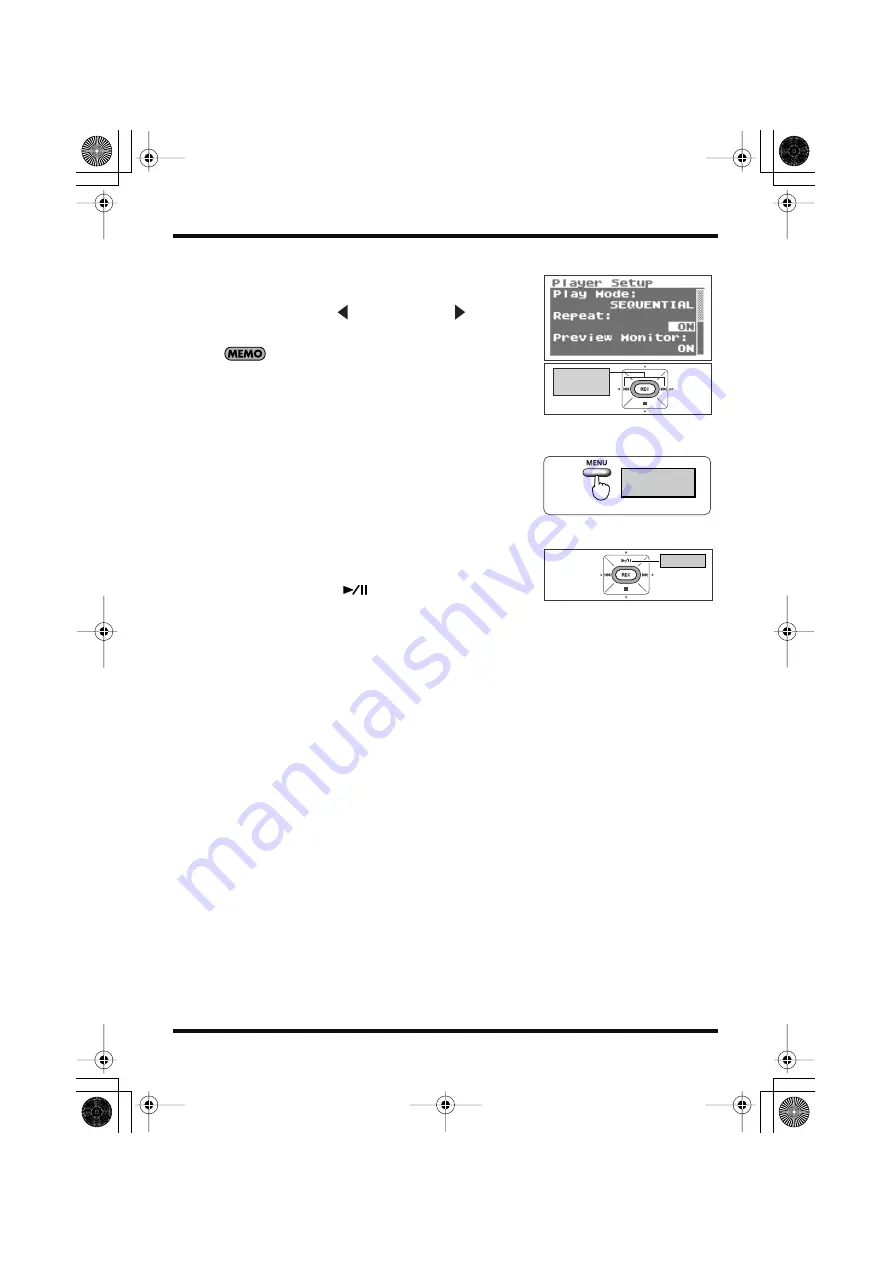
fig.repeat-set-seq-e.eps_80


5.


Set repeat playback.


Use the [PREV button 

] and [NEXT button 

] to change 

the Repeat value.


• If “Repeat” is set to OFF, playback automatically stops once all 

the songs in the selected folder have been played in song order.

• If “Repeat” is set to ON, songs are repeated in the same order 

once all the songs in the selected folder have been played in 
song order.


fig.open-basic2-e.eps_80


6.


Return to <Main Screen>.


Press the [MENU Button] twice to return to the <Main 
Screen>.


fig.play-start-e.eps_80


7.


Play back.


Press the [PLAY Button

].

Change 

the value

Press twice

Show 

<Main Screen>

Play

R-09HR_e.book 63 ページ 2007年12月17日 月曜日 午後2時16分

Содержание R-09HR

Страница 1: ... Musicales Nicaragua Altamira D Este Calle Principal de la Farmacia 5ta Avenida 1 Cuadra al Lago 503 Managua Nicaragua TEL 505 277 2557 PERU Audionet Distribuciones Musicales SAC Juan Fanning 530 Miraflores Lima Peru TEL 511 4461388 IRELAND Roland Ireland G2 Calmount Park Calmount Avenue Dublin 12 Republic of IRELAND TEL 01 4294444 ITALY Roland Italy S p A Viale delle Industrie 8 20020 Arese Milan...

Страница 2: ...isesti asennettu Vaihda paristo ainoastaan laitevalmistajan suosittelemaan tyyppiin Hävitä käytetty paristo valmistajan ohjeiden mukaisesti For Canada This Class B digital apparatus meets all requirements of the Canadian Interference Causing Equipment Regulations Cet appareil numérique de la classe B respecte toutes les exigences du Règlement sur le matériel brouilleur du Canada NOTICE AVIS For th...

Страница 3: ...ologist 011 Do not allow any objects e g flammable material coins pins or liquids of any kind water soft drinks etc to penetrate the unit 012b Immediately turn the power off remove the AC adaptor from the outlet and request servicing by your retailer the nearest Roland Service Center or an authorized Roland distributor as listed on the Information page when The AC adaptor the power supply cord or ...

Страница 4: ...reach of children 106 Never climb on top of nor place heavy objects on the unit 107c Never handle the AC adaptor or its plugs with wet hands when plugging into or unplugging from an outlet or this unit 108b Before moving the unit disconnect the AC adaptor and all cords coming from external devices 109b Before cleaning the unit turn off the power and unplug the AC adaptor from the outlet p 20 110b ...

Страница 5: ...densation may form inside the unit Damage or malfunction may result if you attempt to use the unit in this condition Therefore before using the unit you must allow it to stand for several hours until the condensation has completely evaporated 360 Depending on the material and temperature of the surface on which you place the unit its rubber feet may discolor or mar the surface You can place a piec...

Страница 6: ...ly paying particular note to the following To prevent damage to the cards from static electricity be sure to discharge any static electricity from your own body before handling the cards Do not touch or allow metal to come into contact with the contact portion of the cards Do not bend drop or subject cards to strong shock or vibration Do not keep cards in direct sunlight in closed vehicles or othe...

Страница 7: ... file names are assigned 86 Setting the maximum file size 87 Setting the song playback mode 88 Setting whether to use repeat playback or not 89 Playing sound from the preview monitor 90 Changing the playback speed 91 Setting the reverb type 92 Setting the reverb depth 93 Adjusting the display brightness 94 Setting peak hold for the level meter 95 Setting the time until the screen is darkened when ...

Страница 8: ...ging the playback speed Speed p 64 REVERB button The REVERB button turns the reverb feature on off and changes the reverb type Applying reverb effects during playback p 65 REVERB REVERB is an effect that can be used to for example make it seem as if the sound were being played in a large hall Four types of reverb are available HALL1 HALL2 ROOM or PLATE Reverb type p 65 AB REPEART SPLIT button The ...

Страница 9: ...ursor moves the cursor to the right and changes the value of a selected item Basic operations p 18 Current Screen Status Operation Main Screen Stopped Plays back Playing Pauses playback Recording standby REC button blinking Starts recording Recording REC button lights up Pauses recording Finder Screen Menu Screen Moves cursor up Changes the value Current Screen Current Status Operation Main Screen...

Страница 10: ...ecording standby mode or to start recording It is also used to enter selected items Basic operations p 18 Current Screen Status Operation Main Screen Playing Stops playback Recording standby REC button blinks Releases from recording standby mode Recording REC button lights up Stops recording Finder Screen Menu Screen Moves cursor down Changes the value Current Screen Status Operation Main Screen S...

Страница 11: ...ck then no sound is input via the MIC Input Jack Dynamic microphone The durable dynamic microphone is suitable for vocal or instrumental recordings It does not require a power supply Condenser microphone The sensitive condenser microphone is suitable for recording quiet sounds such as live instrumentals or meetings It requires a power supply from either batteries or plug in power LINE IN jack When...

Страница 12: ...a USB or while Now Processing appears in the display and VOLUME buttons These buttons adjust the output sound level of preview monitor and headphones HEADPHONE jack Connect headphones Playing back p 52 Remote indicator This indicator lights in different ways depending on whether the unit is in recording standby is recording or if there s excessive input Adjusting recording levels using the remote ...

Страница 13: ...on the Menu Screen p 102 PLUG IN POWER switch Slide this switch to the appropriate setting when you ve connected a plug in powered microphone to the MIC Input Jack When set to use plug in powered microphones using a dynamic microphone or a battery powered microphone may cause damage LOW CUT switch This switch turns LOW CUT on or off It is usually set to off MIC GAIN switch This switch changes the ...

Страница 14: ...ssing the input level button increases the input sound level Pressing the input level button decreases the input sound level and VOLUME buttons These buttons adjust the output sound level of preview monitor and headphones PREV button The PREV button selects the beginning of the song or the previous song If it is held down the song rewinds while the button is pressed It can be used during playback ...

Страница 15: ...back It can also pause playback or recording It is also used to move the cursor up in the display or to change the value of a selected item Basic operations p 18 REC button The REC button is used to enter recording standby mode or to start recording It is also used to enter selected items Basic operations p 18 Current Status Operation During a song Moves to next song Beginning of a song Moves to n...

Страница 16: ... This startup screen is shown after power is turned on Songs can be recorded or played This screen shows a song list and allows names to be edited and songs to be deleted or copied You can do things such as set the date and time adjust the recording sound quality adjust the brightness of the display and perform initializations This screen is displayed when a PC is connected via USB Songs can be co...

Страница 17: ...l Playback speed ON OFF Record Recording standby status REC STANDBY Remaining recording time on memory card Peak Song name Recording time Input level Power supply status AC adaptor battery LIMITER AGC status Operates as ON OFF Current time Power supply status AC adaptor battery Song length Sampling frequency of the song being played Sampling frequency during recording Remaining battery power indic...

Страница 18: ...ng Record Recording Standby Displays the Finder screen While the Finder screen is displayed cancels operation or returns to previous screen Displays the Menu screen While the Menu screen is displayed cancels operation or returns to previous screen Enter Change the value Move cursor to the right Change the value Move cursor to the left Move cursor down Normal Move cursor up R 09HR_e book 18 ページ 200...

Страница 19: ...ternal clock date and time Cancel operation Return to previous screen Move cursor to the right Change character Change character Move cursor to the left Delete character Enter Insert character When editing names Fast Forward Next song Playback Pause Adjust the input volume Adjust the playback volume Split file during recording Record Recording Standby Stop Rewind Previous song Start of song R 09HR...

Страница 20: ...aptor into an electrical power outlet fig power onoff e eps_80 4 Turn power on Pressing and holding down the POWER switch turns on the power and shows an R 09HR image in the display To turn off power press and hold down the POWER switch Be sure to use the AC adaptor supplied with this product If the HOLD Switch is in the on position no operations can be performed Be sure to slide it to the off pos...

Страница 21: ...ps_60 1 Turn the R 09HR over 2 Slide the battery case cover up fig battery 2 2 eps_60 fig battery 2 2 eps_60 3 Insert the batteries Insert two AA batteries into the Battery Compartment Be sure the positive and negative terminals are oriented correctly fig battery 4 eps_60 4 Close the battery case cover Using batteries Batteries that can be used AA alkaline batteries LR6 AA nickel metal hydride bat...

Страница 22: ...ings for the power saving feature Setting the power saving feature Setting the time until the screen is darkened when no operations are performed for a set period of time Display Timer p 96 Turning off indicators when the display goes dark Rec Peak LED p 97 Setting the time until the power turns off when no operations are performed for a set amount of time Auto Power Off p 98 Remaining battery pow...

Страница 23: ...tery holder Push it inward until it clicks into place Use only the specified type CR2025 of lithium battery Be sure to insert it as directed to ensure correct polarity Installing batteries in the remote control Back side of the remote control 1 2 Battery holder Press here in the direction of the arrow while you pull out the holder Batteries to use Lithium battery CR2025 R 09HR_e book 23 ページ 2007年1...

Страница 24: ...y life varies according to use As the batteries become low the operating range becomes limited Please replace the batteries if this occurs If you won t be using the remote control for a long period of time you should remove the batteries The response of the remote control may be affected if a strong light such as a spot light is shined at the remote sensor Operations from remote control can be blo...

Страница 25: ...ch on the depression Forcing the cover open may damage the unit fig sdin 3 e eps_60 3 Insert the memory card When inserting the memory card make sure the front side of the card is facing up and insert the card slowly If the card is forcibly inserted incorrectly the R 09HR or the memory card may be damaged Please exercise caution Carefully insert the memory card all the way in until it is firmly in...

Страница 26: ... card after it pops out toward you Never insert or remove a memory card while this unit s power is on Doing so may corrupt the data on the memory card Hold down When using a memory card with the R 09HR for the first time the memory card must be formatted Please format the memory card following the procedure in Formatting p 27 SD Unformatted is shown when an unformatted memory card is inserted into...

Страница 27: ...mory card is inserted Check that the memory card to be formatted is inserted in the Memory Card Slot on the R 09HR Inserting p 25 fig open main e eps_80 2 Show the Menu Screen Press the MENU Button to show the Menu Screen To cancel the operation press the MENU Button You re returned to the previous screen fig sdutl e eps_80 3 Select SD Card Use the PLAY Button and STOP Button to select SD Card the...

Страница 28: ... Card The R 09HR supports SDHC memory cards Some memory card types or memory cards from some manufacturers may not record or play back properly on the R 09HR Never insert or remove a memory card while this unit s power is on Doing so may corrupt the data on the memory card Carefully insert the memory card all the way in until it is firmly in place Do not force the card into the slot fig sdcard2 e ...

Страница 29: ...then press the REC Button When the power is on the internal clock draws power from the AC adaptor or the batteries When the power is off the internal clock will run temporarily on the power stored in the main unit However if the power is off for several days the internal clock settings return to the original settings initial status When power is turned on in initial status the message Clock Initia...

Страница 30: ...ime 2 e eps_80 2 Edit the date and time Move the cursor over the character to change use the PLAY Button and STOP Button to change the date and time then press the REC Button to enter the changes fig open main e eps_80 4 Return to Main Screen Press the MENU Button Move cursor to the left or right Change the value Enter Show Main Screen R 09HR_e book 30 ページ 2007年12月17日 月曜日 午後2時16分 ...

Страница 31: ...evel set eps_80 3 While the sound is being output press the Input Level Button to adjust the volume gradually Adjust so that the level meter moves as far to the right as possible without the PEAK Indicator turning on If the PEAK Indicator stays lit then the input level is too high and the recorded sound becomes distorted See Adjusting recording levels p 45 for details on adjusting the input level ...

Страница 32: ... Preview Monitor p 90 fig outputlevel e eps_80 2 Adjust the volume Use and VOLUME buttons to set the volume to a comfortable level fig phones eps_80 No sound is played from the monitor speaker when headphones are connected See Playing back p 52 for details on playback Playing back Using headphones Play Low Volume High Rewind Fast Forward If the PREV button is held down during playback the recordin...

Страница 33: ...nd STOP Button to select Delete then press the REC Button fig delete sure e eps_80 4 Press the REC Button to delete the song A confirmation screen is shown Press the REC Button to delete the song To cancel press the FINDER Button before pressing the REC Button fig process del eps_80 Do not turn off power while deleting fig open main e eps_80 5 Return to Main Screen Press the FINDER Button Deleting...

Страница 34: ...ly The larger value provides better sound quality When making a digital recording the sound level is measured periodically and that level is made into a digital signal The sampling frequency is a value that defines the time interval and is expressed in kHz A high sampling frequency is needed to faithfully reproduce high sounds Higher sampling frequencies result in larger song sizes and shorter rec...

Страница 35: ...icates data transfer rates in number of bits sent per second The WAV bit is used to represent the size of a sample The sample size indicates the amount of precision used in capturing subtle changes in the sound Larger sampling size values allow for more details of the sound to be expressed and result in sound that is smoother and more natural Higher bps and bit values result in larger song sizes a...

Страница 36: ...iple files Estimated recording times Setting Memory card size 512MB 1GB 2GB 4GB 8GB WAVE 24bit 96kHz 13 27 55 110 220 WAVE 24bit 88 2kHz 15 30 60 120 240 WAVE 24bit 48kHz 27 54 110 220 440 WAVE 24bit 44 1kHz 29 59 120 240 480 WAVE 16bit 96kHz 20 40 80 160 320 WAVE 16bit 88 2kHz 22 44 88 176 352 WAVE 16bit 48kHz 40 81 166 332 664 WAVE 16bit 44 1kHz 44 88 180 360 720 MP3 320kbps 196 392 797 1540 308...

Страница 37: ...one or other device is connected to the LINE IN Jack or MIC Input Jack the Internal Mic cannot be used When using the Internal MIC do not connect anything to the MIC Jack or LINE IN Jack Set monitoring on when recording to monitor the sound through headphones while recording Setting whether to monitor sound while recording p 100 fig power onoff e eps_80 1 Turn on power to the R 09HR Turn on power ...

Страница 38: ...r Setup Use the PLAY Button and STOP Button to select Recorder Setup then press the REC Button fig setsamplingrate e eps_80 3 Select the sampling frequency Sample Rate Use the PREV button and NEXT button to change the Sample Rate value Sampling frequency values 44 1 kHz 48 kHz 88 2 kHz 96 kHz Show Menu Screen Move the cursor up or down Enter Changes the value R 09HR_e book 38 ページ 2007年12月17日 月曜日 午...

Страница 39: ... when the sampling frequency is 88 2 kHz or 96 kHz fig open basic2 e eps_80 4 Press the MENU Button twice to return to the Main Screen 5 Adjust the input level Adjust the volume for the recorded sound Follow the procedures in Adjusting recording levels p 45 to adjust the level Recording mode MP3 64 kbps MP3 96 kbps MP3 128 kbps MP3 160 kbps MP3 192 kbps MP3 224 kbps MP3 320 kbps WAV 16 bit WAV 24 ...

Страница 40: ...ring recording the input level will change Be careful to not mistakenly use the Input Level Button Power cannot be turned off during recording First stop the recording then turn off the power fig rec stop e eps_80 7 Press the STOP Button to stop recording The REC Indicator goes out Press the PLAY PAUSE Button to pause Press the PLAY PAUSE Button again to cancel the pause and restart recording fig ...

Страница 41: ...lways turn down the volume and turn off the power on all devices before making any connections fig power onoff e eps_80 1 Turn on power to the R 09HR Turn on power to the R 09HR See Turning power on off p 20 2 Set the sampling frequency Configuring recording p 34 fig open set e eps_80 1 Show the Menu Screen Press the MENU Button to show the Menu Screen fig recoedersetting e eps_80 2 Select Recorde...

Страница 42: ...e recording mode Use the PREV button and NEXT button to change the Rec Mode value MP3 cannot be selected when the sampling frequency is 88 2 kHz or 96 kHz fig open basic2 2 eps_80 4 Press the MENU Button twice to return to the Main Screen Sampling frequency values 44 1 kHz 48 kHz 88 2 kHz 96 kHz Recording mode MP3 64 kbps MP3 96 kbps MP3 128 kbps MP3 160 kbps MP3 192 kbps MP3 224 kbps MP3 320 kbps...

Страница 43: ...ed if a monaural microphone is used when the external microphone type is set to stereo When set to monaural the same sound stereo is recorded to the L and R channels 6 Connect the microphone Connect a microphone to the MIC Input Jack on the R 09HR To monitor the sound while recording connect headphones to the HEADPHONE jack Feedback may occur when external speakers are connected so please do not u...

Страница 44: ... use the Input Level Button Power cannot be turned off during recording First stop the recording then turn off the power fig rec stop e eps_80 9 Press the STOP Button to stop recording The REC Indicator goes out Press the PLAY PAUSE Button to pause Press the PLAY PAUSE Button again to cancel the pause and restart recording fig song eps_80 The display shows the recorded song The song name is automa...

Страница 45: ... toward the target for recording fig rec st e eps_80 2 Enter recording standby mode Press the REC Button while the Main Screen is showing The REC Indicator blinks The unit is in recording standby mode Recording has not started when in this state fig inputlevel test e eps_80 3 Play the song to record into the microphone The level meter indicates the loudness of the input to R 09HR fig inputlevel e ...

Страница 46: ...rding and return to the Main Menu Because the level settings are saved press the REC Button again to start recording with the same input level Some noise may be heard when the input level is being adjusted with the Input Level Buttons This is not a malfunction Adjusting recording levels using the remote control The recording level can be adjusted using the remote indicator The remote indicator ind...

Страница 47: ...ig level eps e_80 Use the Input Level Buttons to adjust the volume so that the remote indicator does not blink faster clipping stage is not reached even when the loudest sound is produced by the recording target Doing this prevents clipping during the loudest parts of a song or during instrumental passages played fortissimo Once the level setting is finished press the REC Button on the remote cont...

Страница 48: ...yer to the R 09HR fig power onoff e eps_80 1 Turn on power to the R 09HR Turn on the R 09HR s power See Turning power on off p 20 2 Set the sampling frequency Configuring recording p 34 fig open set e eps_80 1 Show the Menu Screen Press the MENU Button to show the Menu Screen fig recoedersetting e eps_80 2 Select Recorder Setup Use the PLAY Button and STOP Button to select Recorder Setup then pres...

Страница 49: ... twice to return to the Main Screen fig cdin e eps_60 4 Connect the CD player Use an audio cable to connect the line out jack on the CD player to the LINE IN Jack on the R 09HR 5 Adjust the input level Adjust the input level while playing the song to be recorded on the CD player After adjusting the input level rewind the song to be recorded to the start Adjusting recording levels p 45 Move the cur...

Страница 50: ...playing fig rec stop e eps_80 8 Press the STOP Button to stop recording The REC Indicator goes out Press the PLAY PAUSE Button to pause Press the PLAY PAUSE Button again to cancel the pause and restart recording fig song eps_80 The display shows the recorded song A song name such as R09_0001 WAV is automatically created The four digit number forming the latter part of the name is arrived at by add...

Страница 51: ...of the memory card Although there won t be any interruptions in the recording when carrying out playback on the R 09HR the files before and after cannot be played without interruptions gapless recording File splitting becomes possible after a file has more than two seconds of recording File splitting cannot be performed on an interval of less than two seconds The sound of the button clicking may b...

Страница 52: ... Button needs to be pressed depends on the screen that is showing fig play 2 e eps_80 2 Use the PREV button and NEXT button to select the song to play Press the PREV button to move back one song at a time Press the NEXT button to move forward one song at a time When No Song is shown there is no song in the current folder that the R 09HR can play When No Card is shown there is no memory card in pla...

Страница 53: ...own in the display do not support MP3 ID3 tagging See Song types that can be played p 66 for songs that can be played back on the R 09HR Play Low Volume High Demo Songs The SD Memory Card has demo songs recorded on it With the demo songs on the SD Memory Card the recording time is reduced by the space occupied by the demo songs The demo songs will be deleted if the SD Memory Card is formatted You ...

Страница 54: ...dphones and speakers Headphones Analog speakers When connecting speakers Turn on power to your various devices in the order specified By turning on devices in the wrong order you risk causing malfunction and or damage to speakers and other devices 1 Turn off power to the R 09HR 2 Turn the volume of the speakers all the way down and then turn off the power 3 Connect the speakers Only speakers with ...

Страница 55: ...d speed increases fig rwdfwd e eps_80 Rewinding and fast forwarding Fast Forward Continue to press Continue to press Rewind Rewinding or fast forwarding during playback When rewinding or fast forwarding during playback a song the rewind or fast forward operation on some memory cards may stop because the rate that the data can be read is too slow If this happens press the STOP Button once to end pl...

Страница 56: ... e eps_80 2 Set the start position marker A Press the AB REPEAT Button once during playback That position becomes the start position marker A for the playback loop fig repeat 2 e eps_80 3 Set the end position marker B Press the AB REPEAT Button again That position becomes the end position marker B for the playback loop Repeated playback of a selected section 2 3 1 Play Setting marker A A Song A B ...

Страница 57: ... the A and B markers are cancelled To stop playback as well press the STOP Button The repeat playback settings A and B markers are saved A B Song Cautions during setting If marker B is not set after setting marker A and playback continues to the end of the song the section between marker A and the end of the song is repeated The repeat settings are cancelled if the PREV button or NEXT button are u...

Страница 58: ...n The Menu Screen is not shown during playback Press the STOP Button to stop playback fig plaersettings e eps_80 2 Select Player Setup Use the PLAY Button and STOP Button to select Player Setup then press the REC Button Repeating a song 7 3 5 2 4 1 6 Show Menu Screen Move the cursor up or down Enter R 09HR_e book 58 ページ 2007年12月17日 月曜日 午後2時16分 ...

Страница 59: ...to the Repeat line fig repeat set e eps_80 5 Select ON Use the PREV button and NEXT button to change the Repeat value and select ON fig open basic2 e eps_80 6 Return to Main Screen Press the MENU Button twice to return to the Main Screen fig play start e eps_80 7 Play back Press the PLAY Button Change the value Move the cursor up or down Change the value Press twice Show Main Screen Play R 09HR_e ...

Страница 60: ...r Setup Use the PLAY Button and STOP Button to select Player Setup then press the REC Button fig setshuffle e eps_80 3 Select SHUFFLE Use the PREV button and NEXT button to change the Play Mode value and select SHUFFLE fig repeat shu e eps_80 4 Select Repeat Use the PLAY Button and STOP Button to move the cursor to the Repeat line Shuffle play Show Menu Screen Move the cursor up or down Enter Chan...

Страница 61: ... is set to ON songs are repeated in the same order once all the songs in the selected folder have been played with the shuffle feature fig open basic2 e eps_80 6 Return to Main Screen Press the MENU Button twice to return to the Main Screen fig play start e eps_80 7 Play back Press the PLAY Button To reshuffle the songs press the Stop Button once then press the PLAY Button again Change the value P...

Страница 62: ...lect Player Setup Use the PLAY Button and STOP Button to select Player Setup then press the REC Button fig setsequential e eps_80 3 Select SEQUENTIAL Use the PREV button and NEXT button to change the Play Mode value and select SEQUENTIAL fig repeat seq e eps_80 4 Select Repeat Use the PLAY Button and STOP Button to move the cursor to the Repeat line Playing back in order Show Menu Screen Move the ...

Страница 63: ... have been played in song order If Repeat is set to ON songs are repeated in the same order once all the songs in the selected folder have been played in song order fig open basic2 e eps_80 6 Return to Main Screen Press the MENU Button twice to return to the Main Screen fig play start e eps_80 7 Play back Press the PLAY Button Change the value Press twice Show Main Screen Play R 09HR_e book 63 ページ...

Страница 64: ...Press the SPEED Button for a number of seconds 2 Set the playback speed Press the PREV button and NEXT button while the playback speed is displayed to change the speed value Changing the playback speed Speed Selecting the playback speed Setting 50 60 70 80 90 110 120 130 140 150 Hold down Show Playback speed Change the value R 09HR_e book 64 ページ 2007年12月17日 月曜日 午後2時16分 ...

Страница 65: ...everb are displayed 2 Change the reverb type Press the PREV button and NEXT button while the reverb type is displayed to change the reverb type Applying reverb effects during playback Applying reverb effects Reverb type Type Effect HALL1 This reverb effect simulates the reverberation in a concert hall A mild reverberation with a long spreading sound is obtained Hall 2 has shorter reverberation tha...

Страница 66: ...w sound density situations Bit rates are increased for high sound density situations Song types that can be played Sampling frequency kHz Sample size bits WAV Playback 32 44 1 48 88 2 96 16 24 Sampling frequency kHz Bit rate kbps MP3 Playback 32 44 1 48 32 320 kbps VBR R 09HR_e book 66 ページ 2007年12月17日 月曜日 午後2時16分 ...

Страница 67: ... e eps_80 4 Connect with the USB cable The R 09HR connects to the PC with the included USB cable When connecting the USB cable to the PC avoid touching the metal portions Hold the base when inserting the plug If you connect to a PC without having a memory card in place the R 09HR s display shows No Card The PC will not recognize the R 09HR if connecting while the Menu Screen is showing or during p...

Страница 68: ...files This section uses screens from Windows XP The actual display may differ depending on the environment Loading songs Windows Downloading songs from a PC To load songs from the PC into the R 09HR select the songs on the PC and drag them to the removable disk icon Songs that can be played on the R 09HR VBR Variable Bit Rate Bit rates are decreased for low sound density situations Bit rates are i...

Страница 69: ...0 4 The actual display may differ depending on the environment Macintosh Downloading songs from a PC To load songs from a Macintosh into the R 09HR select the songs on the Macintosh and drag them to the NO NAME icon Songs that can be played on the R 09HR VBR Variable Bit Rate Bit rates are decreased for low sound density situations Bit rates are increased for high sound density situations Sampling...

Страница 70: ...8 2 Select the memory card Select the R 09HR from the displayed list of hardware devices 3 Click on Stop in the dialogue box fig winr 4 e eps_38 4 Click on OK When the safely remove hardware dialog box appears select the R 09HR memory card and click on OK 5 Disconnect If The USB Mass Storage Device can now be safely removed from the system appears the USB cable connecting the R 09HR and PC can be ...

Страница 71: ...side of the Dock the garbage can changes to and the connection can be terminated This section uses screens from Mac OS 10 4 The actual display may differ depending on the environment 2 Disconnect Once the NO NAME or untitled icon has been deleted from the desktop the USB cable connected the R 09HR and PC can be removed The power to the R 09HR can also be turned off Macintosh R 09HR_e book 71 ページ 2...

Страница 72: ...moves to the Main Screen p 73 Folder Selects a folder and moves to the Main Screen Information Song Shows information about the song Or protects it p 74 Folder Shows information about the folder Delete Song Deletes the song p 75 Folder Deletes the folder Rename Song Changes the song name p 76 Folder Changes the folder name Move Song Moves the song p 77 Copy Song Copies the song p 79 Repair Song Re...

Страница 73: ... the Finder Screen Use the PLAY Button and STOP Button to select a song or folder then press the REC Button To select a subfolder select the folder then press the NEXT button To move up a level press the PREV button fig select e eps_80 2 Choose Select Use the PLAY Button and STOP Button to select Select then press the REC Button The song or folder is selected and the Main Screen is shown Selecting...

Страница 74: ...ed to prevent being deleted accidentally or having its name changed fig setprotect e eps_80 Set protection on or off Use the PREV button and NEXT button to switch it on or off When protection is on a lock is shown on the icon fig key eps_80 fig open basic3 e eps_80 3 Return to Main Screen Press the FINDER Button three times to return to the Main Screen Displaying song or folder information Informa...

Страница 75: ...on and STOP Button to select Delete then press the REC Button fig delete sure e eps_80 3 Press the REC Button to delete the song A confirmation screen is shown Press the REC Button to delete the song To cancel press the FINDER Button before pressing the REC Button fig process del eps_80 Do not turn off power while the deletion takes place fig open main eps_80 4 Return to Main Screen Press the FIND...

Страница 76: ...and NEXT button to move the cursor to the right or left fig rename 3 2 e eps_80 2 Edit Move the cursor to the character to change use the PLAY Button and STOP Button to change the character then press the REC Button to enter the changes Insert a character with the REVERB Button Delete a character with the AB REPEAT Button To cancel press the FINDER Button before pressing the REC Button If the name...

Страница 77: ... the song to the top level When a folder is selected the song is moved into that folder R 09HR memory card structure p 78 To cancel press the FINDER Button before pressing the REC Button To select a subfolder select the folder then press the NEXT button To move up a level press the PREV button fig process mov eps_80 Do not turn off power or remove the memory card while moving songs The Move operat...

Страница 78: ... Changing the name Rename p 76 Folder2 R09_0010 WAV R09_0009 MP3 Folder1 R09_0005 MP3 R09_0004 MP3 R09_0003 WAV R09_0002 WAV R09_0001 WAV Root R09_0008 WAV R09_0007 WAV R09_0006 WAV Folder Song R 09HR top level Use the PLAY Button and STOP Button to change the selected file Use the FWD Button to enter a folder Use the RWD Button to exit a folder R 09HR_e book 78 ページ 2007年12月17日 月曜日 午後2時16分 ...

Страница 79: ...re to copy the song then press the REC Button Select Root to copy the song to the top level When a folder is selected the song is copied into that folder R 09HR memory card structure p 78 To cancel press the FINDER Button before pressing the REC Button To select a subfolder select the folder then press the NEXT button To move up a level press the PREV button fig process cop eps_80 Do not turn off ...

Страница 80: ...to select Repair then press the REC Button This menu is displayed only when the R 09HR detects a damaged song fig copy3 e eps_80 3 Press the REC Button to repair the file A confirmation screen is shown Press the REC Button to repair the song To cancel press the FINDER Button before pressing the REC Button Do not turn off power while repairing songs fig open main e eps_80 4 Return to Main Screen Pr...

Страница 81: ...utton to select the folder where the new folder is to be created fig folder select2 e eps_80 2 Use the NEXT button to enter a folder ffig folder select5 e eps_80 3 Select a folder Use the PLAY Button and STOP Button to select the name of the folder at the top and press the REC Button Creating folders Make Folder Move the cursor up or down Enter Move the cursor up or down Enter Move the cursor up o...

Страница 82: ...er A confirmation screen is shown Press the REC Button to enter A New Folder is created To cancel press the FINDER Button before pressing the REC Button fig process mak eps_80 Do not turn off power or remove the memory card while creating a folder fig open main e eps_80 4 Return to Main Screen Press the FINDER Button Move the cursor up or down Enter Enter Show Main Screen R 09HR_e book 82 ページ 2007...

Страница 83: ...th Sets the depth for the reverb 1 10 p 93 Display Setup Brightness Adjusts the display brightness 1 5 10 p 94 Peak Hold Sets peak hold for the Level Meter OFF ON p 95 Display Timer Sets the time to wait for some input before darkening the screen OFF 2 5 10 20 p 96 Rec Peak LED The REC Indicator and PEAK Indicator can be linked to the Display Timer settings When the display goes dark the REC Indic...

Страница 84: ...ress the REC Button fig setsamplingrate e eps_80 2 Set the sampling frequency Sample Rate Use the PREV button and NEXT button to change the Sample Rate value When finished with the settings press the MENU button to return to previous screens in order SD Card Information Shows information about the SD memory card p 106 Format Formats the SD memory card p 27 Factory Reset Initializes the R 09HR p 10...

Страница 85: ...de Use the PLAY Button and STOP Button to move the cursor to the Rec Mode line fig setrecmode e eps_80 3 Set the recording mode Use the PREV button and NEXT button to change the Rec Mode value When finished with the settings press the MENU button to return to previous screens in order Setting the recording mode Rec Mode Setting MP3 64 kbps MP3 96 kbps MP3 128 kbps MP3 160 kbps MP3 192 kbps MP3 224...

Страница 86: ...en press the REC Button 2 Select File Name Use the PLAY Button and STOP Button to move the cursor to the File Name line 3 Set how the file names are to be assigned Use the PREV button and NEXT button to change the File Name value When finished with the settings press the MENU button to return to the previous screens in order Setting how file names are assigned File Name Setting Date Name Move the ...

Страница 87: ...e Menu Screen Use the PLAY Button and STOP Button to select Recorder Setup then press the REC Button fig recmode e eps_80 2 Select Max File Size Use the PLAY Button and STOP Button to move the cursor to the Max File Size line fig setrecmode e eps_80 3 Set the maximum file size Use the PREV button and NEXT button to change the Max File Size value When finished with the settings press the MENU butto...

Страница 88: ...o select Player Setup then press the REC Button fig setsingle e eps_80 2 Set the playback mode Use the PREV button and NEXT button to change the setting for Play Mode Repeating a song p 58 Shuffle play p 60 Playing back in order p 62 When finished with the settings press the MENU button to return to previous screens Setting the song playback mode Play Mode Setting SINGLE play one song SEQUENTIAL p...

Страница 89: ... eps_80 2 Select Repeat Use the PLAY Button and STOP Button to move the cursor to the Repeat line fig repeat set e eps_80 3 Set repeat playback Use the PREV button and NEXT button to change the Repeat value When finished with the settings press the MENU button to return to previous screens Setting whether to use repeat playback or not Repeat Setting OFF no repeat ON repeat Move the cursor up or do...

Страница 90: ...onitor line fig repeat sin e eps_80 3 Set Preview Monitor to on or off Use the PREV button and NEXT button to change the Preview Monitor value When headphones or external speakers are connected to the Headphone Jack no sound is played from the R 09HR s monitor speaker even if Preview Monitor is set to ON When finished with the settings press the MENU button to return to the previous screens in ord...

Страница 91: ...he cursor to the Speed line fig plaersetting e eps_80 3 Set the playback speed to use after the change Use the PREV button and NEXT button to change the Speed value When finished with the settings press the MENU button to return to the previous screens in order Playback speed cannot be changed when playing a song with a sampling frequency of 88 2 kHz or 96 kHz Changing the playback speed Speed Set...

Страница 92: ... reverb on off screen While this screen is displayed change the reverb type by pressing the PREV button or NEXT button Reverb cannot be be applied when playing a song with a sampling frequency of 88 2 kHz or 96 kHz Setting the reverb type Rev Type Type Effect HALL1 This reverb effect simulates the reverberation in a concert hall A mild reverberation with a long spreading sound is obtained Hall 2 h...

Страница 93: ...he cursor to the Rev Depth line fig revtype set e eps_80 3 Set the reverb depth Use the PREV Button and NEXT Button to change the Rev Depth value Larger values have deeper reverb When finished with the settings press the MENU button to return to the previous screens in order Reverb cannot be be applied when playing a song with a sampling frequency of 88 2 kHz or 96 kHz Setting the reverb depth Rev...

Страница 94: ...to select Display Setup then press the REC Button fig setdisplaybrightness e eps_80 2 Set the brightness using Brightness Use the PREV button and NEXT button to adjust the brightness by changing the Brightness value When finished with the settings press the MENU button to return to previous screens in order Adjusting the display brightness Brightness Setting 1 dark 5 10 bright Move the cursor up o...

Страница 95: ...fig displaytimer e eps_80 2 Select Peak Hold Use the PLAY Button and STOP Button to move the cursor to the Peak Hold line fig setdisplaytimer e eps_80 3 Set Peak Hold Use the PREV button and NEXT button to change the Peak Hold value When finished with the settings press the MENU button to return to previous screens in order Setting peak hold for the level meter Peak Hold Setting OFF no Peak Hold O...

Страница 96: ...e Display Timer line fig setdisplaytimer e eps_80 3 Set the time Use the PREV button and NEXT button to change the Display Time value and set the time until the screen goes dark Set to OFF to keep the screen bright no matter how much time passes units seconds Power saving feature p 22 When finished with the settings press the MENU button to return to previous screens in order Setting the time unti...

Страница 97: ...TOP Button to move the cursor to the Rec Peak LED line fig setdisplaytimer e eps_80 3 Specify whether the indicators are to be on or off Use the PREV button and NEXT button to change the Rec Peak LED value units seconds Power saving feature p 22 When finished with the settings press the MENU button to return to previous screens in order Turning off indicators when the display goes dark Rec Peak LE...

Страница 98: ...lect Power Manage then press the REC Button fig setautopower e eps_80 2 Set the time with Auto Power Off Use the PREV button and NEXT button to change the Auto Power Off value which specifies the time until the power turns off Set to OFF to keep power on Unit minutes Power saving feature p 22 When finished with the settings press the MENU button to return to previous screens in order Setting the t...

Страница 99: ...Y Button and STOP Button to move the cursor to the Battery line fig setbatterytype e eps_80 3 Set the battery type Use the PREV button and NEXT button to set the battery type by changing the setting for Battery Cautions when using batteries with the R 09HR p 22 Power saving feature p 22 Remaining battery power indication p 22 When finished with the settings press the MENU button to return to previ...

Страница 100: ...n to set whether to monitor the input sound through the headphones during recording by changing the setting for Rec Monitor Sw When finished with the settings press the MENU button to return to previous screens in order If you monitor the sound through headphones while recording there will be a 6 ms delay compared to the actual sound but this is not a malfunction Setting whether to monitor sound w...

Страница 101: ...e eps_80 2 Select EXT Mic Type Use the PLAY Button and STOP Button to move the cursor to the EXT Mic Type line fig inputsetting e eps_80 3 Set the external microphone type Use the PREV button and NEXT button to change the EXT Mic Type value When finished with the settings press the MENU button to return to the previous screens in order Setting the external microphone type EXT Mic Type Setting MONO...

Страница 102: ... the Limiter AGC value When finished with the settings press the MENU button to return to the previous screens in order Setting the LIMITER AGC switch function Limiter AGC Setting Limiter AGC Auto Gain Control The limiter is a feature that controls distortion by compressing input levels to an appropriate level when the input sound is too loud AGC Auto Gain Control keeps the overall sound level eve...

Страница 103: ...ut Freq Use the PLAY Button and STOP Button to move the cursor to the Low Cut Freq line fig setlimiterAGC e eps_80 3 Set the Low Cut Freq frequency Use the PREV Button and NEXT Button to change the Low Cut value When finished with the settings press the MENU button to return to the previous screens in order Setting the low cut frequency Low Cut Freq Setting 100 Hz 200Hz 400Hz Move the cursor up or...

Страница 104: ...then press the REC Button fig inputsetting e eps_80 2 Set remote control reception to on or off Use the PREV button and NEXT button to change the File Name value When finished with the settings press the MENU button to return to the previous screens in order Setting whether to accept remote control operations Remote Control Setting Disable Enable Move the cursor up or down Enter Move the cursor up...

Страница 105: ...s_80 1 Select Date Time from the Menu Screen Use the PLAY Button and STOP Button to select Date Time then press the REC Button e e eps_80 2 Edit the time and date fig edit datatim 1 Move the cursor Use the PREV button and NEXT button to move the cursor to the right or left fig edit datetime 2 e eps_80 2 Edit the date and time Move the cursor to the character to change use the PLAY Button and STOP ...

Страница 106: ...ormation Use the PLAY Button and STOP Button to select Information then press the REC Button The information is displayed When finished with the settings press the MENU button to return to previous screens in order Displaying SD memory card information Information Displayed information Total total capacity Remain free space Write Protect protect on off Move the cursor up or down Enter Move the cur...

Страница 107: ...on fig initialize 2 e eps_80 2 Press the REC Button to initialize A confirmation screen is shown Press the REC Button to initialize fig initialize e eps_80 3 Select Yes A confirmation screen is shown Use the PREV button and NEXT button to select Yes then press the REC Button See the table on p 83 for initial settings When not performing initialization press the MENU Button fig process reset eps_80...

Страница 108: ...g is in a file format that cannot be used with the R 09HR Already Exists There is a song or folder of the same name Create the song or folder using a different name Song Protected The song is protected Turn Write protect OFF and then try again Name Too Long The name is too long File System Err The memory card has not been formatted Format the memory card on the R 09HR SD Unformatted The memory car...

Страница 109: ...The memory card may be corrupted No Card No memory card has been inserted Insert a memory card into the R 09HR HOLD is ON The hold switch is ON This message is shown when an operation is attempted while the hold switch is turned on Now Recording Recording is currently in progress This message is displayed when an operation is attempted during recording Cancel the recording to per form an operation...

Страница 110: ...s If a microphone cable or device is connected to the MIC Input Jack or LINE IN Jack the Internal MIC cannot be used MIC INPUT jack p 11 LINE IN jack p 11 Using the internal microphones p 37 When using an external microphone please do not connect anything to the LINE IN Jack If a microphone cable or other device is connected to the Line In Jack then the input from the MIC Input Jack is ignored MIC...

Страница 111: ... protect LOCK feature is turned on Unlock the write protect feature SD Memory Card p 28 Recording cannot be performed correctly if the input level set with the INPUT LEVEL buttons is too low Set a proper input level Adjusting recording levels p 45 When using an external microphone connect it properly to the MIC Input Jack Also check the EXTERNAL MICROPHONE TYPE Switch settings MIC GAIN switch p 13...

Страница 112: ...an only play songs with the MP3 or WAV extensions Also corrupted songs cannot be played Song types that can be played p 66 Changing the name Rename p 76 Message list p 108 The wrong song is played The song playback mode may be in shuffle play SHUFFLE In this mode the R 09HR randomly selects the next song to be played Change the setting to normal play SEQUENTIAL Setting the song playback mode Play ...

Страница 113: ...sing the MENU Button does not make the Menu Screen appear First stop playback or recording then press the MENU Button The display darkens When running on battery power the display may darken when there are no operations depending on the Display Timer settings Setting the time until the screen is darkened when no operations are performed for a set period of time Display Timer p 96 The power turns o...

Страница 114: ... is too large or a song with an MP3 or WAV extension that is taking time to verify on the R 09HR as playable These conditions cause the display to be sluggish when selecting a song Song types that can be played p 66 Feedback occurs when monitoring with headphones If open air headphones are used to monitor recording feedback may occur if the headphones are too close to the R 09HR The R 09HR s inter...

Страница 115: ...etting 29 105 Date Time 83 105 Delete 33 72 75 Disconnecting 70 Display 8 Adjusting the Brightness 94 Display Setup 83 Display Timer 83 Display Setup 94 97 Display Timer 96 Dynamic microphone 11 43 E EXT Mic Type 83 101 External Microphone 41 F Factory Reset 84 107 File Name 83 86 File Size 87 File System Err 108 FINDER button 8 Finder screen 16 72 Copy 72 79 Delete 72 75 Information 72 74 Make Fo...

Страница 116: ... Input Setup 83 Player Setup 83 Power Manage 83 Recorder Setup 83 Remote Control 83 SD Card 84 Message 108 Microphone Condenser microphone 11 43 Dynamic microphone 11 43 External microphone 11 41 Internal MIC 8 37 MIC GAIN switch 13 MIC INPUT jack 11 Microphone sensitivity 13 Monaural microphone 11 Stereo microphone 11 Monaural 11 Move 72 77 MP3 35 N Name Too Long 108 NEXT button 9 15 No Card 109 ...

Страница 117: ...g external microphones 41 Remote Control 23 24 83 104 Remote indicator 12 Removable disk 68 Rename 72 76 Repair 72 80 Repeat 83 89 Repeat A B 56 Repeated playback 56 SEQUENTIAL 62 SHUFFLE 60 SINGLE 58 Rev Depth 83 93 Rev Type 83 92 Reverb 8 HALL1 HALL2 8 65 PLATE 8 65 ROOM 8 65 REVERB button 8 Rewind 9 55 ROOM 8 65 S Sample Rate Sampling frequency 34 83 84 Setting the Sample Rate 84 Screen 16 Find...

Страница 118: ...ex Stereo 11 STOP button 10 15 T Time Setting 29 105 Troubleshooting 110 U USB 2 0 HI SPEED USB 14 USB cable 67 USB screen 16 67 USB terminal 14 V VBR 66 W WAV 35 R 09HR_e book 118 ページ 2007年12月17日 月曜日 午後2時16分 ...

Страница 119: ...88 2 96 kHz Bit Depth 16 24 bits Format MP3 MPEG 1 audio layer 3 Sampling Rate 32 44 1 48 kHz Bit Rates 32 320 kbps or VBR Variable Bit Rate Format WAV Sampling Rate 32 44 1 48 88 2 96 kHz Bit Depth 16 24 bits Recording Time unit minutes Settings Size of Memory Card 512MB 1GB 2GB 4GB 8GB WAV 24 bits 96 kHz 13 27 55 110 220 WAV 24 bits 88 2 kHz 15 30 60 120 240 WAV 24 bits 48 kHz 27 54 110 220 440 ...

Страница 120: ... 150 of playback speed Others Display 128 x 64 dot graphic display Power Supply AC Adaptor Alkaline dry battery LR6 AA type x 2 or Nickel metal hydride battery HR15 51 x 2 Current Draw 370 mA Dimensions 62 0 W x 112 9 D x 27 0 H mm 2 1 2 W x 4 1 2 D x 1 1 6 H inches Weight 174 g 7 oz including batteries and memory card Accessories Owner s Manual Remote Control AC Adaptor SD Memory Card 512 M bytes...

Страница 121: ...121 For China R 09HR_e book 121 ページ 2007年12月17日 月曜日 午後2時16分 ...

Страница 122: ...res in the mains lead of this apparatus may not correspond with the coloured markings identifying the terminals in your plug proceed as follows The wire which is coloured BLUE must be connected to the terminal which is marked with the letter N or coloured BLACK The wire which is coloured BROWN must be connected to the terminal which is marked with the letter L or coloured RED Under no circumstance...

Страница 123: ...isesti asennettu Vaihda paristo ainoastaan laitevalmistajan suosittelemaan tyyppiin Hävitä käytetty paristo valmistajan ohjeiden mukaisesti For Canada This Class B digital apparatus meets all requirements of the Canadian Interference Causing Equipment Regulations Cet appareil numérique de la classe B respecte toutes les exigences du Règlement sur le matériel brouilleur du Canada NOTICE AVIS For th...

Страница 124: ... Musicales Nicaragua Altamira D Este Calle Principal de la Farmacia 5ta Avenida 1 Cuadra al Lago 503 Managua Nicaragua TEL 505 277 2557 PERU Audionet Distribuciones Musicales SAC Juan Fanning 530 Miraflores Lima Peru TEL 511 4461388 IRELAND Roland Ireland G2 Calmount Park Calmount Avenue Dublin 12 Republic of IRELAND TEL 01 4294444 ITALY Roland Italy S p A Viale delle Industrie 8 20020 Arese Milan...

Отзывы: