background image


I.


Product Information


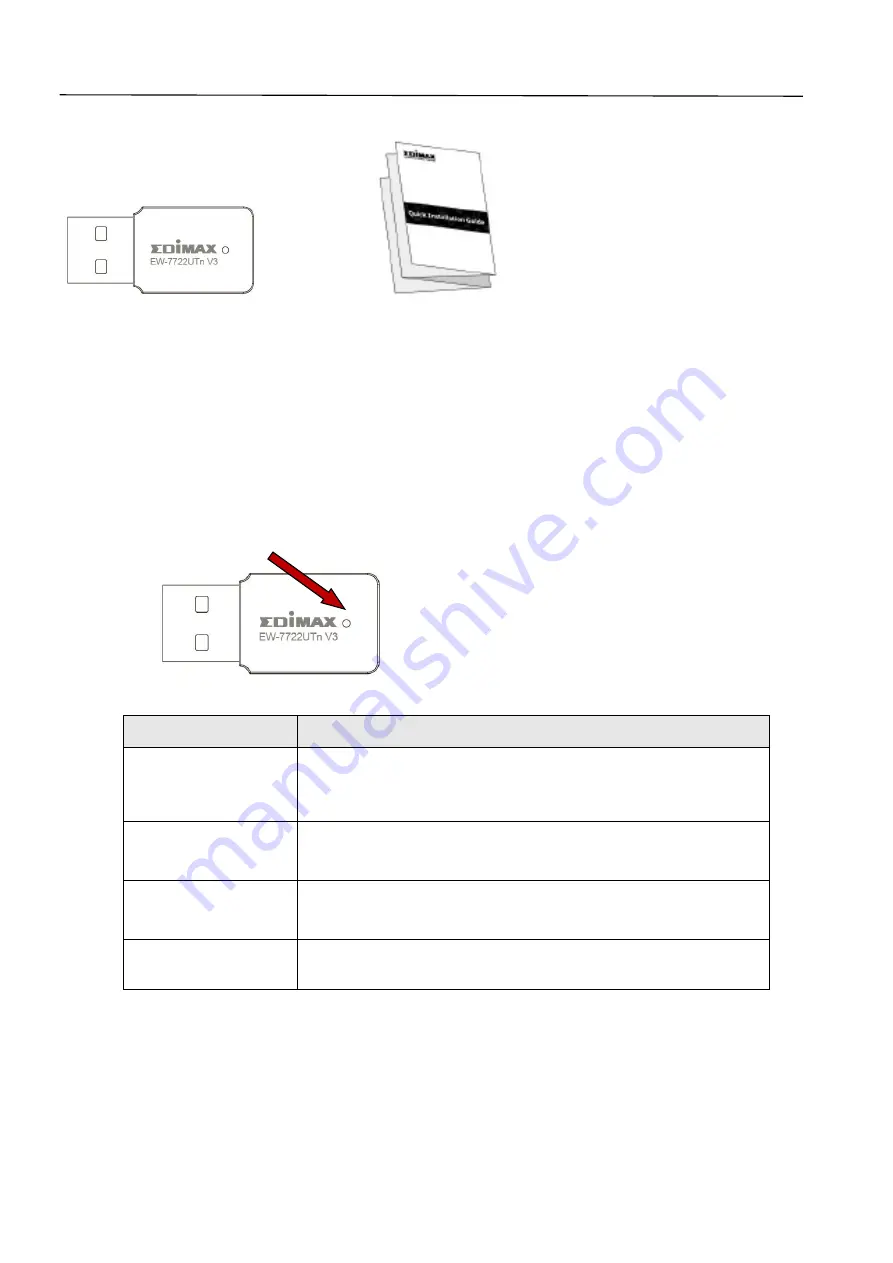
I-1. Package Contents 


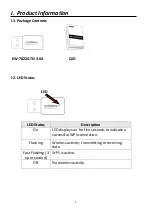
I-2. LED Status


LED Status 

Description 

On 

LED displays on for five seconds to indicate a 
successful WPS connection. 

Flashing 

Wireless activity: transmitting or receiving 
data. 

Fast Flashing (3 

x per second) 

WPS is active. 

Off 

No wireless activity. 


LED


EW-7822GTN 3.0A


QIG


Содержание EW-7822GTN 3.0A

Страница 1: ...1 EW 7822GTN 3 0A Quick Installation Guide 07 2019 v1 0...

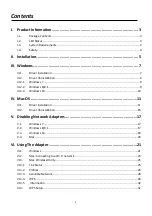
Страница 2: ...ws 8 8 1 9 III 2 3 Windows 10 10 IV Mac OS 11 IV 1 Driver Installation 11 IV 2 Driver Uninstallation 16 V Disabling Network Adapters 17 V 1 Windows 7 17 V 2 Windows 8 8 1 17 V 3 Windows 10 18 V 4 Mac...

Страница 3: ...tatus LED Status Description On LED displays on for five seconds to indicate a successful WPS connection Flashing Wireless activity transmitting or receiving data Fast Flashing 3 x per second WPS is a...

Страница 4: ...ontains small parts that are a danger to small children under 3 years old Please keep the wireless adapter out of reach of children 4 Do not place the wireless adapter on paper cloth or other flammabl...

Страница 5: ...B adapter into an available USB port of your computer Never use force to insert the USB adapter 2 Please download driver from https www edimax com download 3 If a Hardware Wizard Driver Installation w...

Страница 6: ...users the setup wizard will open For Mac users the CD s Mac folder will open Linux drivers are also included in the Linux folder 5 Please follow the instructions in the appropriate chapter for your o...

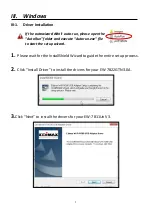
Страница 7: ...en the AutoRun folder and execute Autorun exe file to start the setup wizard 1 Please wait for the InstallShield Wizard to guide the entire setup process 2 Click Install Driver to install the drivers...

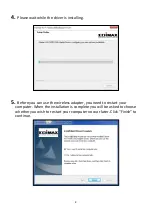
Страница 8: ...is installing 5 Before you can use the wireless adapter you need to restart your computer When the installation is complete you will be asked to choose whether you wish to restart your computer now o...

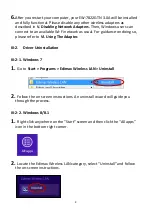
Страница 9: ...ce on doing so please refer to VI Using The Adapter III 2 Driver Uninstallation III 2 1 Windows 7 1 Go to Start Programs Edimax Wireless LAN Uninstall 2 Follow the on screen instructions An uninstall...

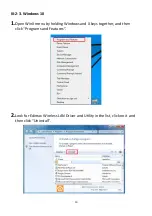
Страница 10: ...2 3 Windows 10 1 Open WinX menu by holding Windows and X keys together and then click Programs and Features 2 Look for Edimax Wireless LAN Driver and Utility in the list click on it and then click Uni...

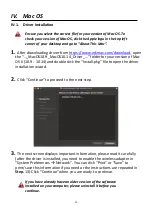
Страница 11: ...le click the Install pkg file to open the driver installation wizard 2 Click Continue to proceed to the next step 3 The next screen displays important information please read it carefully after the dr...

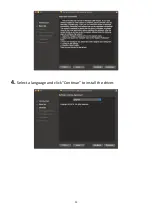
Страница 12: ...12 4 Select a language and click Continue to install the driver...

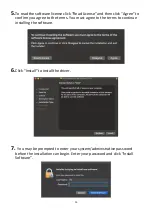
Страница 13: ...nfirm you agree to the terms You must agree to the terms to continue installing the software 6 Click Install to install the driver 7 You may be prompted to enter your system administrative password be...

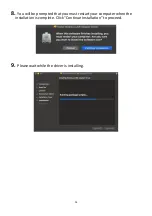
Страница 14: ...14 8 You will be prompted that you must restart your computer when the installation is complete Click Continue Installation to proceed 9 Please wait while the driver is installing...

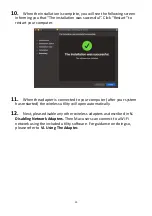
Страница 15: ...1 When the adapter is connected to your computer after your system has restarted the wireless utility will open automatically 12 Next please disable any other wireless adapters as described in V Disab...

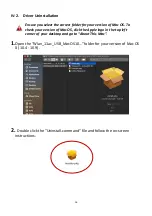
Страница 16: ...f Mac OS To check your version of Mac OS click the Apple logo in the top left corner of your desktop and go to About This Mac 1 Open the Wlan_11ac_USB_MacOS10 folder for your version of Mac OS X 10 4...

Страница 17: ...to the user manual for your computer or follow the guidance below V 1 Windows 7 Go to Start Control Panel Click View network status and tasks Wireless Network Connection and click Disable V 2 Windows...

Страница 18: ...18 V 3 Windows 10 1 Open Settings The click on Network Security Status Change adapter options...

Страница 19: ...19 2 Right click the network adapter and select the Disable option...

Страница 20: ...ect System Preferences from the dock 2 In System Preferences select Network 3 All of your network connections will be displayed as shown below Select Wi Fi from the left panel 4 Click Turn Wi Fi off i...

Страница 21: ...i Fi network using the included utility software as described in VI 2 Mac VI 1 Windows Below is an example of how to connect using Windows Vista the process may vary slightly for other versions of Win...

Страница 22: ...22 3 After correctly entering your password you will be successfully connected to your Wi Fi network...

Страница 23: ...ill open automatically when the adapter is connected to your computer If the utility doesn t open you can open it from the Applications menu in your Mac 2 Click the Available Network tab in the wirele...

Страница 24: ...Wi Fi network confirm the password network key again below and click OK 4 After entering your password you will be successfully connected to your Wi Fi network A summary of the connection will be disp...

Страница 25: ...o monitor and configure your connection Navigate the wireless utility using the menu across the top of the window VI 3 1 Link Status The Link Status page displays information about the current wireles...

Страница 26: ...Fi connection settings as Profiles Existing profiles are listed in the Profile List Add Opens a new window to manually add a new profile Edit Edit an existing profile Remove Remove an existing select...

Страница 27: ...puter to computer AdHoc network and select a channel Profile Name Enter a reference name for the profile SSID Manually enter the SSID to be used for this profile Network Authentication Select the type...

Страница 28: ...e Wi Fi networks within range along with various categories of information about each network Refresh Refresh the list of available wireless networks Connect Connect to a selected wireless network Add...

Страница 29: ...vated via a device s web user interface which has the same effect as physically pushing the WPS button known as PBC or push button configuration PIN code WPS is an additional variation of WPS which ca...

Страница 30: ...connection with your wireless router access point PIN Code WPS PIN code WPS includes the additional use of a PIN code between devices This is useful for identification and verification purposes in cro...

Страница 31: ...S page The wireless adapter will establish a connection with your wireless router access point Below is a general description of items on the WPS page Scan Refresh the list of available wireless netwo...

Страница 32: ...WPS then you can use this method to connect to a Wi Fi network 1 Press the WPS button often the WPS Reset button on your router access point to activate WPS Please check the instructions for your wir...

Страница 33: ...old or licensed as is Should the programs prove defective following their purchase the buyer and not this company its distributor or its dealer assumes the entire cost of all necessary servicing repai...

Страница 34: ...ty to operate equipment Federal Communications Commission FCC Radiation Exposure Statement This equipment complies with FCC radiation exposure set forth for an uncontrolled environment In order to avo...

Страница 35: ...ensure the safe use of the equipment EU Countries Intended for Use The ETSI version of this device is intended for home and office use in Austria Belgium Bulgaria Cyprus Czech Denmark Estonia Finland...

Страница 36: ...adn po iadavky a al ie pr slu n ustanovenia smern c 2014 53 EU 2014 35 EU Deutsch Dieses Ger t erf llt die Voraussetzungen gem den Richtlinien 2014 53 EU 2014 35 EU Espa ol El presente equipo cumple l...

Страница 37: ...le life this product should not be treated as household or general waste It should be handed over to the applicable collection point for the recycling of electrical and electronic equipment or returne...

Страница 38: ...Spectrum EN 300 328 V2 1 1 2016 11 EMC EN 301 489 1 V2 1 1 2017 02 EN 301 489 17 V3 1 1 2017 02 EMF EN 62311 2008 Safety LVD IEC 60950 1 2005 2nd Edition Am 1 2009 Am 2 2013 EN 60950 1 2006 A11 2009...

Отзывы: