210-1036-01
I f you en coun ter p ro bl ems wh en i nst alli ng thi s p ro du ct, con tact yo ur ser vice pr ovider.
Choose a Suitable Location
The EWS-100 is a free-standing unit, and
for best reception should be located as
close as possible to a window or an
outside wall.
A convenient power outlet is required
within 6 feet of the unit, and the LAN
source (your computer) must be reachable
with the supplied Ethernet cable (unless
you purchase a longer cable).
4
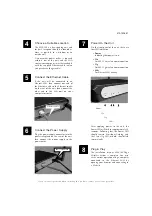
Power On the Unit
On the front panel of the unit, there are
four LED indicators:
• Power
Indicating that power is on.
• 11a
For 802.11a wireless communication.
• 11g
For 802.11g wireless communication.
• LAN
For Ethernet LAN activity.
7
Power
11a
11g
LAN
Plug & Play
The installation of your EWS-100 Edge
Wireless System is complete. You may
verify correct operation using a computer
connected to the Ethernet LAN by
opening your browser and connecting to
a Web site.
8
Connect the Ethernet Cable
If the unit will be connected to an
Ethernet LAN, then connect one end of
the Ethernet cable to the Ethernet socket
on the rear of the unit, then connect the
other end to the LAN port on your
computer or router.
5
Ethernet cable
Connect the Power Supply
Plug the power supply connector into the
power receptacle on the rear of the unit,
then connect the power supply to the
power outlet.
6
Power connector
After applying power to the unit, the
Power LED will flash for approximately 20
seconds. Following that, the Power LED
should remain lit without flashing, and
the 11a or 11g LED (or both) should flash
intermittently.


